
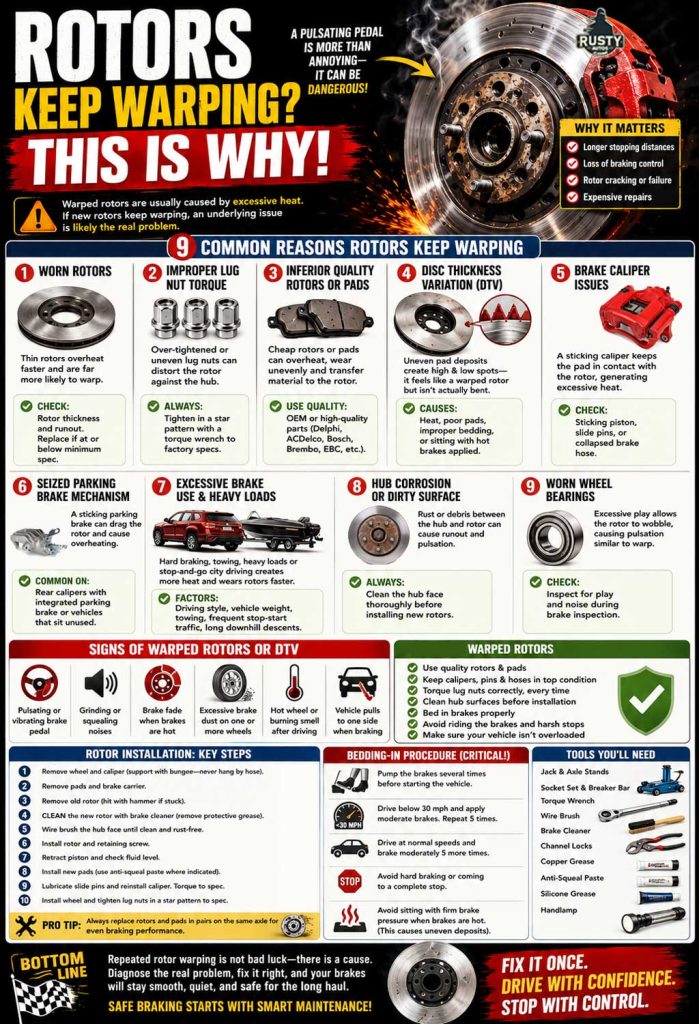
A pulsating brake pedal is irritating and can be dangerous when emergency braking. You are correct to question why your rotors keep warping. I’m a mechanic, and very shortly, we’ll have this figured out.
Brake rotors commonly warp when they overheat. When replacement rotors keep warping, there may be an underlying issue, such as:
- Inferior quality rotors
- Wrong type rotors fitted
- Brake caliper issue
- Excessive brake use
In this post, you’ll learn about the most common reasons brake rotors keep warping and what you can do to prevent it.

Index
- Why rotors warp
- Worn rotors
- Inferior quality rotors
- Wrong type rotors fitted
- Brake caliper issue
- Excessive brake use
- Why warped rotors are dangerous
- Rotor buying tips
- Fitting rotors
- Sum up
Why do Brake Rotors Warp?
As previously mentioned, brake rotors typically warp when they overheat, so we are really asking why our brakes are overheating.
Improper Lug Nut Torque
One of the most overlooked causes of repeated rotor warping or brake pulsation is improper wheel installation.
Over-tightened or unevenly tightened lug nuts can distort the rotor slightly against the hub, creating lateral runout. Over time, this causes uneven pad contact, excessive heat buildup, and the pulsating brake pedal many drivers associate with “warped rotors.”
This commonly happens when wheels are installed using high-powered impact guns without finishing with a torque wrench.
Mechanics Tip: Always tighten lug nuts in the correct star pattern using a torque wrench set to manufacturer specifications. Even brand-new rotors can develop brake pulsation if the wheel isn’t installed correctly.
Some reasons are obvious, like worn-out rotors, and we’ll cover that below, but since your replacement rotors keep warping, I suspect you may have an underlying issue. But first, we’ll need to eliminate a few of the more common reasons rotors warp.
Not All “Warped Rotors” Are Actually Warped
In many cases, the rotor itself hasn’t physically bent. Instead, the issue is uneven brake pad material deposited on the rotor surface, known as Disc Thickness Variation (DTV).
This creates high and low spots on the rotor surface, causing the brake pedal to pulse during braking.
DTV is commonly caused by:
- Excessive heat
- Aggressive braking
- Poor-quality pads
- Improper bedding-in procedure
- Sitting stationary with hot brakes applied
To the driver, DTV feels almost identical to a warped rotor.
Worn Rotors
The most common reason brake rotors overheat is wear. As rotors wear, they become thinner, and the thinner the metal, the faster it heats up and the more likely it is to warp.
When a mechanic inspects brakes, they check the pad material depth and rotor wear. All manufacturers have minimum rotor thickness and runout specifications. If the rotors meet this minimum spec, they may be turned. Turning, also known as machining the rotors, removes a thin layer of metal from both sides of the rotor, renewing the pad contact surface and also making the rotor true.

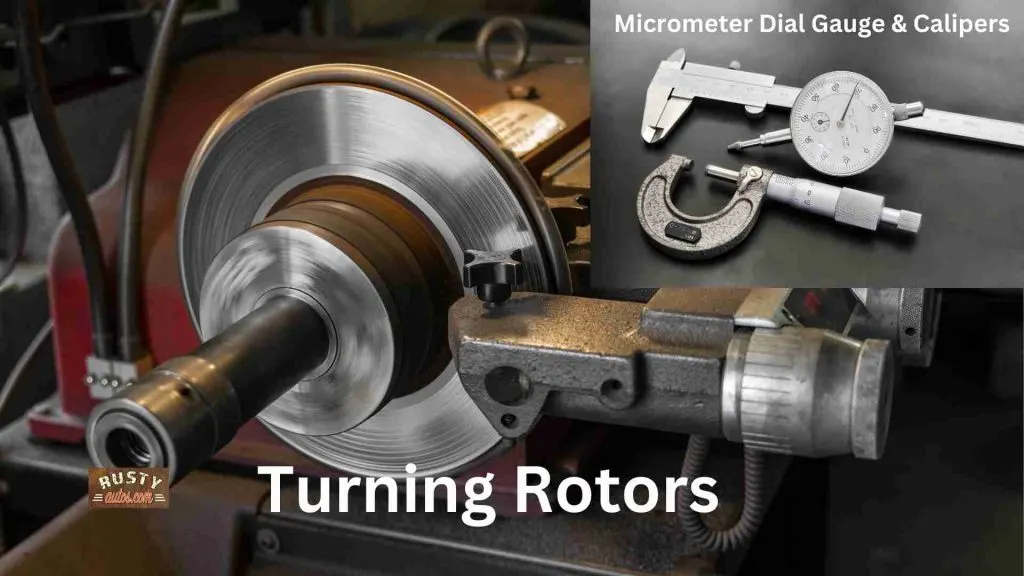
Tools – In the workshop, to check rotors, we typically use a dial gauge to measure runout and a micrometre to measure disc thickness at five locations.
Both runout and thickness must be within min spec to machine the rotors.
Diagnosis – When inspecting vehicles, the first job I do is a test drive. This gives me a ton of information before I ever drive into the workshop. If I have a pulsating brake pedal, I know I have a warped rotor, and while the rotors may be within spec when measured, experience has shown me that the best solution for a warped rotor is replacement.
The fix – Replace the rotors. I cover replacing rotors and rotor buying tips, which are important to know since your rotors keep warping.
Inferior Quality Rotors
Rotors are under a ton of stress and must be up to the job; some aftermarket rotors simply aren’t. I’ve fitted rotors for over twenty-five years. While OEM (Original Equipment Manufacturer) and spurious replacement parts may look alike, their materials and manufacturing processes make a huge difference in performance and durability.
In my experience, many replacement rotors just aren’t up to the job.
Cheap brake pads can also contribute to rotor overheating and brake pulsation. Poor-quality friction material often creates uneven heat transfer and inconsistent pad deposits on the rotor surface.
In many cases, replacing rotors without upgrading low-quality pads simply leads to the same issue returning later.
It’s okay to use inexpensive spurious parts for noncritical, low-stress applications like window motors, door locks, etc.
Brakes, steering, and suspension need top-quality OEM components or at least a top-rated parts maker.
Inexpensive rotors work for low-mileage, low-stress braking, but a heavily used vehicle will warp replacement rotors in no time.
Wrong Type Rotors Fitted
As an apprentice, my job included running to the local parts store with a shopping list of parts, which would inevitably include some wrong parts. My solution is to bring all the old parts with me and cross-reference.
Happy to say wrong parts have largely been eliminated. Your auto part store accesses a central computerised system that automatically lists parts for your vehicle by chassis number.
Ordering parts this way is almost foolproof; note I say almost.
Rotors come in two main flavours – solid and vented. The performance between these types of rotors is day and night. While it isn’t likely you have the wrong rotors fitted, it is possible and worth checking.
Solid rotors
Solid rotors, as their name suggests, have a solid friction surface. This type of rotor is fitted to smaller, lighter vehicles that aren’t likely to travel at high speeds or tow a trailer, etc.

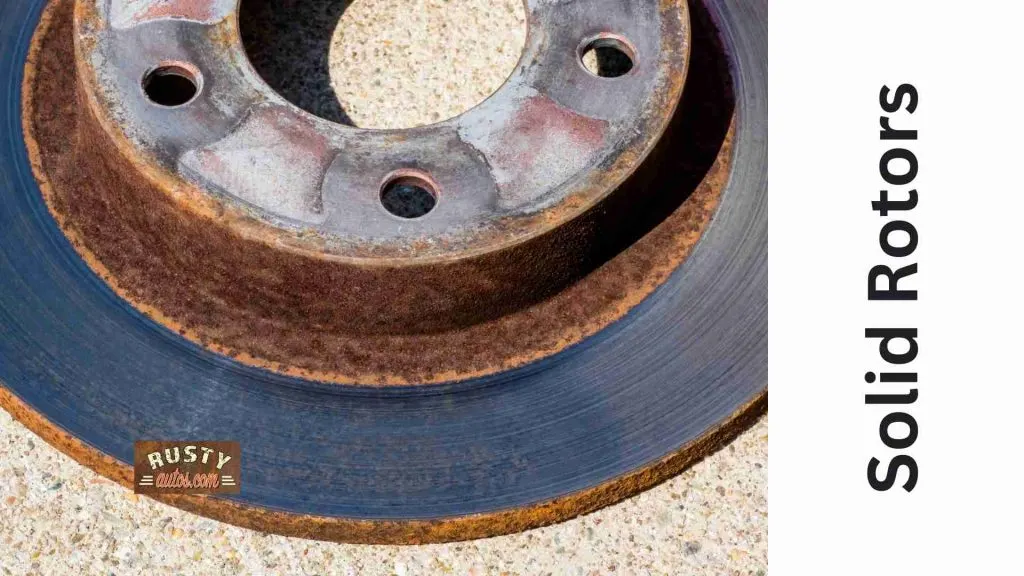
The advantage of the solid rotor is its lower cost compared to the vented rotor.
The disadvantage of the solid rotor is its inefficiency at shedding heat and, if stressed by excessive braking, it can cause overheating and rotor warping.
Vented rotors
Vented brakes are just like their name suggests; there is a void between the friction surfaces of the rotor. Vented rotors are fitted to luxury, commercial, and performance vehicles where the vehicle’s weight alone requires better brake performance.

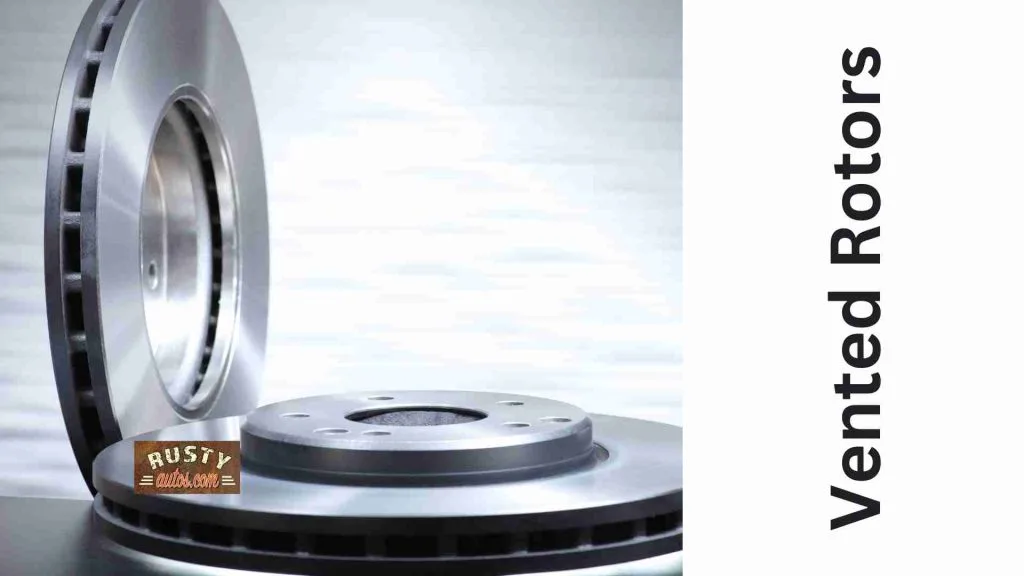
The advantages of vented rotors: the void between the contact surfaces allows airflow and efficiently removes friction heat.
The disadvantage of the vented rotors is the cost; they cost more than solid rotors and are more complex to manufacture.
Diagnose – Check your rotors when cold; most vehicles won’t require wheel removal. The rotor edge will feature the aforementioned void between the friction surfaces.
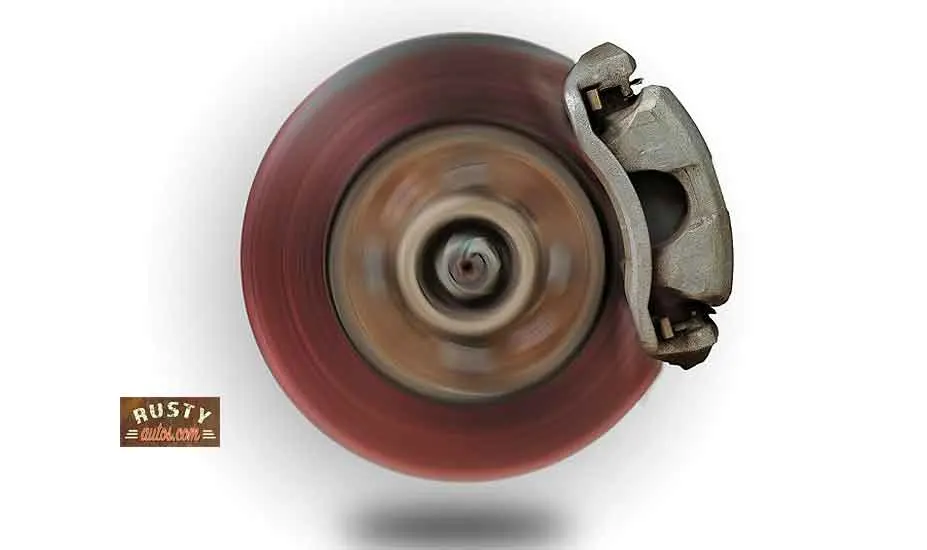
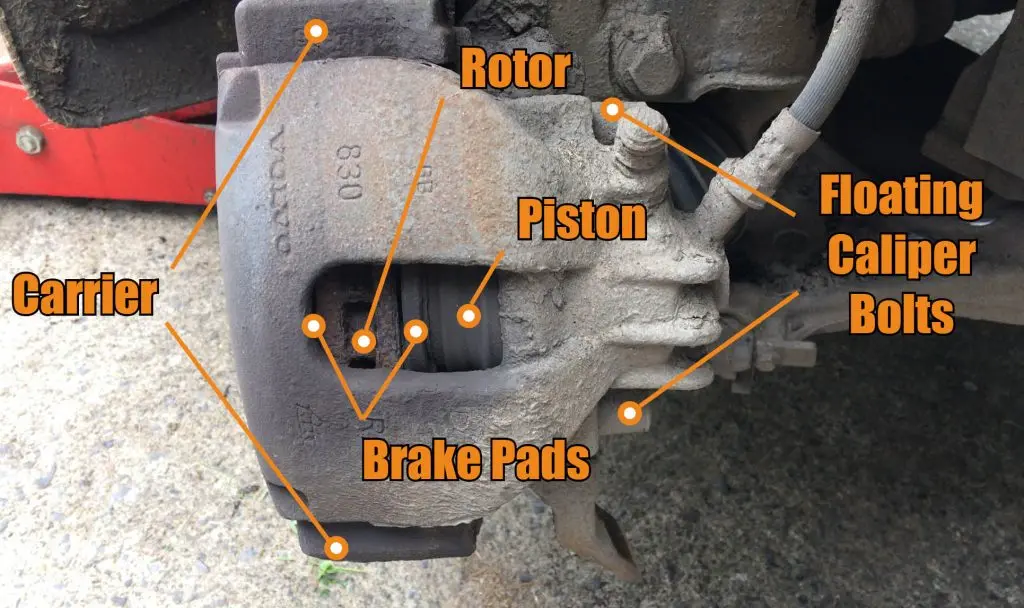
Brake Caliper Issue
Rotors, calipers, and pads all work hard, and the caliper, in particular, can cause a few common issues. Rotor warping is, as you know, caused by excessive heat; a dragging brake is a likely culprit. And a dragging brake is commonly caused by a sticking caliper; the caliper brake remains partially on, and that, as you can imagine, causes the rotor to heat excessively.
The obvious question is, what causes the caliper to stick?
A collapsed brake flexi hose can also mimic a seized caliper. Internally damaged hoses may allow brake pressure to apply the brake but prevent fluid from returning properly, causing the brake to drag and overheat the rotor.
This issue is more common in older vehicles, where the hose’s internal lining begins to break down.
There are two common issues, they are:

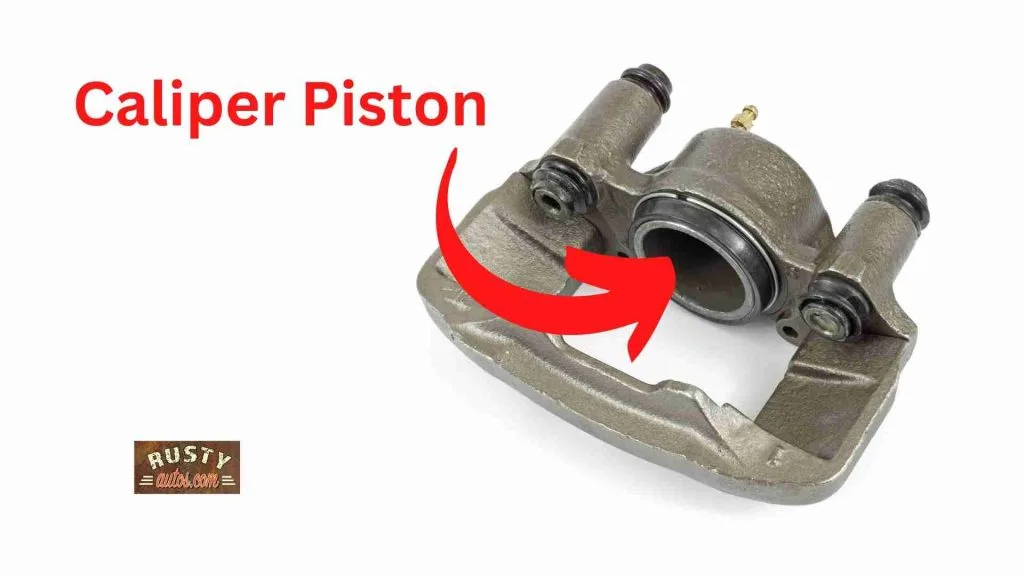
1 Seized caliper piston – The caliper employs a hydraulically controlled piston that forces the pads against the rotor.
In older brake systems, moisture inside the brake lines can cause piston corrosion, preventing the piston from retracting and keeping the brake partially on.

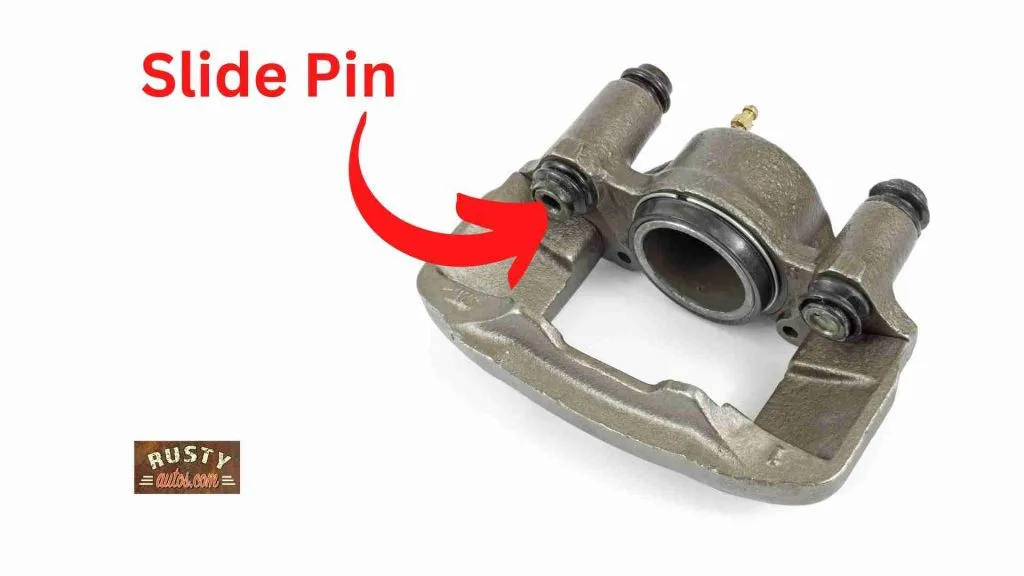
Seized caliper slide pins – A seized caliper slide pin/bolt only applies to floating-type calipers, which, to be fair, are most calipers fitted to regular-type vehicles.

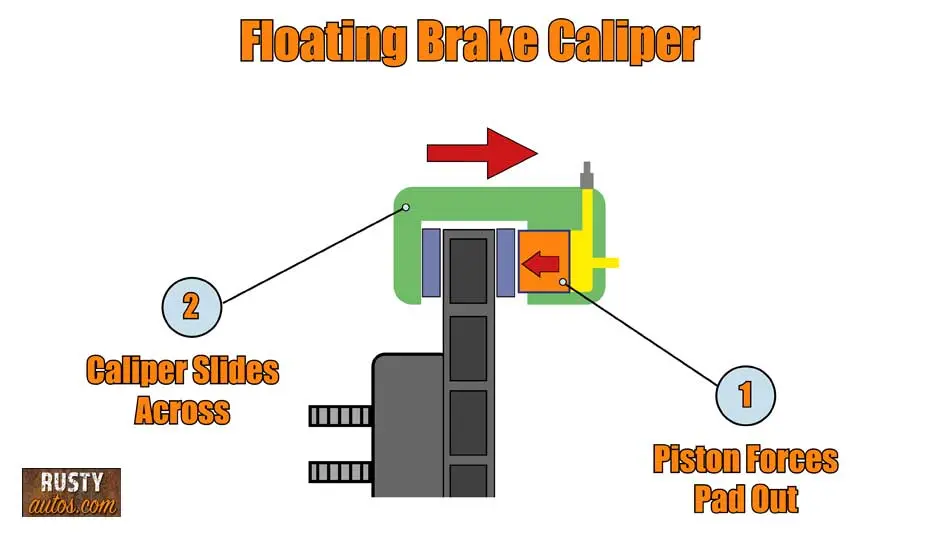
I covered what a floating caliper is previously, and you can check that out here – “Are calipers suppose to move?” but since most calipers are floating, this will likely apply to you.
In rear brake systems, a sticking parking brake mechanism can also cause excessive rotor heat and repeated warping.
This is especially common on rear calipers with built-in parking brake mechanisms or vehicles that sit unused for long periods.
Diagnosis – Common symptoms of a dragging wheel include excessive brake dust on one wheel, heat from one wheel, particularly, and the vehicle pulling to one side. To diagnose a suspected dragging brake, jack the affected wheel up and spin it; it should spin freely.
If it won’t budge or only moves a little, you’ve found a dragging brake, and you’ll need to remove the wheel for further diagnosis.
You may find the brake resources page useful, it’s a fluff-free guide to DIY brake repairs.
While checking the wheel, also inspect for excessive wheel bearing play. A worn wheel bearing can allow the rotor to wobble slightly during braking, creating brake pulsation symptoms similar to a warped rotor.
With the wheel removed, try the following:
- Open the brake fluid reservoir cap one turn
- Remove the caliper retaining bolts
- Remove the caliper
- Attempt to retract the piston with channel locks
- If it fails to retract, suspect a frozen piston
- If it retracts without issue, check the slide pins
- If the slide pins are sticking or seized, repair or replace
- Close reservoir cap again when complete
I wrote a complete post about diagnosing and fixing a dragging brake “What causes a brake to drag?”
Excessive Brake Use
Driving style and use will dictate how quickly our brakes wear or overheat. One customer may get fifty thousand miles from a set of rotors, and another customer might not make twenty thousand.
It depends on many factors; the three that contribute the most to rotor wear and overheating are: the type of driving your vehicle does, the weight of your vehicle, and driver type.
Symptoms associated with excessive brake use include: heavy brake dust on wheels, glowing rotors, smoke from rotors, grinding noise under braking, and brake fade when brakes are hot.
All of these symptoms contribute to warped rotors.
Type of Driving
Vehicles generally either live and work in a city or an urban environment, or a mix of both.
City living and working vehicles tend to be hard on brake rotors and pads, no surprise, since they do a ton of stop-and-go driving.
Urban living and working tend to be the easiest on the brakes, but as you’ll learn later, this type of light brake use can cause other issues.
The commuter vehicle, urban living, but works in the city, wears brakes at a rate somewhere between the previous types. Vehicles that lean more on highway driving than city driving are generally easier on brakes.
Weight of Vehicle
The weight of your vehicle obviously plays a large role in how hard your brakes work and how quickly they wear. It makes sense, a pickup truck, for example, will wear brakes faster than a family sedan, and more mass takes greater force to control.
If your vehicle ordinarily carries a ton of kit in the trunk, or maybe you have a hatchback and regularly carry lots of heavy gear, you can expect heavier brake temperatures and wear.
Similarly, if your pickup spends most of its life fully loaded or hauling a trailer, then you can expect heavier-than-normal rotor wear, and as we know, the thinner the rotors get, the more likely they are to overheat and warp.


It might be worth assessing if the vehicle is up to the workload. Modern SUV Crossover-type vehicles look impressive and are great vehicles, but many just aren’t suitable for hauling a trailer or lugging heavy loads regularly.
Type of Driver
We had customers from both sides of the spectrum at our shop, and different driving styles caused their own particular issues.
After working on a ton of customers’ vehicles, you develop a sense of the type of drivers they are; typically, drivers fit into one of three groups:
- The high-speed, heavy-load late-breaker type – This type of driver likely hauls a heavy trailer or just enjoys driving a little faster than most. Typically, this driver brakes hard and late, which is reflected in the vehicle’s maintenance records. Rotors might not last this driver for more than 20,000 miles.
- Average speed, average brake use type – This type of driver makes up the majority, and rotors might last thirty to forty thousand miles.
- The low-speed light breaker type – The low-speed driver can expect to get 50,000 miles or more from their rotors. But because this type of driver is so easy on the brakes, it causes rust to build up on the rotors, and the rotors often require replacement, not because of wear but because of corrosion.
Why Warped Rotors Are Dangerous
You already know what a warped brake rotor feels like; pulsing pedals, brake grab, and excessive brake noise are common, but so too is a long brake pedal, which can be dangerous.
The pads are designed to ride close to the rotor, but a warped rotor pushes the pads further away, requiring greater brake pedal force and travel to make pad-to-rotor contact. And greater travel means it takes longer, and time is crucial when emergency braking.

Yep, a warped rotor is dangerous, and not just because they take longer to work but also because a warped rotor is far more likely to fracture and break up, causing either a lack of brakes or wheel lock up, both highly dangerous.
Rotor Buying Tips
As said earlier, I recommend buying OEM parts when working on critical systems like Brakes, steering, and suspension, or at least a top-tier spare parts manufacturer. Go to the parts store armed with your chassis number and explain your issue. Most good parts stores are happy to help and will recommend the best rotors they have, from manufacturers like Delphi, ACDelco, and Bosch.


If you need superior brake performance, you’ll need to shop in the performance-brake aisle: EBC, Brembo, Willwood, etc. I wrote a post about Wilwood brakes previously, and you can check that post out here “Are Wilwood brakes worth it?”
Fitting Rotors
Fitting rotors is a job the home mechanic can easily do, but you’ll need a few tools to nail this successfully.
Tools, supplies – You’ll need the following:
- Jack
- Axle stand
- Torque wrench
- Socket set and breaker bar
- Selection of wrenches
- Torx & Hex bit selection
- Flat screwdriver

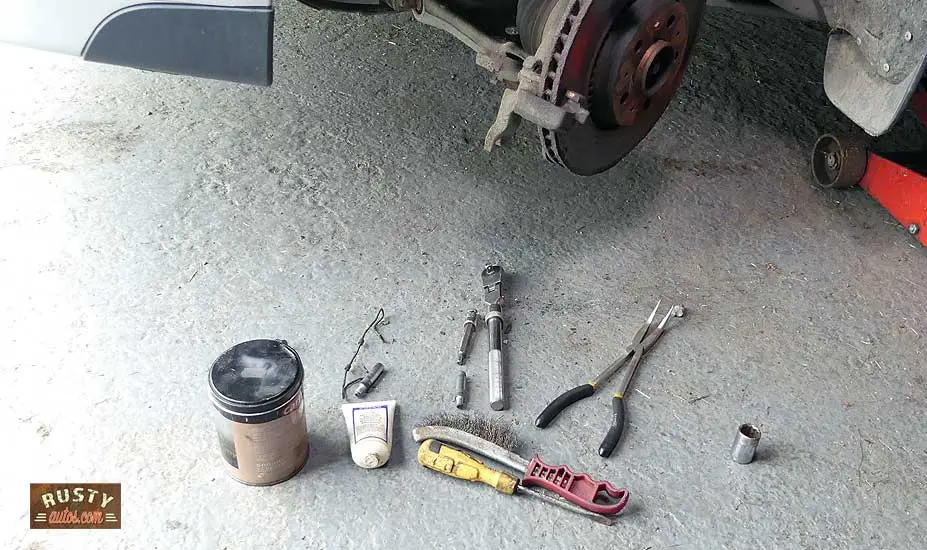
- Channel locks
- Wire brush
- Copper grease
- Anti squeal paste
- Silicone grease
- Brake cleaner
- Handlamp
You’ll find all these tools here on the “Brake repair tools page”
Parts – You’ll need the following:

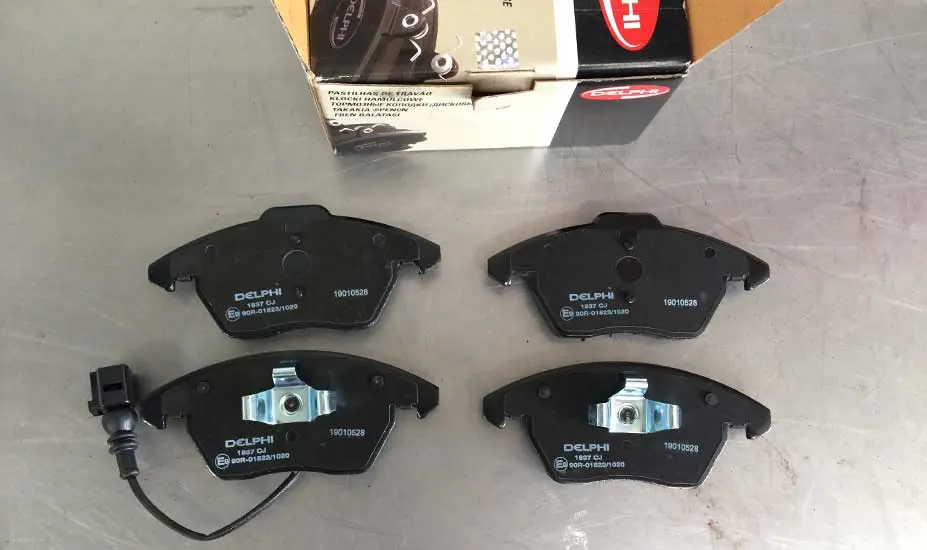
- Two rotors – we fit brake components in pairs for equal brake performance on the same axle
- Set brake pads – we always fit new brake pads with new rotors
The rotor removal process looks like this:
- Remove wheel
- Remove the rotor to hub locating fastener (typically a countersunk Torx)
- Remove the caliper fasteners and secure the caliper with a bungee cable (do not allow the caliper to hang from flexi line)
- Remove pads
- Remove two brake carrier fasteners using the breaker bar and socket and set the carrier aside
- Remove the rotor (if it’s stuck, hit it with a hammer)
The fitting process looks like this:

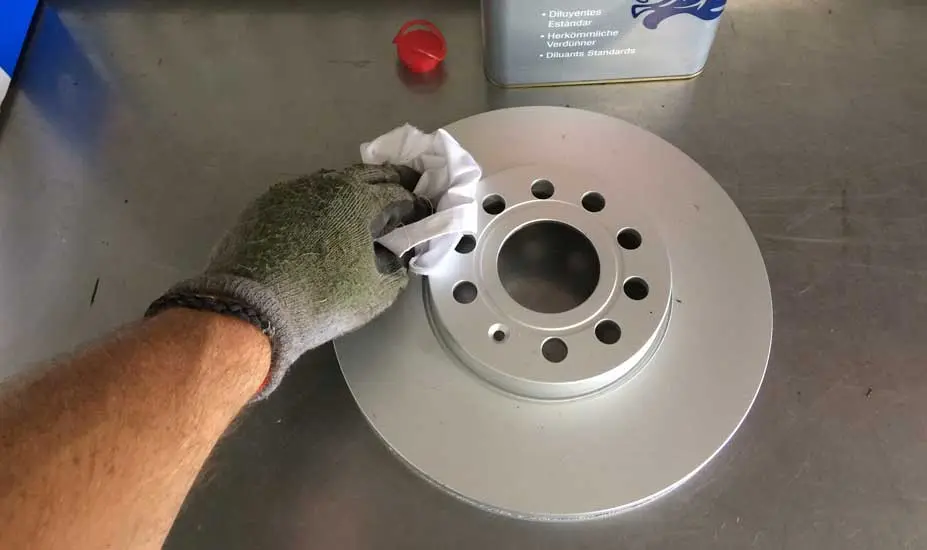
- Clean the new rotor thoroughly using brake cleaner. New rotors come with protective grease, which, if not removed, will contaminate your new pads
- Wire brush the hub interface before fitting the rotor and fastener
Mechanics Tip: The hub surface must be perfectly clean and free from rust scale before fitting the new rotor. Even minor corrosion trapped between the rotor and hub can create rotor runout and brake pulsation.
- Wire brush the brake carrier (clean outdoors is best)
- Fit the carrier and tighten the fasteners to spec (typically about 195 Nm (144 ft-lbs)). Many manufacturers recommend replacing these bolts once removed.
- Open brake fluid reservoir cap one turn
- Use channel locks or a wind-back tool to retract piston


- Apply anti-squeal paste to pads before fitting (check the pads are location specific)
- Check and lube slide pins
- Fit the caliper, taking care not to twist the brake flexi hose.
- Fit the caliper fasteners and tighten to spec (typically about 30 Nm (22 ft-lbs)). Many manufacturers recommend these bolts are replaced once removed.
- Repeat the process on the other side
- Fit the wheel
Mechanic Tip: Tighten the wheel lug nuts gradually in a star pattern using a torque wrench set to manufacturer specifications. Uneven lug-nut torque can distort the rotor and cause brake pulsation.
- Important Pump brakes several times before driving the vehicle
- Check brake fluid reservoir level before closing the cap
- Bed in brakes
Bed in brake procedure looks like this:
- Pump brakes several times before starting the vehicle
- The brake pedal should feel normal
- Drive the vehicle below 30 mph and apply brakes; repeat five times
- Go ahead and drive at normal speeds and test the brakes five times
No need to brake hard or excessively; it only damages the new components.
Avoid sitting stationary with firm brake pressure immediately after aggressive braking during the bedding process. Holding hot brake pads against hot rotors can create uneven pad deposits that later feel like warped rotors.
Check your fluid level again, and you are done; nice work!
I covered the whole process step by step with pictures previously; you can check it out here: “Are rotors hard to change?“
Sum Up
Rotors warp when subjected to repeated cycles of overheating. They commonly overheat and warp as they wear out and become thin. Other possible reasons are poor-quality rotors, excessive brake use, and a binding brake caliper.
Rapid cooling can also stress overheated rotors. Driving through deep water immediately after heavy braking may cool the rotor unevenly, increasing the likelihood of brake pulsation or cracking.
A thorough diagnosis is needed: inspect the brakes, check the quality of the rotors fitted, and assess the driving style and type of use.
In the trade, repeated rotor warping usually points to an underlying heat issue rather than bad luck. If your new rotors keep failing, focus on the cause of excessive heat buildup rather than simply replacing parts repeatedly.
You may also find the following posts helpful:
Would You Know What To Do?
If your engine warning light came on tonight, would you know to keep driving, pull over, or call for recovery?
Most drivers wouldn’t.
That’s exactly why I wrote this guide.

- About the Author
- Latest Posts


John Cunningham is an Automotive Technician and writer on Rustyautos.com. He’s been a mechanic for over twenty-five years and has worked for GM, Volvo, Volkswagen, Land Rover, and Jaguar dealerships.
John uses his know-how and experience to write articles that help fellow gearheads with all aspects of vehicle ownership, including maintenance, repair, and troubleshooting.
David Harper
Sunday 15th of September 2024
The most common cause of warped rotors is inferior rotors and inferior pads. Midas, Merlin and meineke are notorious for this. Brake rotors should NEVER warp under any normal circumstances. Corvettes go 160 mph yet their rotors don't warp. Why not?