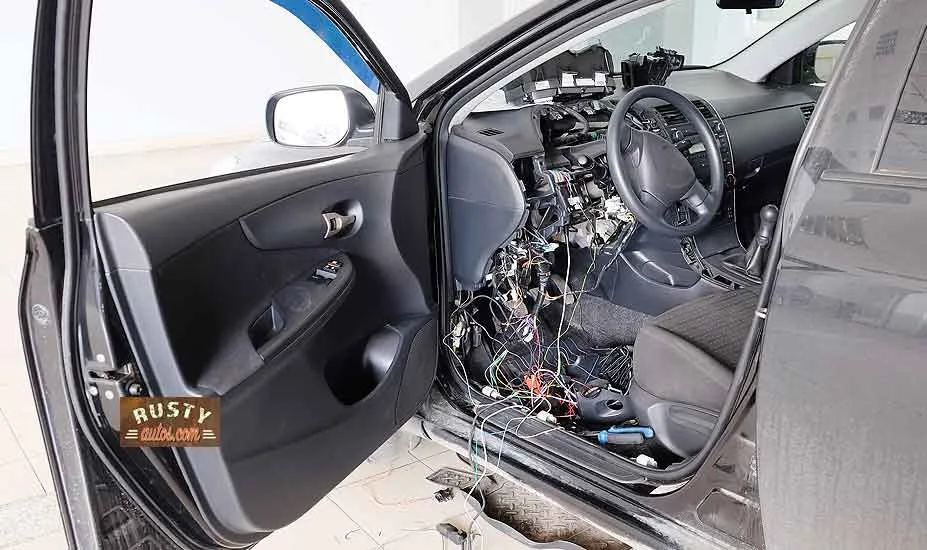
A blown fuse is a good thing; the fuse is doing its job – it’s blowing and protecting your circuit from heat and possible fire damage. But pinpointing the short can be a royal pain in the hiney. I’m a mechanic, and shortly you’ll know how to fix your short like a pro.
To locate a wiring short, first, identify the circuit at fault, isolate the circuit by removing power, and then systematically test resistance in easily accessible sections of the circuit to pinpoint the location of the short.
In this post, you’ll learn how to locate a blown fuse; you’ll learn the importance of using the correct fuse size; we’ll cover locating a short, locating a parasitic battery drain, and finally, repairing the short. Okay, let’s get stuck in.
Index
- What is a short
- Using the correct fuse size
- Locating a short
- Locating a parasitic battery drain
- Fixing a short
- Sum up
What is a Short?
A short, as its name suggests, is where your battery’s voltage takes a shortcut, bypassing its intended route (through a light, motor etc). Voltage moves inside a circuit; it’s called a circuit because its ultimate destination is pretty much where its journey began.
When voltage leaves your battery positive terminal, it has two objectives, they are:

1 Get back to the battery (negative side)
2 Get there (battery negative) by the shortest possible routeIt is important to know that a circuit has two sides, the power side, and the ground side.
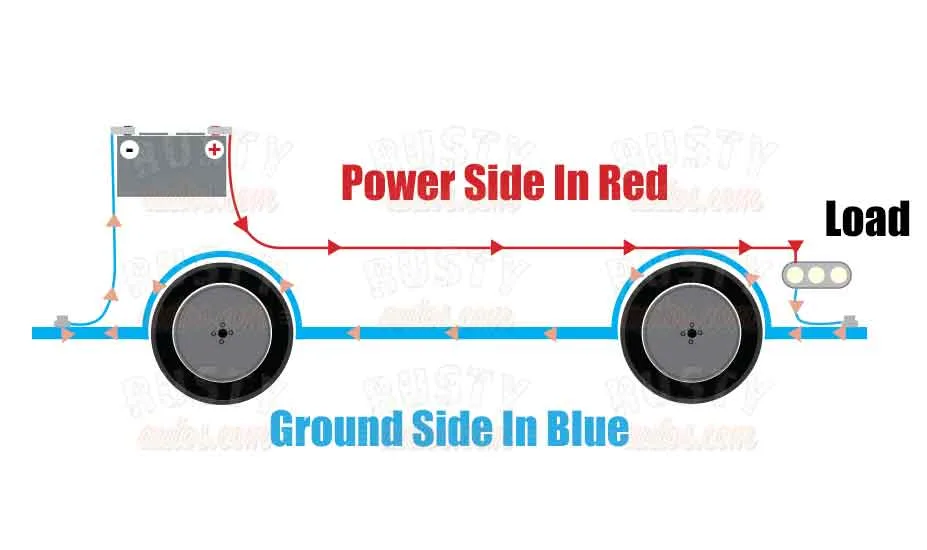
- The power side is described as the circuit from the battery positive (source) to the load (light, motor, etc.)
- The ground side is just after the load back to the battery negative.
When diagnosing car wiring circuits, it is important to know since voltage is happy to move through metal, the vehicle’s metal chassis makes up part of the ground side of the circuit.
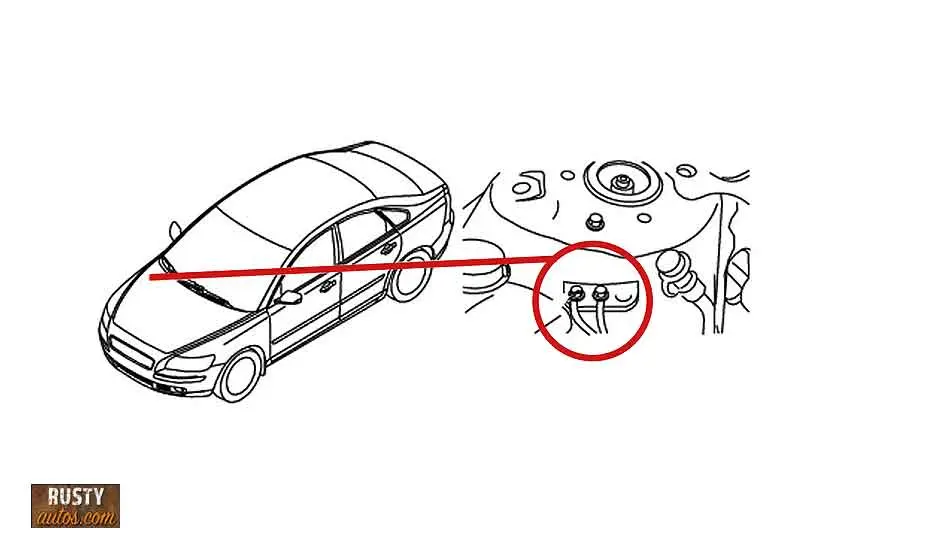
This is made possible by connecting your vehicle’s battery negative terminal to the metal chassis of your vehicle.
Harness the Voltage
Voltage is useless unless we harness it and make it do some work. By routing voltage through insulated copper wiring and connecting that wiring to a light bulb, motor, or could be a sensor, or whatever we want to power (we call this the load), before finally connecting it to ground, we make use of all that voltage potential.
Broadly there are three categories of shorts:
- Short to ground
- Component internal wiring short
- Short to voltage
1 Short to ground
The most common type of short occurs when the insulated power side wire rubs through, exposing the copper wire and voltage to a ground source, such as the bare chassis metal.
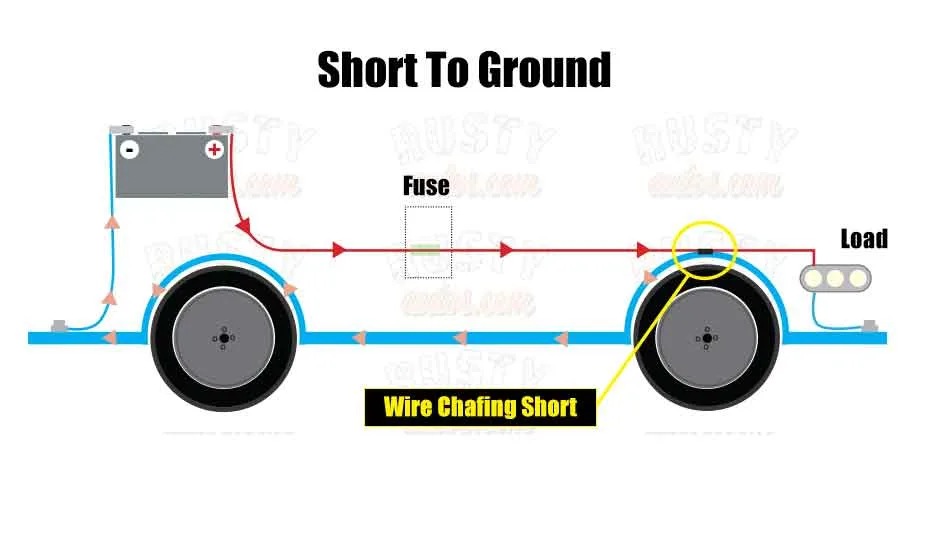
And since voltage loves a shortcut, it takes full advantage, bypassing the load.
Depending on how much contact the raw copper wire makes with the chassis will dictate if our short blows a fuse or becomes an irritating parasitic battery drain. (more on this below)
2 Component internal wiring short
A short within the load is possible too. Copper windings of a motor are a common cause of a short. While technically, the load is part of the circuit, we often assume when a fuse blows, we have a wiring fault instead of a component issue, but in very many cases, it’s the component (load) that has failed. We’ll cover testing components a little later too.
3 Short to voltage
This is a less common type of short as it requires two wires from separate circuits to become damaged and then make contact. A short to voltage results in some strange electrical gremlins.
As the short affects two separate circuits, you’ll find, for example, operating the power windows allows voltage to leak into another circuit, say the central locking, now operating the power windows causes the central locking to operate also.
Using Correct Fuse Size
Some shorts aren’t shorts at all; they are instead simply caused by fitting an incorrect fuse size. A fuse, as you know, is designed to burn (blow) when the current (amp) passing through its filament exceeds its rating. The excessive power flow causes heat which burns the filament; this, of course, is a good thing.
A blown fuse is a pain but is better than a heat-damaged circuit or, worse, a vehicle fire. It does happen.
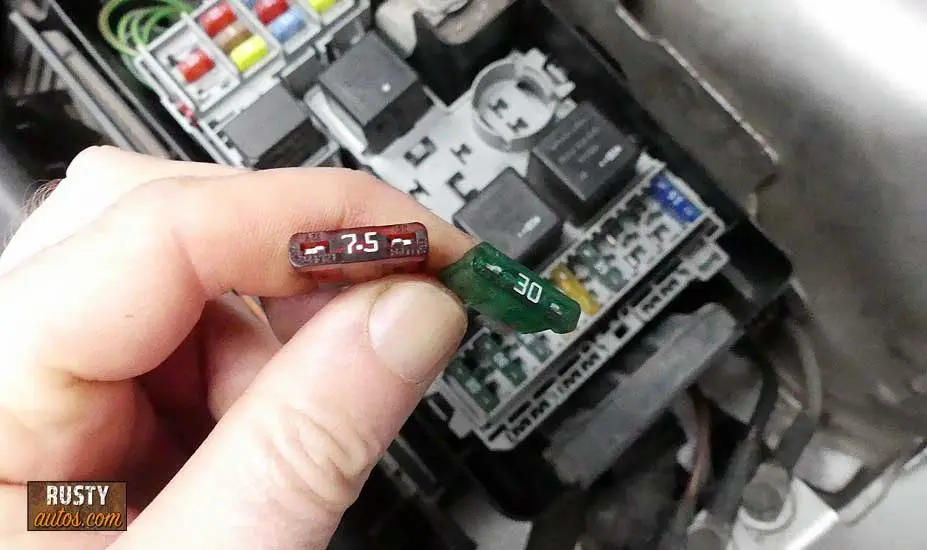
Different electrical components and circuits demand different power rates; the rates are measured in amps.
For example, a single high beam headlamp circuit might draw six amps of power, and so to protect the circuit from excessive heat; the fuse rating may be set at ten amps. Using a smaller amp in this circuit will result in blown fuses every time we operate the headlamps. The fix is simple, check the rating of the circuit and use the appropriate fuse.
While using a fuse that’s too small isn’t going to risk damage to the circuits, the reverse is not true. Using a fuse amp that exceeds the rated spec for that circuit will cause damage and is a fire risk should the circuit develop a short.
Locating a Short
Before we break out the test equipment, it is worth spending just a few minutes running a visual inspection; it often yields a big clue as to the location of a short.
Considering most shorts are caused by one of the following, they are worth checking:
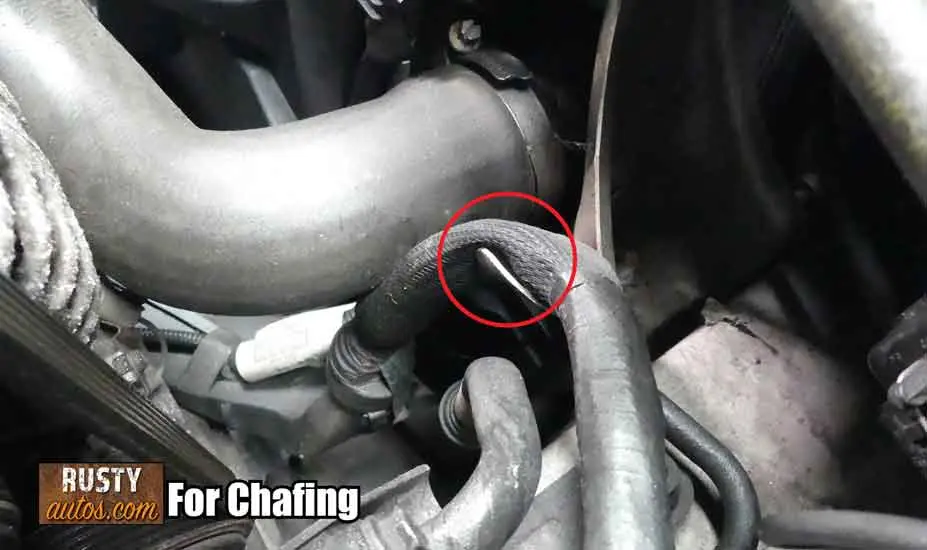
- Rubbed through wiring insulation – Loose wiring and loom turning sharply around chassis or engine corners often causes rubbed wiring
- Component failure – Check for obvious component damage, such as water or burn marks
- Accident damage – Recent accident damage, even a small bump can damage wiring
- Accessory installation error – Fixing accessories screws blind is a common cause of gremlin-type shorts
If visual checks don’t yield a result, we’ll need to roll our sleeves a little.
Identifying the affected circuit
With almost a mile of wire in the average vehicle, simply searching for a short isn’t practical. The search must be strategic, and the first step towards finding our short is identifying which circuit is affected.
The symptom of our short will help direct our focus, and that’s what we’ll look at next.
Wiring shorts typically have one of three symptoms:
- Fuse keeps blowing – Fuse blows as soon as it’s replaced or when the load is activated
- Flat battery – Vehicle battery drains overnight or over several days parked without starting
- Sensor circuit fault code – A wiring fault detected by the ECU and registers a unique fault code
If one of your symptoms is a blown fuse (lucky you), your circuit has already identified itself, and you can jump ahead to locating the short here.
If, however, your symptom is a flat battery, then you’ll need to run an additional step to identify the circuit.
If your symptom is a fault code, then you hit the jackpot, too, as the code Identifies which circuit is at fault. The unique fault code is stored in the ECM just as it detects it. You can read more about sensor and comm circuits here.
Tools We’ll Need
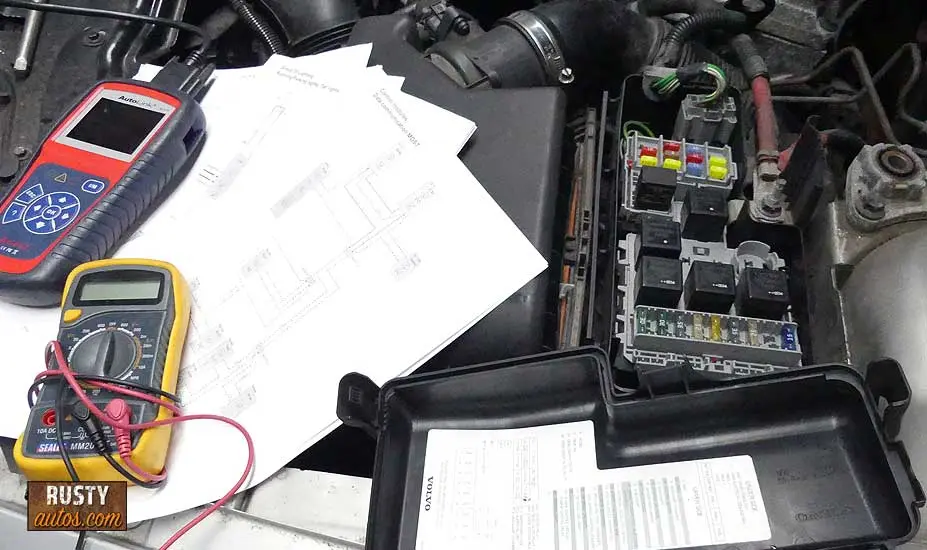
We’ll need a DVOM (Digital Volt Ohm Meter), also known as a Voltmeter, back probes, and we may need a code reader if chasing sensor coom faults.
You’ll find all the tools I use here on the “Auto electrical tools page.”
A wiring diagram for most vehicles will be needed as tracing wiring manually just isn’t practical. While wires are color-coded, it is extremely difficult to trace wires by color alone; you’ll need a map of where they go and what route they take.
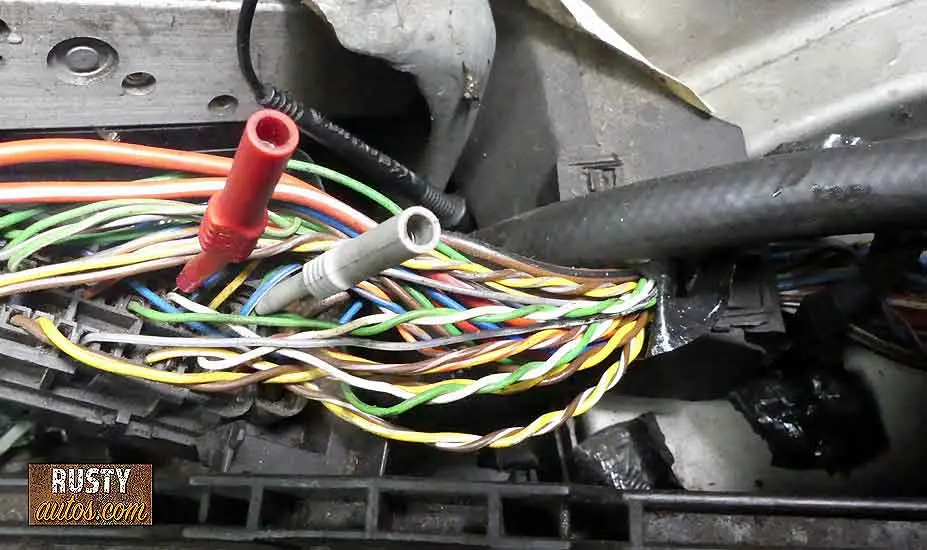
Only a wiring diagram will have this type of info. Mitchells 1 offers a pretty good DIY account. You may find this post helpful “How to read car wiring diagram.”
Locating Parasitic Short
Suppose your vehicle suffers from unexplained intermittent or a regular flat battery, and you’ve ruled out a faulty battery and alternator. (You can check out how to test your battery here and how to test your alternator here.) In that case, a parasitic battery drain is likely, and you are in the right place.
A parasitic drain is usually caused by a short, but the short doesn’t draw enough amps to blow a fuse. This, of course, helps conceal its presence, and so we need to take an extra step to identify the affected circuit.
The best method for locating the affected circuit is by using the volt drop test. The logic is simple, a circuit that is drawing current will offer a telltale difference in voltage across the fuse (volt drop). This makes the process of identifying our live circuit easy, but as you are about to learn, we need to be careful not to misdiagnose; not every volt drop is a parasitic draw.
Modern vehicles employ a ton of computers, and these guys draw power for a time, even after you shut down your vehicle. So we must be careful not to misdiagnose a normal current draw as our parasitic draw.
To test successfully, we’ll need the computers to go into what’s known as “Sleep mode.” To do that, we must trick the vehicle into thinking the doors, hood, and trunk are closed and locked, as we’ll need access to fuse boxes.
The steps are as follows:
- Locate all fuse boxes and remove access covers
- Open hood, trunk, and drivers door to gain fuse box access
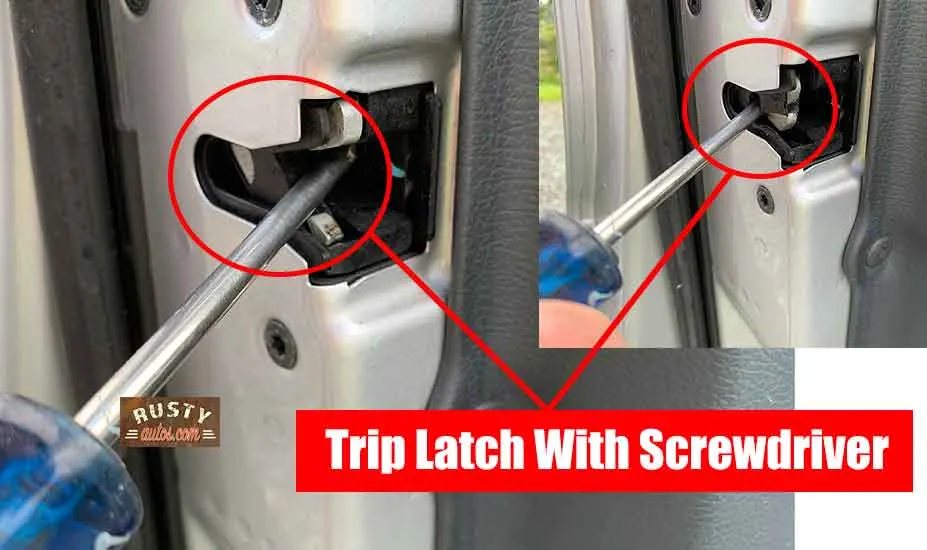
- Trip hood and door latch and any other latches
- Lock vehicle and remove keys, place keys away from the car
- Wait twenty minutes for computers to enter sleep mode
- Voltmeter set to MV (Millivolts)
- Volt drop test each fuse in turn
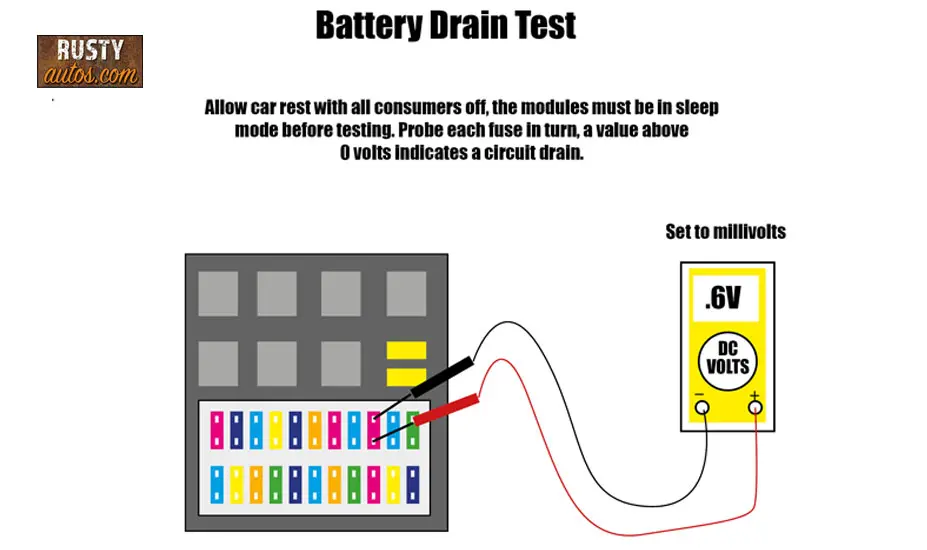
Any fuse that reads above this 0 mv indicates a faulty circuit and needs investigation. With the circuit identified, you can now move on to locating the short below.
Locating Sensor Wiring Short
Remember, not all circuits are used to power components; many use low voltage and resistance to communicate with the ECM (Engine Control Module (Computer)) and other control modules in your vehicle.
To test these types of circuits, we’ll need to check resistance (Ω) with a Voltmeter. It is important to isolate a circuit before testing resistance but especially so with circuits that are connected to computers. (By isolating, I mean disconnecting it from the ECM and any other modules it’s connected to)
The reason this is important is that when checking resistance, a voltmeter sends a small charge down the circuit, which could otherwise damage the sensitive computers.
Resistance readings are the more common way to check sensor or communication circuits, and when isolated fault finding is the same as any other circuit, I’ve covered that below.
Locating Blown Fuse Short
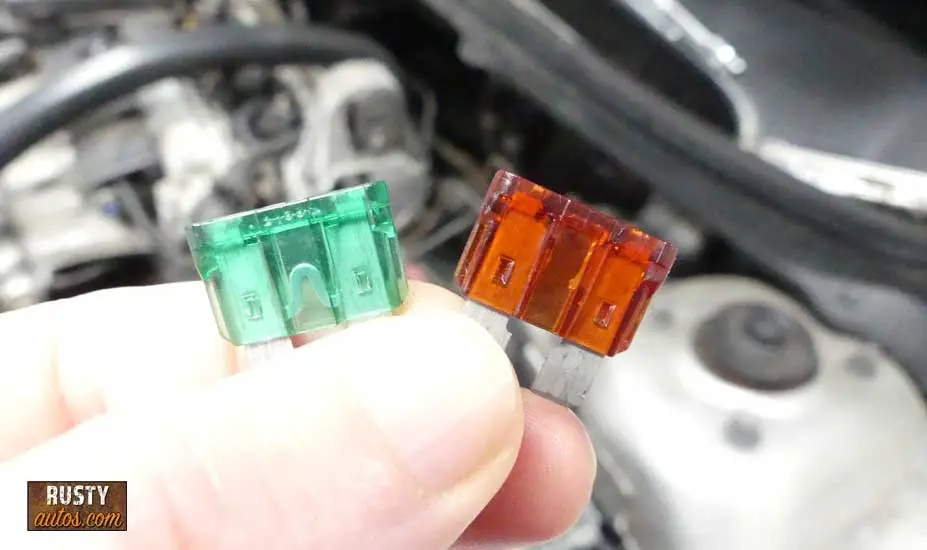
The fuse keeps blowing; this is the easiest type short to identify as the blown fuse identifies the affected circuit. (Lucky you!)
In this section, we’ll locate the most common type of short – the short to ground. But if you are chasing a short in a sensor or communication circuit or a short to voltage, this same concept works.
When resistance testing, the circuit being tested must be isolated. To isolate a circuit, you must disconnect it from the power source. Disconnecting the battery negative terminal serves to cut all power.
You should know before disconnecting the battery negative; you may need to calibrate some systems like electric windows, HVAC, Electric steering, ABS, etc. This isn’t usually a big deal, simply driving the vehicle restores all the functions; that said, some higher-end vehicles might require a trip to the dealer to calibrate some systems… just saying!
If you are working on a sensor or communication circuit, you must disconnect it from all control modules (computers). For that, you’ll need access to a wiring diagram to be sure you are isolated from all control modules.
For this test, we’ll use our voltmeter set to resistance (Ω).
The short-to-ground test steps are as follows:
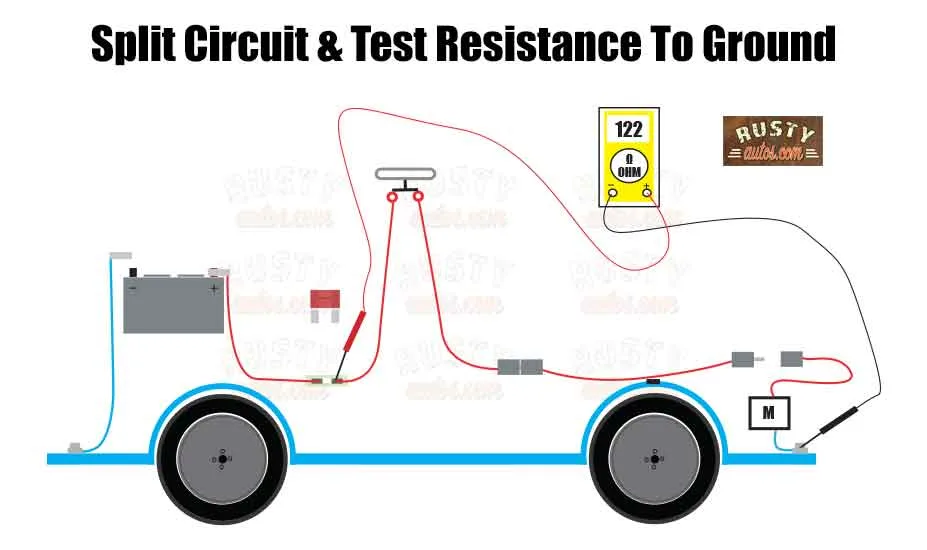
- Isolate the circuit by removing battery negative cable
- Pull fuse and remove the load block connector
- Set voltmeter to resistance Ω
- Check resistance to ground on each side of the circuit
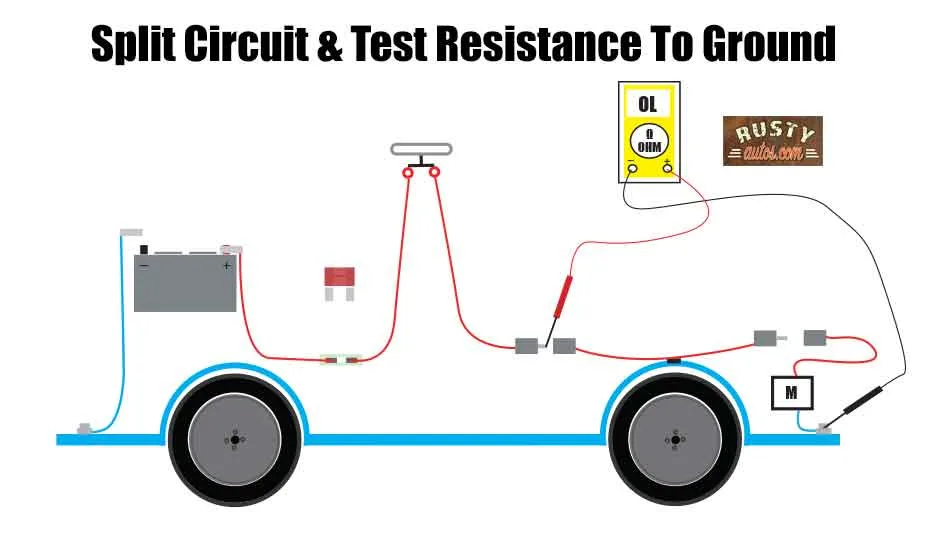
- A short circuit section will offer a value
- A good circuit section will read Open Loop (OL)
- Chase the side with low resistance
- Read the wiring diagram and split the circuit in two again
- Check resistance to ground
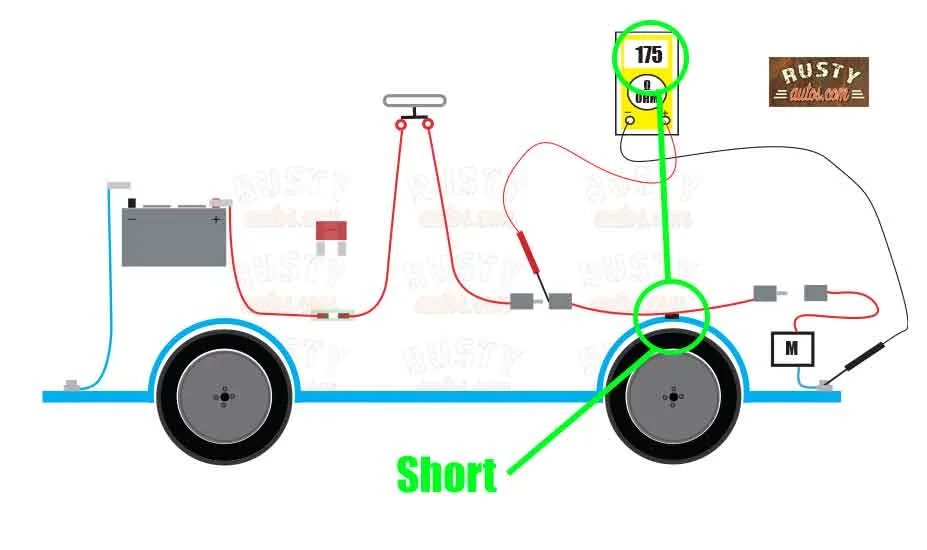
- Chase the side with low resistance
- Repeat until you can visually identify the short
- If your circuit tests OK, go ahead and check your component (if applicable)
That’s it; the hard part is over; now we’ll need to repair it.
Testing a component
Testing an electrical component will require a DVOM as we’ll need to check component resistance. All electrical components have a very particular internal resistance and once the value of a known good component is known, checking our suspected faulty component is easy.
A motor is a very typical electrical component to cause issues. Motor issues and associated symptoms come in three basic flavors:
1 The internal copper windings break – motor stops operation but doesn’t cause a fuse to blow or a battery drain.
2 Mechanical motor resistance – motor becomes stiff to turn, a partially seized bearing or binding wiper arm assembly will cause a mechanical resistance, this will cause a fuse to blow but won’t cause a battery drain.
3 Internal copper windings short – the internal windings (copper wire) are coated with insulation to prevent contact; when the insulation breaks down, the winding comes into contact and causes a short. Typically this causes the fuse to blow and could drain a battery depending on how it is wired.
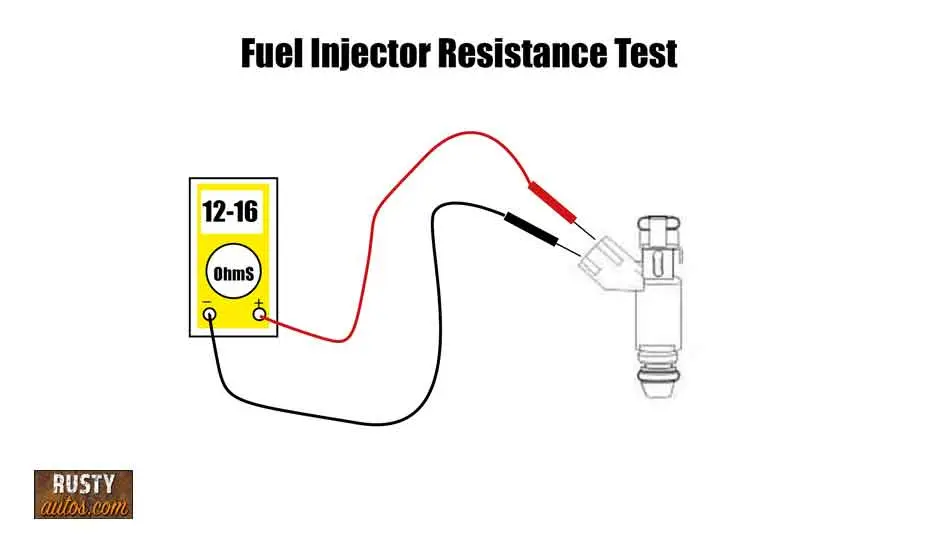
The problem we often encounter when checking component resistance is verifying what the resistance reading of a good motor should be.
This type of information is available inside workshop manuals, but you may need to consult manuals such as Mitchells 1, this is not an affiliate link, and I don’t gain from recommending them.
Component resistance test is as follows:
Testing component internal resistance as follows:
- Isolate the component by disconnecting the block connector
- Identify the internal circuit pins
- Set meter to resistance (Ω)
- Probe appropriate pins (Power and ground)
- Compare resistance against known good component
Replace as necessary.
Fixing a Short
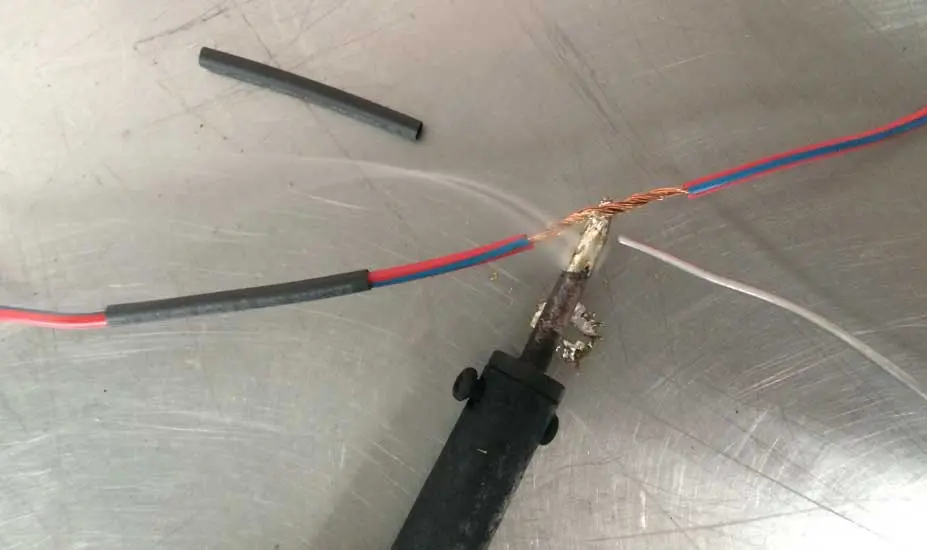
When repairing wiring shorts, soldering is the best approach, and if the wiring is exposed to the elements, then you’ll need to use a heat-shrink waterproof cable wrap.
The soldering process is as follows:
- The circuit must be isolated, remove the fuse or disconnect the block connector
- Gain good access to the repair area
- Access if the wiring may be joined or if a section of wire needs to be fitted. Note if fitting a section of wire, the size (gauge) must be the same.
- Strip both wire ends and add the heat-shrink
- Twist the wire ends around each other
- Heat the soldering iron and add solder to the tip (tinning)
- Solder the full length of the wires
- When cool, slide the heat-shrink over the joint
- Heat the heat-shrink with a heat gun
- Use black insulation tape to seal the loom and secure the loom to chassis etc., with zip ties
Note if the wiring under repair is voltage sensitive (twisted pair), the twist in the repair section must be maintained.
Sum Up
A rubbed wire causes most shorts. Often a visual inspection of the circuit in question will reveal the location of the short. Use a wiring diagram and a volt meter to systematically check resistance between circuit sections until the shorted section reveals itself.
Repair the short using solder and heat-shrink wrap.
You may also find the following posts helpful:
How to read car wiring diagram
Is the ground the same as the negative?
- About the Author
- Latest Posts
John Cunningham is an Automotive Technician and writer on Rustyautos.com. He’s been a mechanic for over twenty-five years and has worked for GM, Volvo, Volkswagen, Land Rover, and Jaguar dealerships.
John uses his know-how and experience to write fluff-free articles that help fellow gearheads with all aspects of vehicle ownership, including maintenance, repair, and troubleshooting.

