
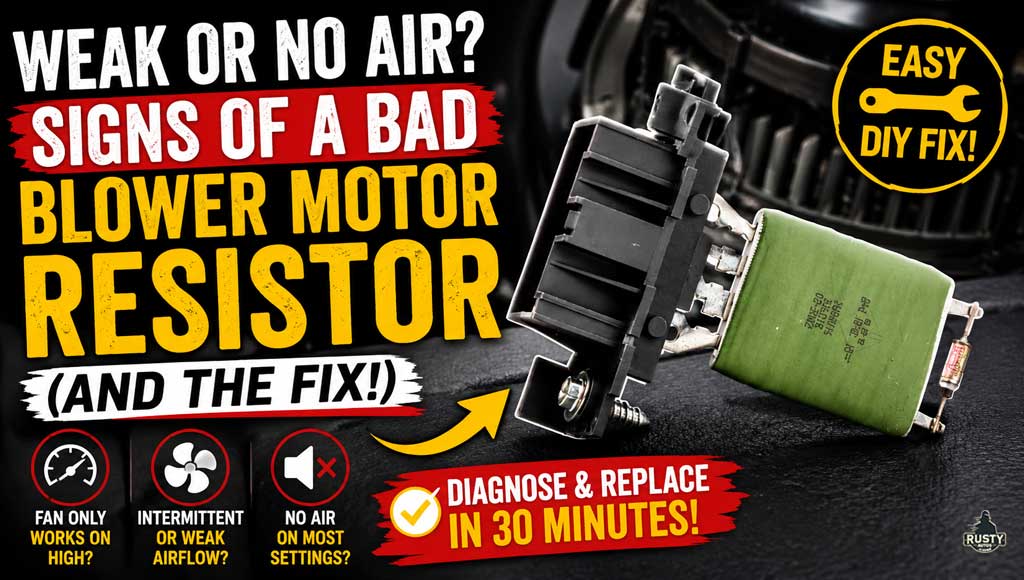
Stuck in a hot car or a chilly ride because your air vents aren’t working? You might have a faulty blower motor (fan) resistor. This small but important component is key to controlling the airflow inside your vehicle.
The blower motor resistor adjusts the amount of power delivered to the blower motor based on the fan speed setting you select. Want a light breeze or a strong blast? The resistor regulates the electrical flow.
The resistor is generally easy to reach and located near the blower motor itself, under the dashboard, inside the HVAC housing. When it starts to fail, you may notice the fan only works at certain speeds, not at all, or it becomes unpredictable.
Knowing how it works and where it’s located can help you quickly spot problems and fix them yourself, keeping your drives pleasant and stress-free.
In this guide, we’ll help you identify the warning signs, diagnose the problem, and even walk you through replacing the resistor if needed. Let’s get started so you can get back to driving comfortably.
Where Is The Blower Motor Resistor Located?
In most vehicles, the blower motor resistor is mounted directly beside the blower motor inside the HVAC housing.
Manufacturers place the resistor in the airflow stream so that the passing air helps keep it cool.
Common locations include:
- Under the passenger side dashboard
- Behind the glove box
- Under the centre dash area
- Inside the HVAC case near the blower motor
If you’re having trouble finding it, locate the blower motor first. The resistor is usually mounted within a few inches of it.
Signs of a Bad Blower Motor Resistor


The blower motor resistor is the usual culprit when your vehicle’s air system starts acting up.
Here are the common signs to watch out for:
- Inconsistent Fan Speeds: If the fan only works on certain settings and ignores others, it’s a dead giveaway. Often, you might only get airflow on the highest setting because that bypasses the resistor entirely.
- Intermittent Operation: The fan might cut in and out randomly, leading to frustration, especially on extreme-weather days. This can happen if the resistor’s connections are deteriorating or overheating.
- Reduced fan speed: On certain settings, it can indicate a partially failed resistor; however, weak airflow is more commonly caused by a restricted cabin air filter or a failing blower motor.
- Fan Not Responding to Controls: If you twist or push the fan speed control and notice no change in airflow intensity, your resistor may be on the fritz.
- No Airflow at All: When the fan doesn’t work on any setting, it may indicate the resistor has completely failed.
- Burning Smell: A failing resistor or overheated connector may produce a burning plastic smell from the dashboard vents. If detected, inspect the resistor and connector immediately to prevent further damage.
Next, let’s look into diagnosing the little guy.
Diagnosing a Faulty Blower Motor Resistor
Diagnosing HVAC issues in vehicles with climate control requires an understanding of how these systems operate. Unlike basic systems, which directly control the fan, climate-controlled systems use a computer to adjust the fan speed based on your inputs.
In these systems, pressing the controls sends commands to a central HVAC control module. It determines the optimal fan speed and temperature settings to maintain your desired comfort level. This can sometimes make the system seem unresponsive if left in ‘Auto’ mode, as the computer manages settings for optimal efficiency. Always try turning the system off ‘Auto’ to assess if manual settings prompt any changes.
When diagnosing problems, remember that climate-controlled systems have several potential points of failure, including the control panel, blower motor (fan), resistor, or even the HVAC control module itself.
Here’s a step-by-step approach to narrow down the issue:
- Toggle Through Fan Settings: Check every fan speed setting by taking the system out of ‘Auto’ mode. If the fan operates only on the highest setting, this often suggests a blower motor resistor is the issue.
- Inspect Fuses and Relays: If there is no blower at all – check the HVAC system’s fuses and relays, if fuses are good but there is no fan, it suggests a possible bad blower motor.
- Blower Motor and Obstruction Check: Verify that the blower motor is functioning, and inspect for obstructions such as leaves or debris that could affect airflow and create resistance. Check for power at the blower motor, but if there is no action, the fan motor is toast. No power at the motor points back to the resistor, wiring or control panel issue.
- Examine the Resistor: Locate the blower motor resistor in the HVAC casing and visually inspect it for burns, damaged connectors, or corrosion.
- Test with a Multimeter: Remove the resistor and measure its resistance with a multimeter. Refer to your vehicle’s service manual for the correct readings—a mismatch indicates the resistor is shot.
The Classic Resistor Failure Pattern
If the blower motor works only on the highest fan speed and none of the lower speeds operates, the blower motor resistor is the most likely culprit.
This happens because the highest speed setting typically bypasses the resistor completely and sends full battery voltage directly to the blower motor.
Check The Electrical Connector
A common failure point isn’t actually the resistor itself but the electrical connector that plugs into it.
Over time, heat generated by the resistor can cause the connector terminals to overheat, melt, or corrode. This creates excessive resistance and can mimic the symptoms of a failed blower motor resistor.
Inspect the connector carefully for:
- Burnt plastic
- Melted terminals
- Green corrosion
- Loose pins
- Signs of overheating
If the connector is damaged, replace it along with the resistor. Fitting a new resistor to a damaged connector often results in a repeat failure.
In vehicles with climate control, problems may stem from the HVAC control panel or the control module. These components should be further inspected if basic troubleshooting doesn’t resolve the issue. A scan tool is often required to activate the HVAC system and confirm proper operation. Additionally, climate control systems generate fault codes that can provide valuable diagnostic insights.
Why Resistors Fail Repeatedly
If you’ve replaced the resistor before and it failed again shortly afterwards, the blower motor itself may be the root cause.
As blower motors wear, they often begin drawing excessive electrical current. This extra load generates heat inside the resistor, which can quickly burn out a replacement unit.
If the blower motor is noisy, slow to start, intermittently sticking, or drawing excessive current, replacing both the motor and resistor together may save time and money in the long run.
How to Replace Your Blower Motor Resistor
Replacing a faulty blower motor resistor is straightforward. Steps as follows:
Tools You’ll Need:
- Socket set (usually 7mm, 8mm, or 10mm)
- Screwdrivers (Phillips and flathead)
- Ratchet and extension
- Flashlight
Step 1: Locate the Blower Motor Resistor
The blower motor resistor is located under the dashboard on the passenger side, near the blower motor. In some vehicles, you may need to remove the glove box or a plastic kick panel for access.
Step 3: Remove the Old Resistor
- Locate the resistor, which is typically secured by two screws or bolts.
- Unplug the electrical connector by pressing the release tab and gently pulling it out.
- Use a socket wrench to remove the screws/bolts holding the resistor in place.
- Pull the resistor out.
Step 4: Install the New Resistor
- Position the new resistor in place, ensuring it lines up with the mounting holes.
- Secure it using the original screws or bolts.
- Reconnect the electrical plug, making sure it clicks into place.
Step 5: Test the New Resistor
- Turn on the vehicle’s blower motor and cycle through all fan speeds to confirm proper operation.
- If all speeds work correctly, the installation is successful.
You nailed it!
FAQs
Can I drive with a bad blower motor resistor?
Yes, you can still drive your vehicle with a faulty blower motor resistor, but your HVAC system may not function correctly. You might be stuck with no airflow, maximum speed only, or an inconsistent fan operation, which can make driving uncomfortable in extreme temperatures.
What causes a blower motor resistor to fail?
The most common causes of failure include overheating, corrosion, moisture exposure, and excessive electrical load due to a failing blower motor or restriction (debris). A blower motor that draws too much current can burn out the resistor over time.
How long does it take to replace a blower motor resistor?
Most replacements take 15 to 30 minutes, depending on accessibility. In many vehicles, the resistor is easy to reach under the dashboard, but some models require removing the glove box or trim panels, which can add to the time.
How much does it cost to replace a blower motor resistor?
A replacement blower motor resistor typically costs between $20 and $80, depending on the vehicle make and model. If you hire a mechanic, labour costs can range from $50 to $150, bringing the total repair cost to $70 to $230 on average.
Do I need to replace the blower motor when replacing the resistor?
Not necessarily, but if the blower motor is faulty or drawing too much power, it could cause the new resistor to fail prematurely. If your blower motor is noisy, weak, or intermittently failing, it’s best to test or replace both the blower motor and the resistor to avoid further issues.
You may find the following pages helpful:
Would You Know What To Do?
If your engine warning light came on tonight, would you know to keep driving, pull over, or call for recovery?
Most drivers wouldn’t.
That’s exactly why I wrote this guide.

- About the Author
- Latest Posts


John Cunningham is an Automotive Technician and writer on Rustyautos.com. He’s been a mechanic for over twenty-five years and has worked for GM, Volvo, Volkswagen, Land Rover, and Jaguar dealerships.
John uses his know-how and experience to write articles that help fellow gearheads with all aspects of vehicle ownership, including maintenance, repair, and troubleshooting.