
I’ve been a mechanic for more than twenty-five years, and brake jobs are one of the most common types of repairs I perform but also one of the easiest for the DIY mechanic to nail successfully at home. You are in the right place, and 5 mins from now, you’ll be an expert.
Replacing brake rotors is not a difficult auto maintenance task. A DIY mechanic may successfully replace the brake rotor in under two hours. Tools required include ratchet, socket set, wrench set, hammer, jack, and axle stand.
In this post, we’ll cover everything you need to know in order to nail rotor replacing successfully. We’ll cover Tools needed; rotor removal, rotor fitting; pad fitting; brake noise prevention, and bedding in the brake process.
Tools Needed

For most, the tools required to replace rotors are the type of tools a DIY mechanic would ordinarily have. We’ll cover them here in a little more detail.
Most vehicles run rotors front and rear. Since front rotors work harder than the rear, they wear out more frequently.
In any event, this post will cover replacing both front and rear rotors. This content is owned by moc.sotuaytsur. Note, replacing rear rotors may require a brake caliper wind back tool or handheld service tool (I’ll show you how to figure out if you need these later), so I’ll list tools and supplies required for front and rear rotor replacement separately.
You’ll find all these tools and supplies on the “Brake repair tools page” and if you need brake parts, check out the Amazon link below.
Amazon Brake PartsYou may find the brake resources page useful, it’s a fluff-free guide to DIY brake repairs.
Front rotor tools and supplies
- Socket set
- Ratchet
- Breaker bar
- Torque wrench (optional)
- Long flat screwdriver
- Bungee
- Hammer
- Wire brush
- Blue thread lock
- Brake cleaner
- Permatex brake pad lube
- Silicone grease
Rear rotor tools and supplies


- Hand-held scanner (vehicles with electric parking brake (EPB))
- Wind back tool (vehicles with wind back calipers)
- Socket set
- Ratchet
- Breaker bar
- Torque wrench (optional)
- Long flat screwdriver
- Bungee
- Hammer
- Wire brush
- Blue thread lock
- Brake cleaner
- Permatex brake pad lube
- Silicone grease
Front Rotor Removal
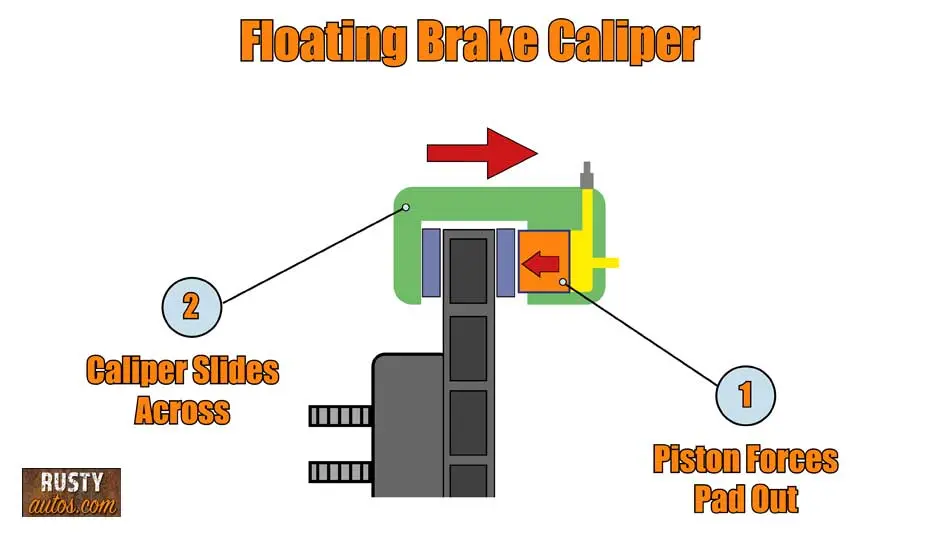
Front rotor wear is more common than the rear, and that’s no surprise since they carry the weight of the vehicle under braking. Most vehicles employ what’s known as free-floating brake calipers, as they’re the most common type; I’ve used them in this guide. The less common fixed caliper may be fitted to larger commercial vehicles, high-performance cars, and classics.

The rotor removal process looks like this:
- Park vehicle on a level hard surface
- Loosen lug nuts
- Jack vehicle
- Fit axle stand
- Remove wheel
- Loosen rotor face fastener (Torx or Star head)
- Turn the steering wheel fully outwards
- Open the hood and loosen brake fluid reservoir cap
- Using a flat screwdriver, slowly lever the piston backward
- Remove caliper clip (if fitted)
- Loosen brake caliper fasteners
- Remove brake pad sensor wire (if fitted)
- Remove caliper and suspend from coil spring using bungee
- Remove brake pads and discard (note pad clip location, if fitted)
So far, the story is pretty typical of all free-floating calipers. For some lucky DIYers, the rotor can be removed at this stage, Nice!
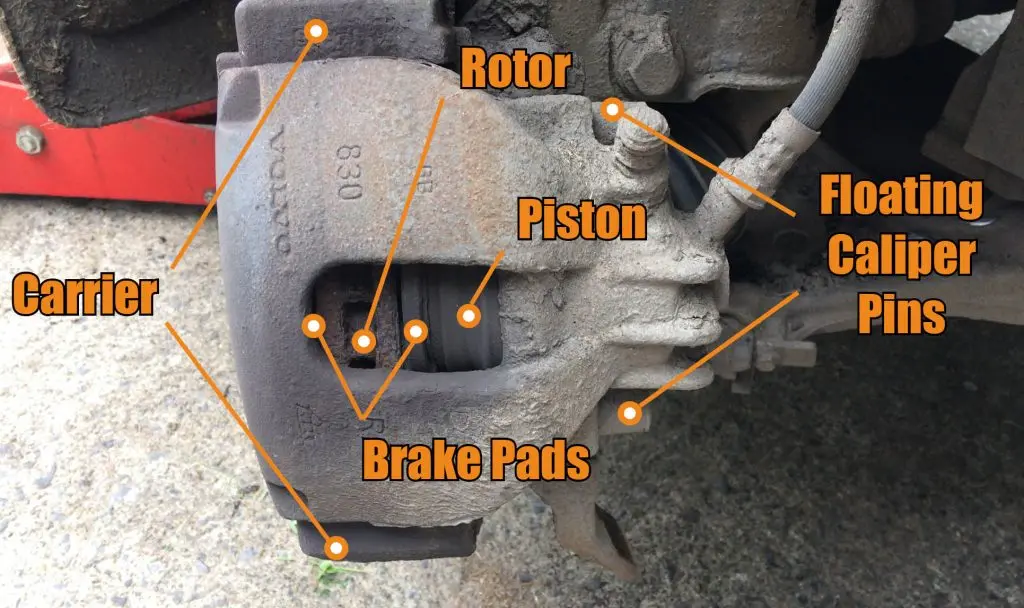
However, most will need to go one step further and remove the brake caliper carrier. The carrier is easily identified as it’s the metal component the brake caliper is/was fastened to.

Brake carrier removal is as follows:
- Using a breaker bar, loosen both carrier fasteners (located behind the wheel knuckle)
- Remove the carrier
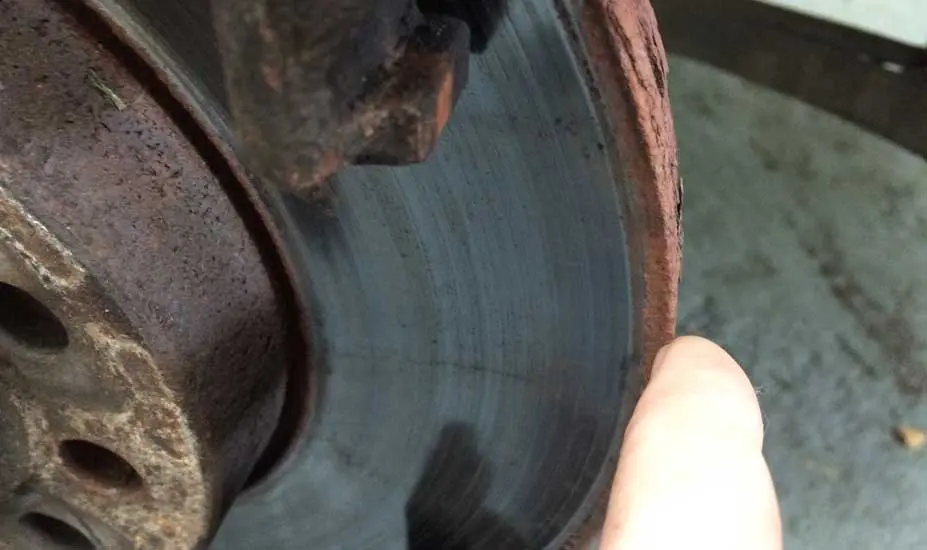
You’re now free to remove the rotor. However, on occasion, the rotor may remain stuck to the hub. If this sounds like your problem, the solution is as follows:
Note we’ll be striking the rotor, so best to wear eye protection. In addition, if your vehicle’s lug nut threads are exposed, thread the nuts on a turn to help protect the threads from potential damage when using the hammer.
- Using a ball head hammer (preferred), strike the rotor sharply, head on, around the hub
Front Rotor Fitting

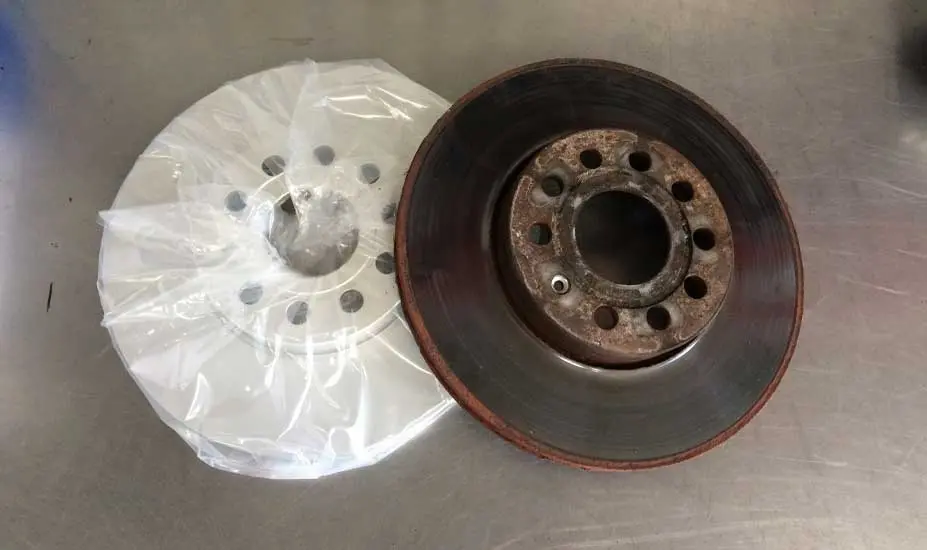
Rotors are bare metal and prone to corrosion. Since nobody wants to buy rusty rotors, they are given a light coat of primer and a coat of wax as part of the manufacturing process.
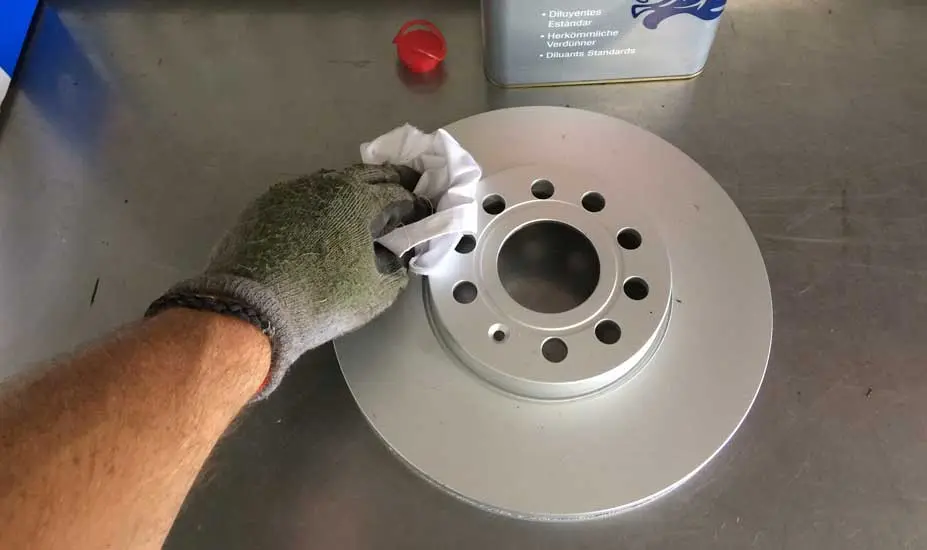
The primer has no negative effects on new brake pads, but the wax does. It is, therefore, mission-critical we remove the protective wax coating before fitting the rotor. To clean the wax coating, spray the rotor on both sides with brake cleaner and wipe clean with a clean cloth.
The rotor fitting process is as follows:
- Using a wire brush, remove loose rust from the hub rotor interface
- Fit the rotor and fit the rotor fastener (Torx or Star screw)
- Remove brake pad clips and discard if new clips are supplied with new pads (otherwise, clean and refit)
- Using the wire brush, clean the brake carrier rails (use a dust mask)
- Refit old clips or refit new
- Use Permatex brake on both rail clips
- Using a wire brush, clean both carrier fastener threads and add thread locker
- Fit carrier and fit fasteners
- Torque carrier fasteners to spec (typically 75 lb. ft. 100 Nm)
Front Brake Pad Fitting


Fitting front brake pads is easy, and no special tools are needed. The procedure is as follows:
- Check pad markings; some may be left side right side sensitive or fitted with a brake sensor
- If pads come with new pad clips, go ahead and fit them
- Test fit pad
- Remove pad and apply Permatex anti-squeal paste to rear
- Fit pads
- Fit caliper (if caliper won’t fit – push piston fully home)
- Clean caliper pins and apply silicone grease
- Fit new caliper fasteners (if supplied) otherwise clean and fit old ones adding blue thread lock
- Torque to specification typically 20 lb. ft. (28 Nm)
- Plug in break sensor (if fitted)
- After completing both sides, refit the brake fluid reservoir cap
Important – PUMP BRAKES BEFORE MOVING VEHICLE
That’s it; see bedding in new brakes below.
Rear Rotor Removal

Many vehicles today are fitted with an integrated parking brake caliper. It simply means the rear calipers do two jobs, they activate with the brake pedal, but they also activate with the parking brake application. This means we need to treat this system a little differently than we do the front calipers.
In addition, how the parking brake is activated makes an additional difference in how we approach rear rotor replacement.
Rear rotor removal is, for the most part, the same as the front. However, some steps may differ depending on what type of parking brake your vehicle employs.
For the purpose of this guide, we’ll assume your vehicle is equipped with the rear caliper integrated parking brake since most are.
That said, there are two common methods of activating the parking brake:
- Manual – conventional manual-operated handle or foot lever
- Electronic – electronic parking brake (EPB), identified by a push button activation
Manual activation – If your vehicle employs a standard manually operated brake, then rear caliper pistons can’t be pushed back. They must instead be wound back. A special tool known as a wind back tool is required in order to retract the rear caliper piston.
Electronic – If your vehicle is fitted with EPB, a scan tool is required in order to place the parking brakes in service mode at which point they may be pushed back like regular caliper pistons.
Manual parking brake activation – rear rotor replacing
This process is nearly identical to the front rotor replacing process covered earlier, so I won’t repeat it here. The process has an additional step. As said, it does require a tool known as a wind back tool, and you can find that tool here on the “Brake repair tools page”
The additional step is needed to retract the caliper piston. The process is as follows:
- With the rear caliper removed, fit the correct size wind back tool adaptor to the piston
- Winding the tool (simultaneously winds and compresses the piston)
- When fully retracted, remove the tool
The rest of the process is identical to the front rotor fitting.
Electronic parking brake activation – rear rotor replacing
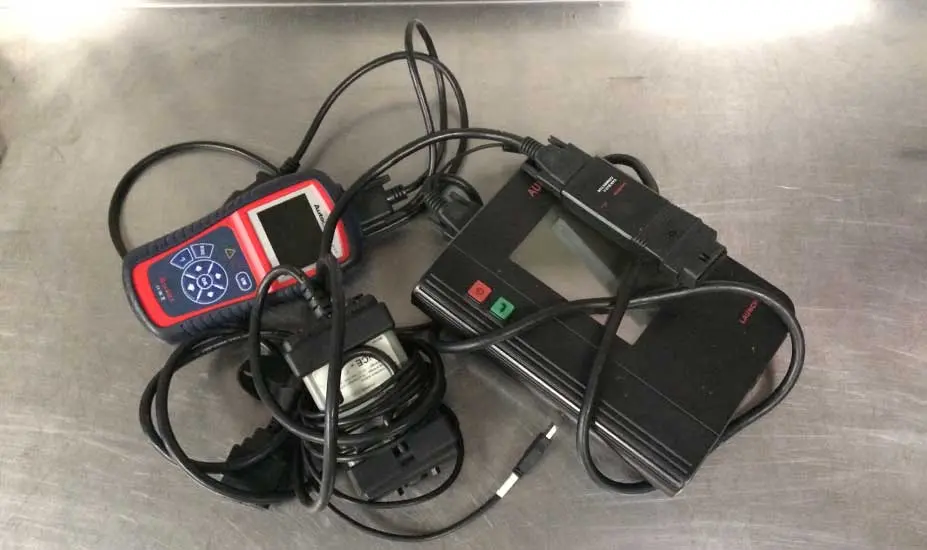
If your parking brake activates automatically or you press a button to activate it, you have an EPB system. Before working on this system, you will need a scan tool and a wind-back tool in order to replace the rear pads and rotors. You can find all the tools you’ll need to perform this repair here on the “Brake repair tools page”.

The process is as follows:
- Using a bidirectional, plug the tool into the OBD port (under dash)
- Turn ignition to position 2
- Select parking brake service function
- Set parking brake to “Service mode.”
- Turn ignition off
From here, the process is identical to the manual process, i.e., you’ll need to use the wind back tool to retract the pistons before moving on to rotor replacing.
After replacing the rotors as per the process described earlier, go ahead and reverse the service mode process by turning service mode “Off.”
Ideally, all wheels should be torqued to specification Cars usually run around 75 lb. ft. (100 Nm) – SUV and trucks approx. 100 lb. ft. (135 Nm)
Bedding In Brake Procedure
Your new pads and rotors won’t feel effective until their surfaces mate. That usually occurs after six to ten on-road brake applications, but that can vary.
The bed in the procedure is important, especially after caliper pistons have been fully retracted. Before moving your vehicle, pump the brake pedal must be pumped several times to push pistons out to meet the pads.
If you fail to pump the brake pedal before moving, YOU WON’T HAVE BRAKES
Bed in the process as follows:
- Before moving the vehicle, pump the brake pedal until the brake pedal feels firm (usually 3 or 4 pumps)
- Now go ahead and check the brake fluid reservoir level (it should read max)
- Move the vehicle a few feet and apply brakes to test
- Move to a quiet road and from 30 – 40 mph, perform a normal brake application, repeat 6 to 8 times (Avoid hard braking)
At this point, the brakes should feel great. The last job is to recheck the brake fluid level.
You are now a pro!
You may find this post helpful:
- About the Author
- Latest Posts


John Cunningham is an Automotive Technician and writer on Rustyautos.com. He’s been a mechanic for over twenty-five years and has worked for GM, Volvo, Volkswagen, Land Rover, and Jaguar dealerships.
John uses his know-how and experience to write articles that help fellow gearheads with all aspects of vehicle ownership, including maintenance, repair, and troubleshooting.