

Fitting a new set of brake pads is a nice, simple Saturday-morning kind of job… except it’s not! It’s turned into a giant turd of a job.
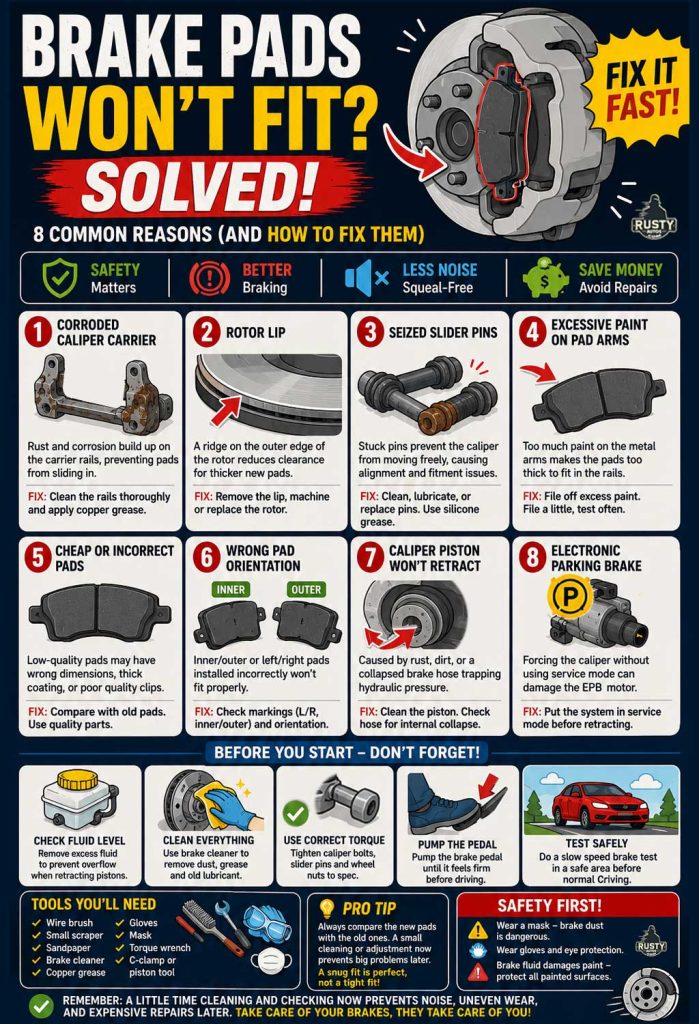
The most common reason new brake pads won’t fit is corrosion on the calliper carrier bracket. Other causes include:
- Excessive paint on the brake pad arms
- Wrong pads
- Wrong pad orientation
- Caliper piston not retracted
Pads that won’t fit are usually pretty simple to fix, and in this post, we’ll look at the most likely reason and how you can fix them.
Warning: some cars are fitted with dynamic braking systems. These systems can be dangerous to work on without disabling them first. Check if your car is fitted with a brake assist system.
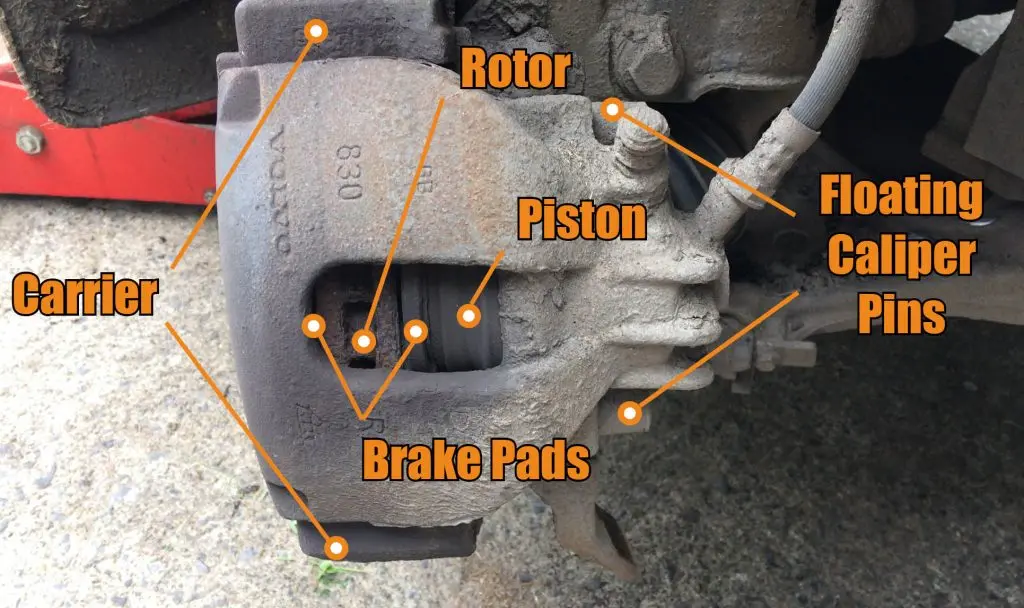
Brake Caliper Carrier
Most modern cars use a free-floating brake caliper set-up. The calipers are free to move laterally across the caliper carrier. This free movement offers even braking force over both sides of the rotor.
The caliper is fixed to the carrier by two sliding pins. The pins are lubed and allow for smooth caliper action.
The pads sit on the carrier with the brake pad arms in a rail. The rail holds the pads snugly in place and guides it to the rotor as the brake pedal is pressed.

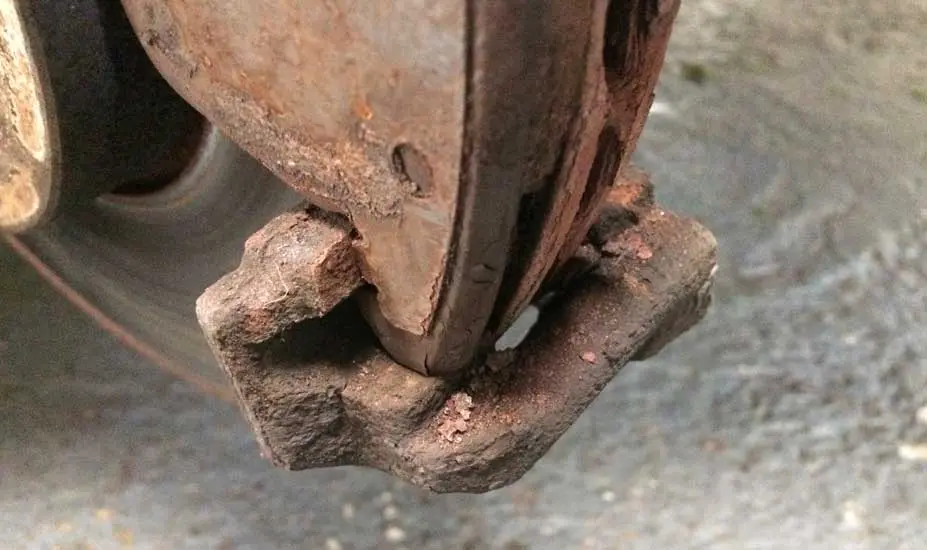
Problems arise when corrosion builds up on the carrier rail. Corrosion can cause all sorts of braking problems, including:
- Noisy brakes
- Hard brake pedal
- Ineffective braking
- Sticking brake caliper
- Smoke from brake caliper
- Excessive brake pad wear
- Uneven brake pad wear
- Brake steering issues
And when it comes to fitting a new set of pads, you may find them difficult to fit. And you’ve guessed it, the corrosion needs to be cleaned, and the rails need some copper grease.

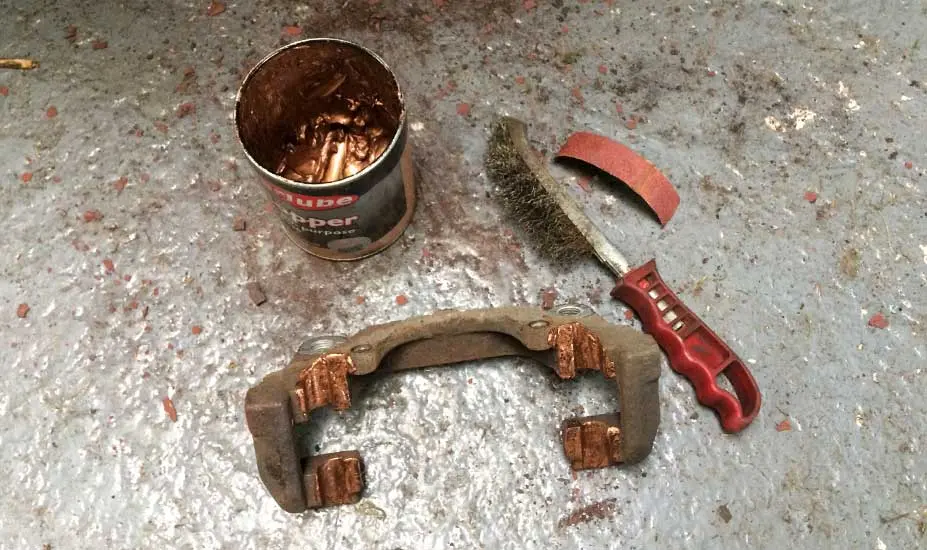
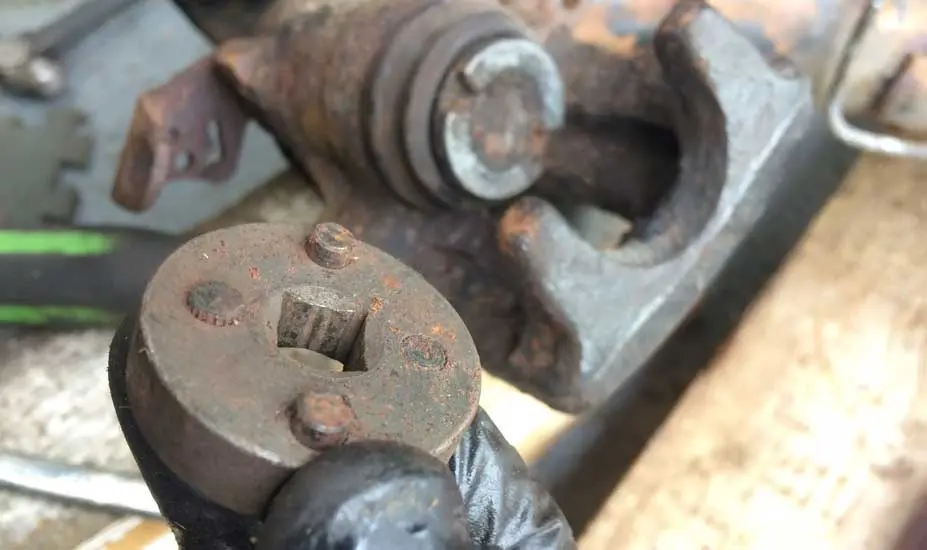
I removed this carrier just to show what it looks like, but you can do a perfectly good job cleaning it on the car. The copper grease helps the pads move smoothly along the rail and prevents brake squeal.
The tools you’ll need:
- Dust mask
- Gloves
- Wire brush
- Small scraper
- Sandpaper
- Copper grease
- Brake cleaner
Before cleaning, you’ll need a mask. Brake dust is dangerous to the lungs. When there’s a lot of brake dust on the calipers, I wet the whole area with water using a spray bottle. Help keep the dust down.
The cleaning procedure involves scraping, sanding, and checking your work by fitting the old brake pad, not the new one, because the rust and crap will contaminate it. When checking, the pad should move freely across the rail. If so, go ahead and add some copper grease. You’ll find links to the tools and consumables I use here on the Brake repair tools page.


When applying the grease, less is more; too much grease will contaminate the rotors & pads, and your brakes will be crap.


Some brake pad carriers will also employ brake pad retaining clips. These guys are important; they keep the pad in place, and just off the rotor, help reduce brake noise, extend pad life, and keep them cooler.
New pads don’t always come with replacement clips, and so old ones are often reused. As they age, unsurprisingly, they become bent out of shape, which can cause fitting issues.
If your clips are old and bent, treat your brakes to a new set.
Seized Caliper Slider Pins
Slider pins allow the caliper to move freely across the rotor.
If the pins seize from corrosion, torn rubber boots, or dried grease, the caliper won’t retract or align properly, making brake pad installation difficult.
Common symptoms include:
- One brake pad more worn than the other
- Uneven braking
- Brake drag
- Difficult pad installation
What can I check?
Remove the slider pins and inspect them for:
- Rust
- Pitting
- Torn rubber boots
- Dried grease
The pins should move smoothly by hand.
Clean and lubricate reusable pins using proper silicone brake grease.
Badly corroded pins should be replaced.
Excessive Brake Pad Paint

What does excessive brake pad paint mean? It means the brake pads have too much paint on the arms and consequently won’t fit in the carrier rails.
I know this because I worked as a technician for GM Canada in a large dealership that did first-class work and used only OEM parts.
The pads were made in Mexico and were in GM-branded packaging. Although the pads were top quality, they still needed to be filled – Chevy Colt or Cadi, didn’t matter.
The problem was excessive black paint on the metal pad arms, right where they meet the carrier rail.
The solution is simple: check your pads for excess paint, use a small file to remove it from the metal pad arms, file a little more, and test. Removing too much material will cause the pad to become loose in the carrier, leading to brake noise.
The pads should be snug in the rail but not tight. When you’re happy with the fit, use a small amount of copper grease to keep things moving smoothly.
Brake Rotor Lip Preventing Pad Fitment
Worn brake rotors develop a lip around the outer edge over time.
That lip forms because the brake pad doesn’t contact the very outer edge of the rotor surface.
So what’s the problem?
The new brake pads are much thicker than the old worn pads, and when combined with the rotor lip, there may not be enough clearance to slide the caliper back over the rotor.
This is incredibly common on older vehicles.
What can I check?
Run your finger carefully around the outer edge of the brake rotor.
If there’s a noticeable ridge or lip, that’s likely contributing to the problem.
The fix may involve:
- Replacing the rotor
- Machining the rotor
- Carefully removing the lip where appropriate
If the rotor is heavily worn, replacement is usually the best option.
Cheap Brake Pads Can Cause Fitment Issues
Not all aftermarket brake pads are manufactured to the same tolerances.
Cheap brake pads sometimes suffer from:
- Excessive paint thickness
- Incorrect backing plate dimensions
- Poor-quality clips
- Oversized friction material
Even when the parts catalogue says they’re correct.
If you’re struggling with badly fitting pads, compare them carefully against the original parts.
Sometimes the issue isn’t the car.
It’s the parts.
Wrong Pad Type


Wrong parts don’t often happen today. Parts guys are usually pretty good at their job. When I was an apprentice, most of my time was spent running back and forth to the parts store.
As S**t flows downhill, I soon found it was more efficient to have the old part in my hand to compare before leaving the shop.
But mistakes can happen, so check the old and new pads carefully, and use Vernier callipers or a tape measure if needed.
Having your chassis number to hand when ordering parts helps avoid miscommunication.
Wrong Pad Orientation


Removing pads is easy, but sometimes you forget or just don’t pay attention to which pad came from where. Taking photos when stripping is a great tip because it’s easy to forget.
Most brake calipers use identical pads, meaning the pads can be fitted to either the inner or outer side of the caliper and on either side of the vehicle.
However, some vehicles use specific pads for:
- Inner and outer positions
- Left and right sides
- Or even all four positions individually
When pads are side-specific, they’ll be marked “L” (Left) and “R” (Right).
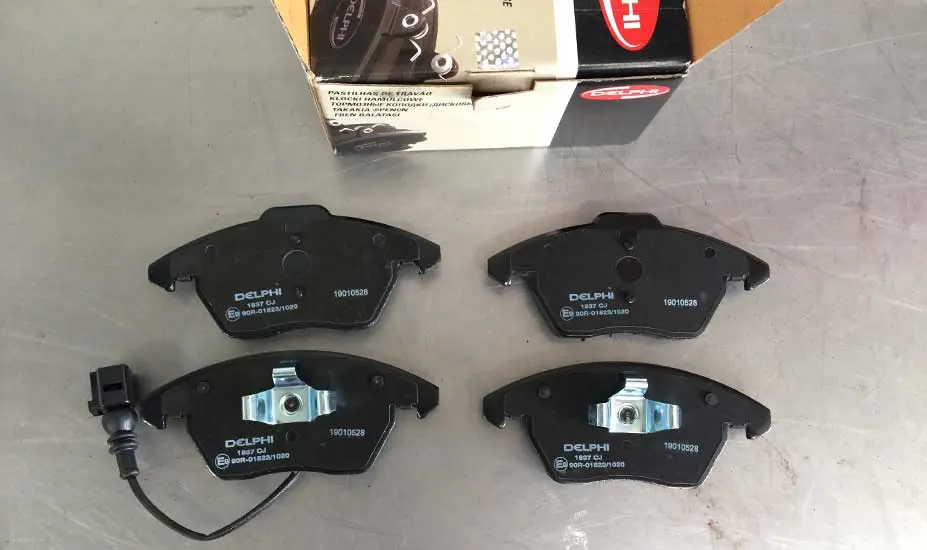
Some pads may also include wear sensors, anti-rattle springs, or locating tabs that only fit one position correctly, so always compare the new pads carefully with the old set before installation.
I had an apprentice once. I’m not going to name names, “god bless him” he fitted a new set of calipers and was having difficulty fitting the pads that were marked L and R.
It turned out the pads were on the correct side, alright, but the calipers weren’t; it could happen to a bishop.
Caliper Piston Extended


Before attempting any brake repairs, make sure it’s safe to do so. Some cars are fitted with brake assist. It’s a pre-charged braking system that can cause injury. Check and see if your vehicle is fitted with a dynamic brake assist system. If it has, disable it.

The pads won’t fit because the piston in the caliper hasn’t retracted far enough. The piston needs to be pushed all the way home. Front caliper pistons are usually easy to retract. A channel lock or c-clamp will do the job or pry them back using a longish screwdriver.
The proper tool is called a wind-back tool, and while it isn’t necessary for front pads, it is a useful kit.


Remove the brake fluid reservoir cap before forcing the caliper piston home, (helps prevent fluid overflow.) Watch for Brake Fluid Overflow
As the caliper piston retracts, brake fluid returns to the master cylinder reservoir.
If the reservoir was previously topped up while the old pads were worn, the fluid level may overflow once the pistons are pushed back.
Brake fluid damages paint very quickly.
Before compressing the pistons:
- Protect painted surfaces immediately
- Check the reservoir level
- Remove excess fluid if necessary
If the caliper piston refuses to move, you may have a faulty caliper or hose pipe. Check this post. It covers this type of problem “Brakes won’t bleed”
Sometimes the flexible brake hose internally collapses and traps hydraulic pressure inside the caliper.
The brake applies normally, but the fluid can’t return properly, preventing the piston from retracting fully.
This type of fault is more common on older vehicles.
Fitting rear pads isn’t as easy. First off, if you have an electronic parking brake (Push button), you’ll need a service tool.
Never attempt to force back an electronic parking brake caliper without first placing the system into service mode.
Damage to the parking brake motor or internal gearing can occur very easily.
That repair gets expensive fast.
The handheld tool communicates with the parking brake control unit and puts it into service mode. After the repairs, the service mode will need to be turned off.

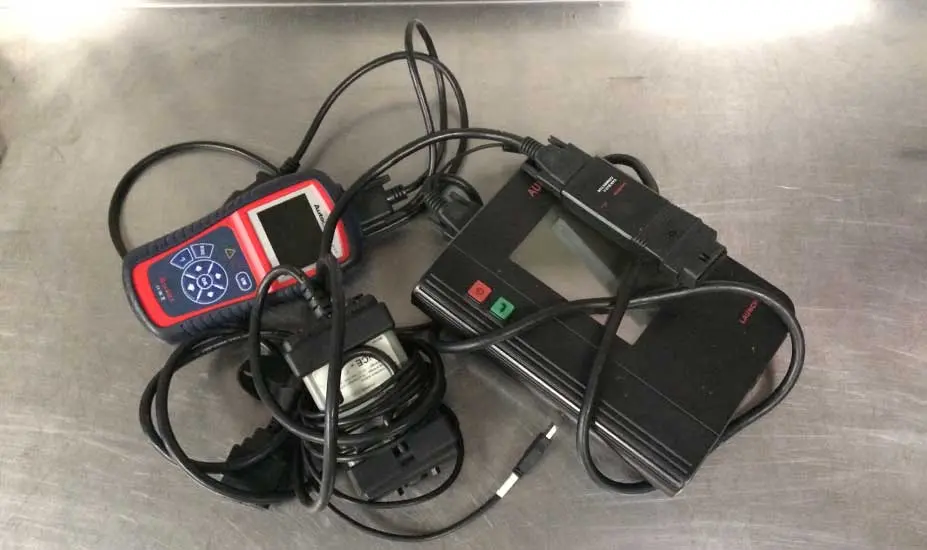
Service tools aren’t as expensive as you might think. You can check out the tools I recommend on the “Brake repair tools page” and if you need brake parts, check out the Amazon link below.
Amazon Brake PartsRear calipers won’t just push back like front calipers. Instead, they need to be screwed and pushed at the same time.
You’ll need a tool like the Orion Motor Tech wind back kit, it’s perfect for beginners, and it’s universal. It covers all vehicles and is conveniently sold and delivered by Amazon.com. Nice! I wrote a post about retracting rear calipers, and you can check it out here – Rear caliper won’t depress.
Final Brake Assembly Tips
Before driving the vehicle:
- Double-check all bolts are tightened correctly
- Torque wheel nuts properly
- Ensure caliper bolts meet manufacturer’s torque specs
- Pump the brake pedal before moving the vehicle
The brake pedal will often go to the floor initially until the pads reseat against the rotor.
Never drive the vehicle until the brake pedal feels firm again.

Related Questions
Should brake pads fit tight? Brake pads should fit snugly in the brake caliper carrier but should slide freely.
Would You Know What To Do?
If your engine warning light came on tonight, would you know to keep driving, pull over, or call for recovery?
Most drivers wouldn’t.
That’s exactly why I wrote this guide.

- About the Author
- Latest Posts


John Cunningham is an Automotive Technician and writer on Rustyautos.com. He’s been a mechanic for over twenty-five years and has worked for GM, Volvo, Volkswagen, Land Rover, and Jaguar dealerships.
John uses his know-how and experience to write articles that help fellow gearheads with all aspects of vehicle ownership, including maintenance, repair, and troubleshooting.