
I’m a mechanic and customer complaints of brake noises are very common. Luckily, most brake noises fit into the category – not serious, more of an irritant than a problem. But there’s another category – brake noises that require your immediate attention.
And that’s the one we are dealing with here. You are absolutely correct to question the grinding noise, you’ve come to the right place and we’ll get this figured out right now.
The most common cause of grinding brakes is worn-out brake pads. The grinding noise is caused by the brake pad backing plate, rubbing against the rotating metal rotor. Braking ability is compromised, replace the brake pads immediately.
In this post, you’ll learn more about the causes of grinding brakes, how to diagnose them and fix them like a pro. I’ll also share some insider tips for preventing noisy brakes.
Brake Pad Wear

If you’re new to driving, you may not know what brake pads are or what they do, and that’s Ok. Here’s a brief explanation of what they are, where they live, how they work, why they wear out, and why they make a grinding noise when they do.
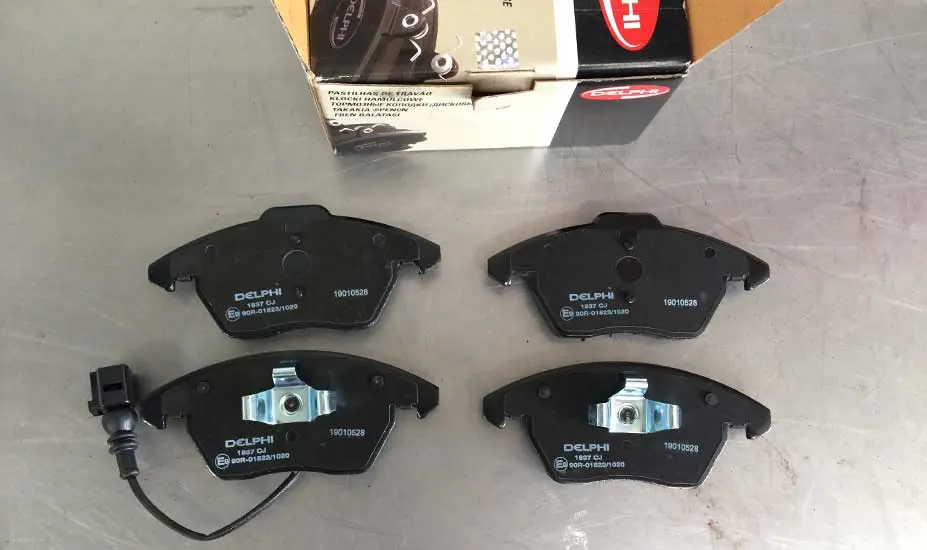
What pads are – Brake pads as you likely know, used to slow and stop your vehicle. The common brake pad friction material is a mixture of soft metallic fillings and resin molded into a pad and mounted on a metal backing plate. They are specific to your vehicle but are available from various manufacturers and in various compounds – metallic, organic, and ceramic. The different compounds offer different braking characteristics.

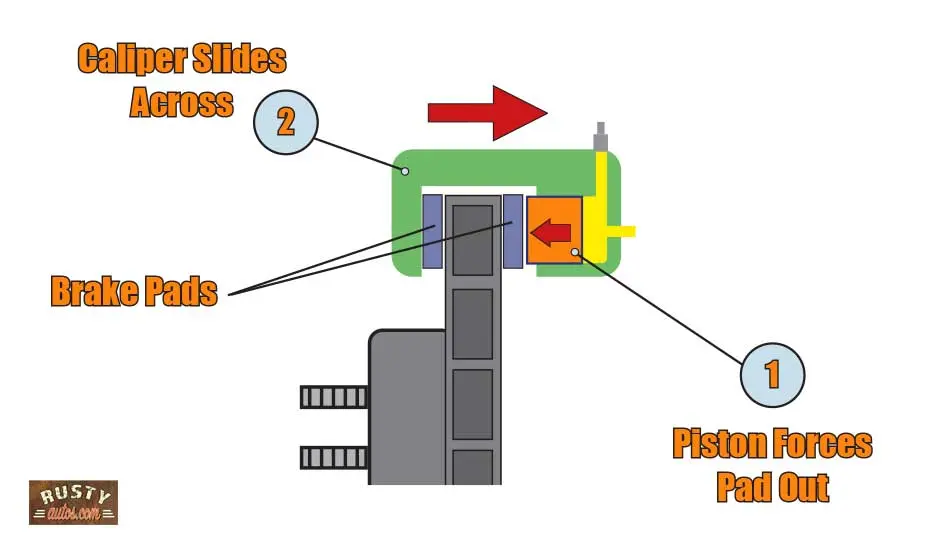
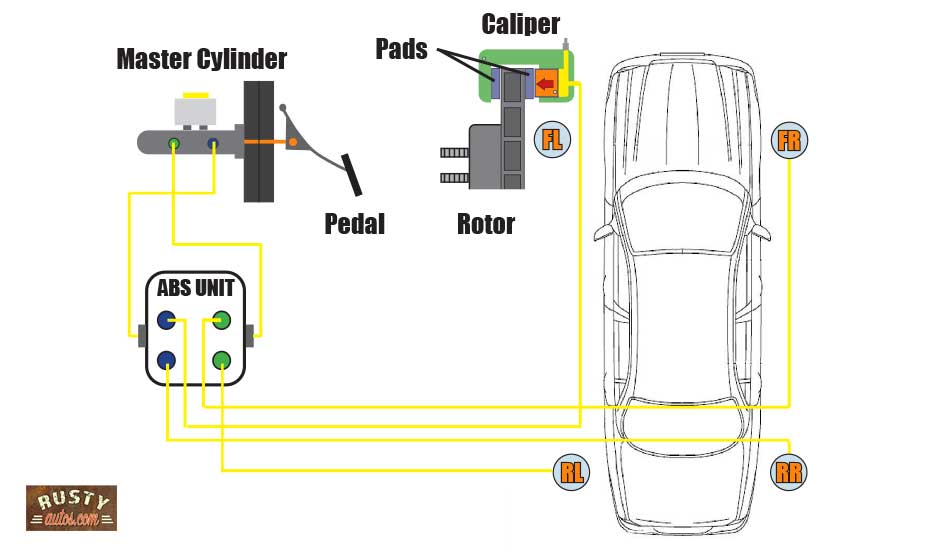
Where they live – Two pads (usually) are located at each wheel and are housed in a brake caliper which sits fixed over the top of the spinning rotor, the rotor is fixed to the wheel.
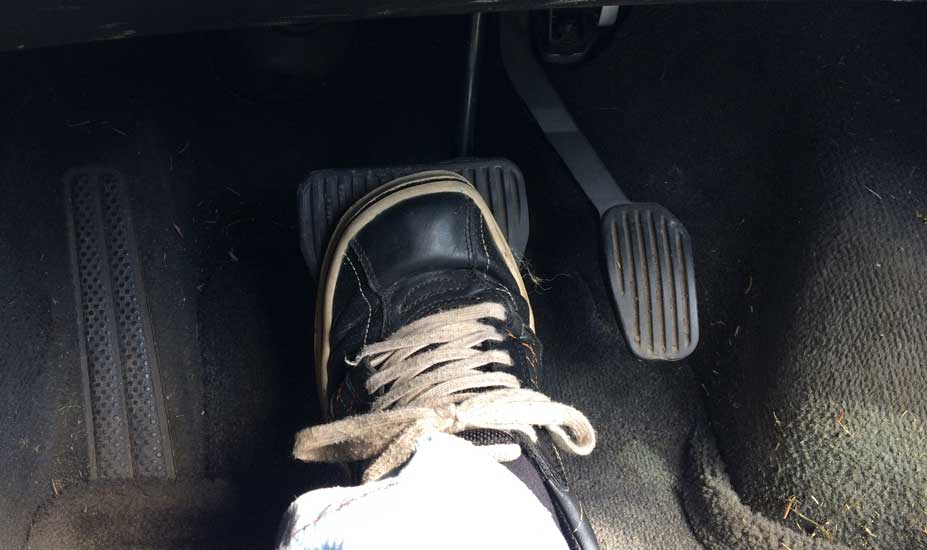
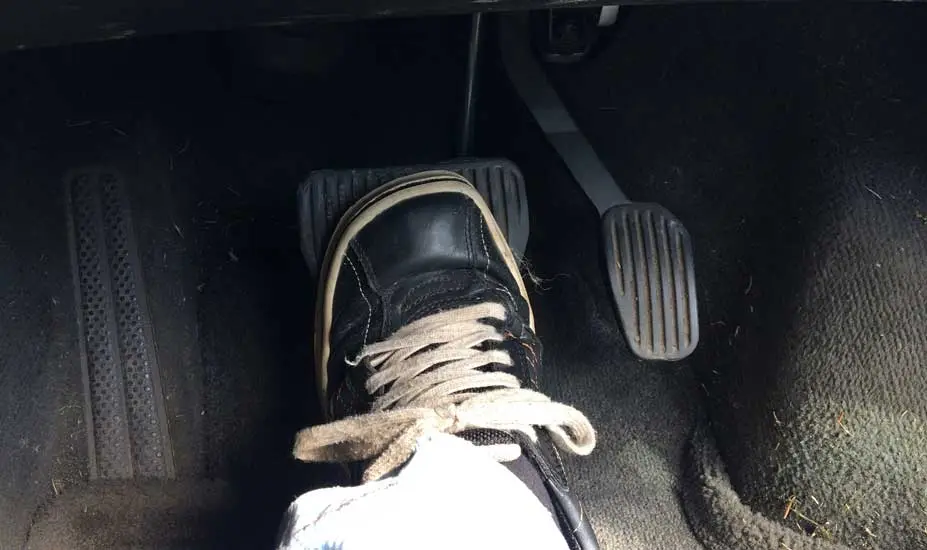
How do they work – The caliper incorporates a hydraulic piston which is activated by pressing the brake pedal. The pads live between the piston and the spinning rotor, pressing the brake, therefore, forces the pads against the spinning rotor, which slows and stops the vehicle.

Why they wear out – As you can imagine, the pads simply wear out after repeated braking applications. How quickly they wear out depends on a ton of factors. One driver may require brake pads every few months, another may only change once a year or less.
Just some of the factors that influence brake pad wear:
- Driving style – one driver may brake late and hard; and another just sparingly
- Brake pad materials
- Rotor materials
- Weight of vehicle
- How vehicle is used – towing
- Where vehicle is used – city driving involves more braking than highway use
- Weather – cooler climates more easier on brakes
Why they make noise when they wear out – There are two possible causes, however, both mean your pads are worn out.
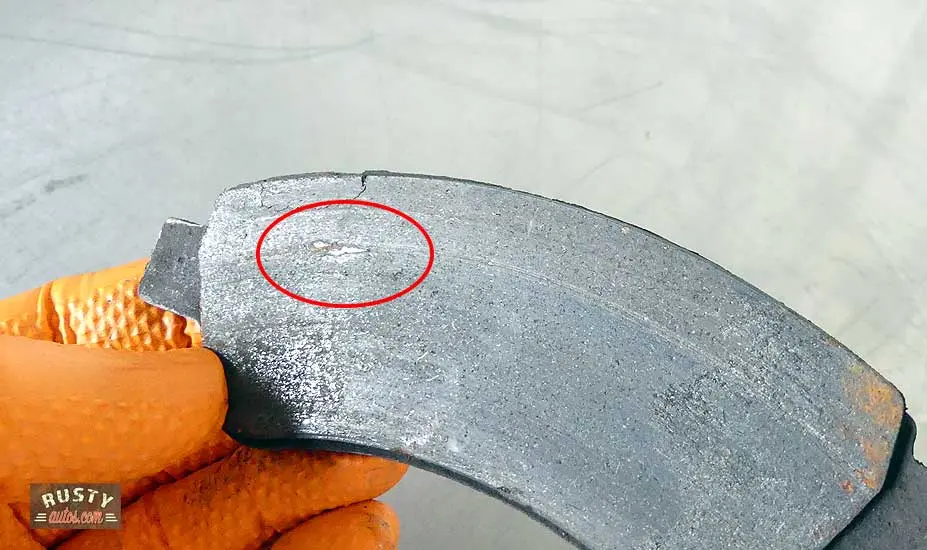
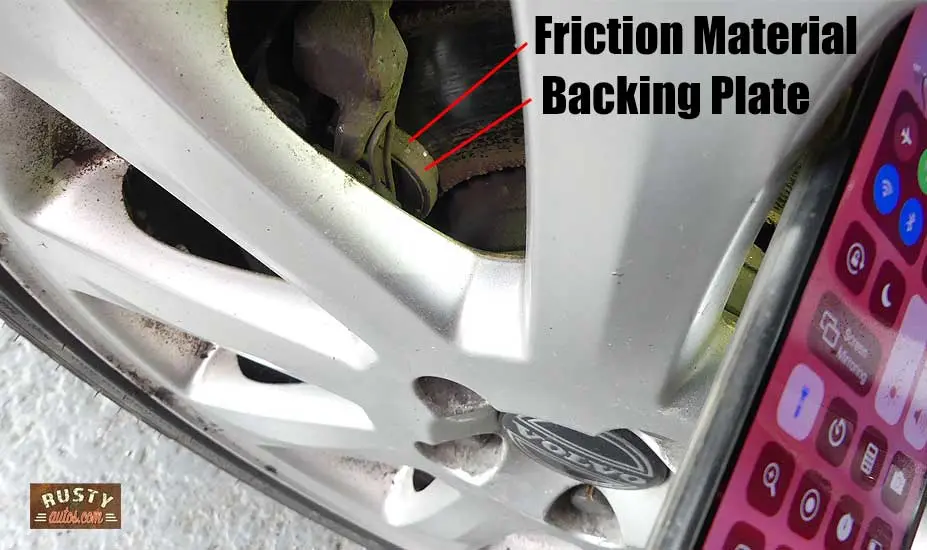
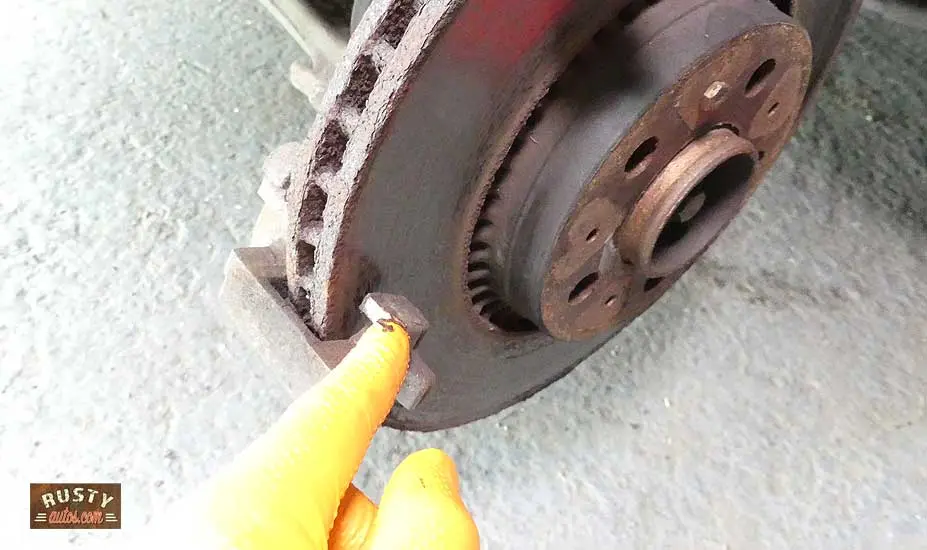
1 – The pads friction material is spent, the brake pads metal backing plate is pushed against the rotor. That’s the grinding sound, it’s metal on metal and is a rotor killer.
2 – Many pad manufacturers place a metal tang on the brake pad, close to, but not at the pad backing plate. It serves as a reminder to get your pads changed. The idea is simple, low-tech but works a treat.
When the pads get low (worn), but not critically low, the tang starts to rub on the rotor. This content is owned by moc.sotuaytsur. The tang is a fine piece of soft metal, and while it makes horrible grinding noise you just can’t ignore, it doesn’t actually damage the rotor.

Needless to say, a grinding noise means your brakes pads are likely worn out, apart from the terrible noise, your car brakes are compromised and they need immediate attention.
Symptoms of worn brake pads
Symptoms vary by vehicle and by brake system type, but here’s a shortlist of the most common symptoms:
- Grinding noise when moving and brake pedal pressed
- Grinding noise when moving, all the time, worse when brake pedal pressed
- Cyclical rubbing noise when moving
- Brakes not gripping as usual
- Smoke from wheels
- Sparks from wheels
- Lots of heavy brake dust on the wheel rims
- Fine rust particles on the rims
How to diagnose worn pads

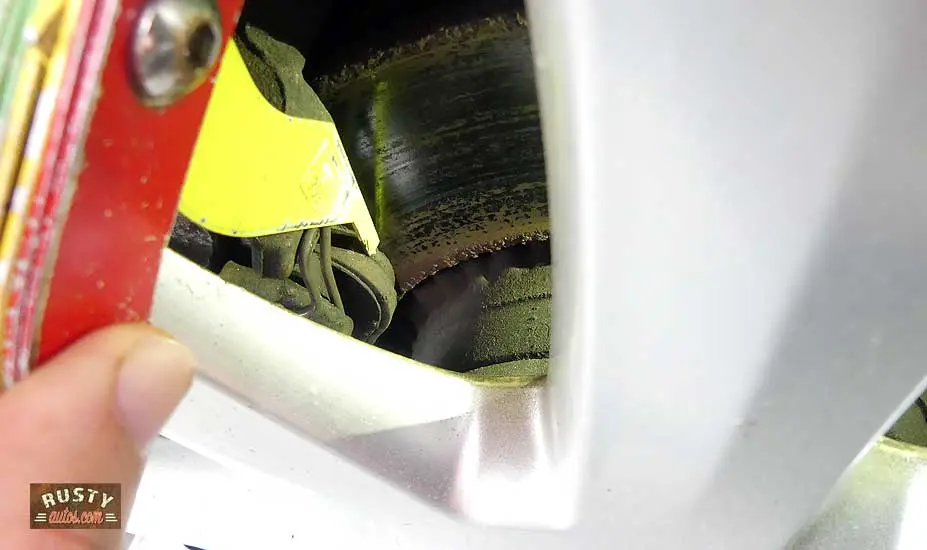
Most cars are fitted with alloy wheels which are usually quite open spoked. By open I mean you can view brake components between the spokes of the wheel. The brake rotor, caliper, and pads are viewable without ever taking a jack out or removing a wheel.
This makes diagnosing pretty easy, mechanics just love the open spoked wheel.
Here are a few mechanics notes –
It is highly likely the front brakes are making the grinding noise, they work harder than the rear, and are prone to wear. Makes sense to check the front brakes first.
Brake pads never wear evenly, meaning the pads on either side of the same rotor wear at a different pace. That’s down to the nature of floating brake calipers. The inner pad is more prone to wear and is the pad most likely causing the noise.


If there’s a large difference between the inner and out pad wear, the caliper pins could be binding.
An imbalance in brake wear is common for brakes opposite on the same axle. Meaning a driver’s side front brake could be worn to the point of grinding, while the passenger front may appear only 90% worn. It means there’s a brake imbalance and if excessive, should be checked by a professional.
Checking the brake pads process is as follows:
- Park vehicle on level ground and apply parking brake
- Check the front wheel, drivers side
- Using a flash light, phone light works great too
- Identify the brake pads (closest the rotor) and identify the rotor
- Check brake pad and judge the friction material quantity (is metal backing close to rotor?)
- Check both front brakes before checking both rear brakes
Technicians use a brake pad wear gauge to measure brake pad wear for safety inspections. But a gauge isn’t needed. You can estimate by looking if it has close to a tenth of an inch (3 mm) or less, you found your problem, go ahead and change the pads.

The new brake pad friction material is about half-inch (12 mm) or so thick. So, if you check and find your pads are all good, meaning they look only about half worn. You likely have a different issue, you may have trapped debris, a stone, etc. logged between the rotor and rotor shield. If you think this sounds like your problem, you’re in luck, I cover that below, in “Trapped debris”.
How to replace brake pads
Replacing brake pads isn’t a difficult task and can be undertaken by a DIYer with just a few tools. Time to nail this procedure varies by vehicle but most vehicles make brake pad changing pretty easy and even a beginner could make this repair in less than two hours.
Here’s a list of the tools and supplies required:
- Car Jack
- Axle stand
- Socket set & ratchet
- Long flat screwdriver

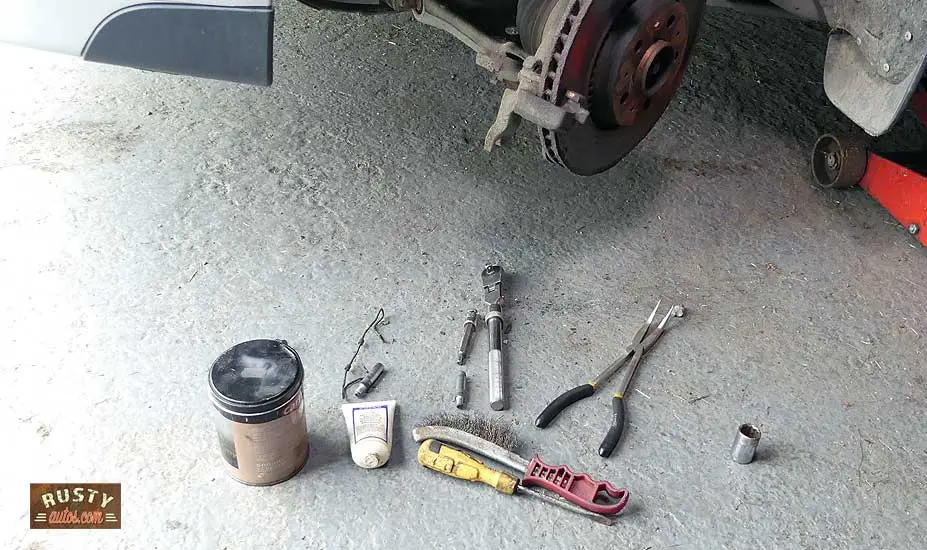
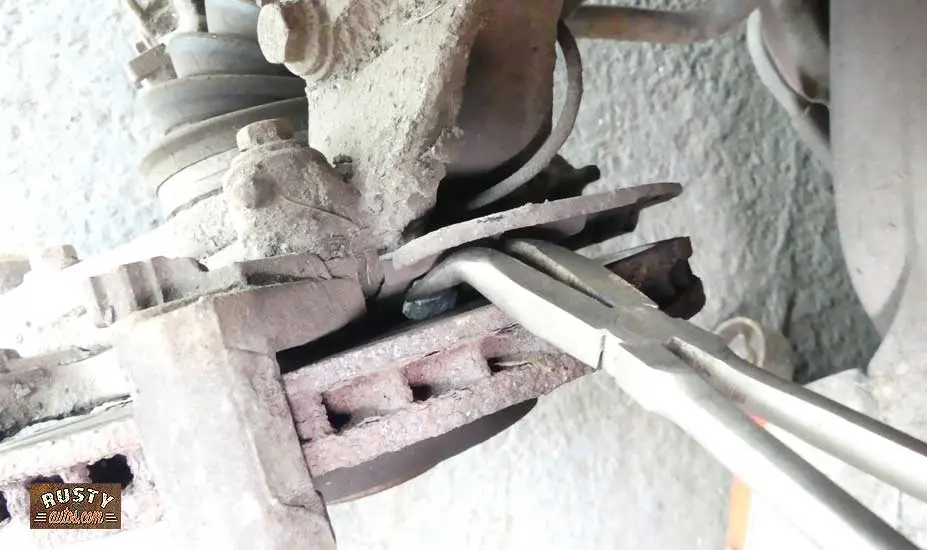
- Pliers
- Wire brush
- Bungee cord
- Torque wrench
- Brake component cleaner
- Permatex brake lube
- Set of pads
You’ll find many of the tools and supplies I use here on the “Brake repair tools page” and if you need brake system parts, check out the Amazon link below.
Amazon Brake PartsThe brake pad replacement process is as follows:
- Remove wheel
- Turn steering wheel out
- Pop hood and loosen brake fluid reservoir cap

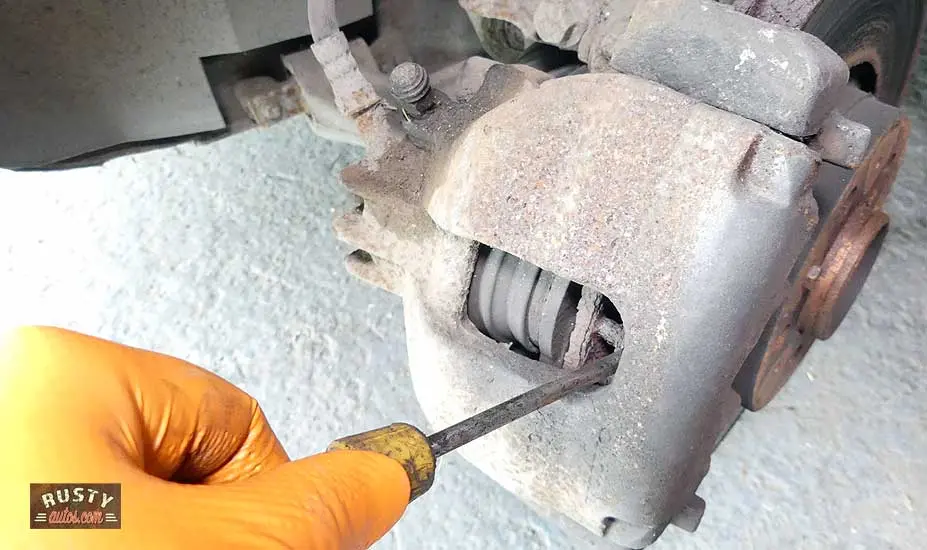
- Using flat screwdriver lever back caliper piston
- Remove caliper clip (if fitted)
- Remove caliper fasteners

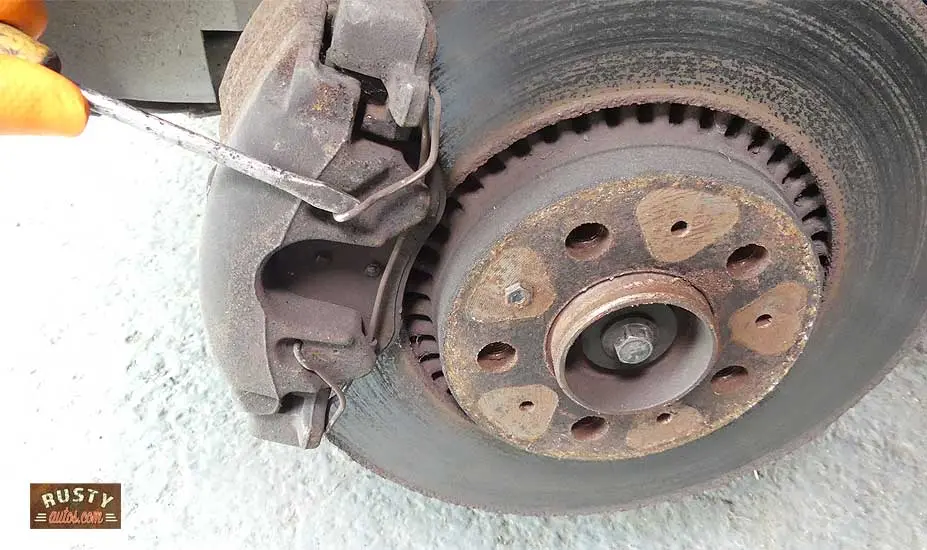

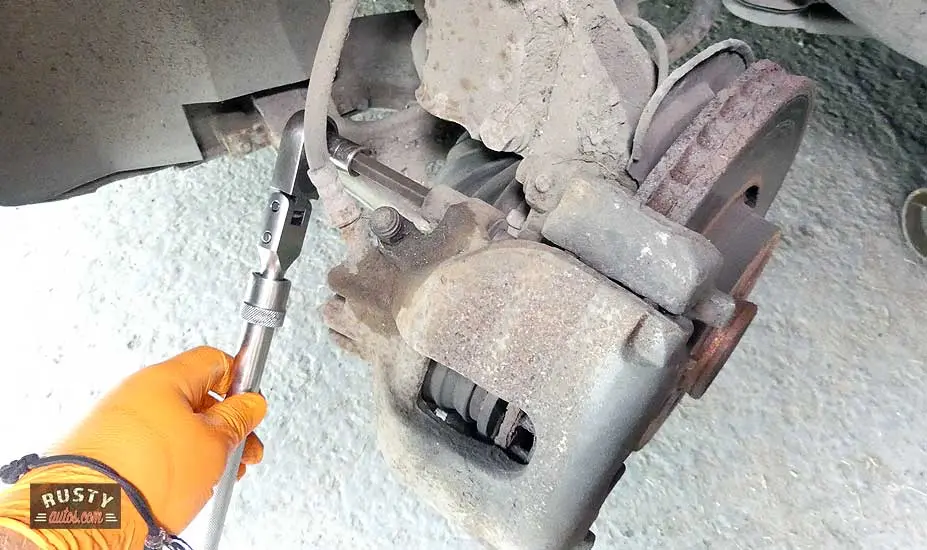
- Remove caliper and support from coil spring
- Remove brake sensor (if fitted)
- Remove pads

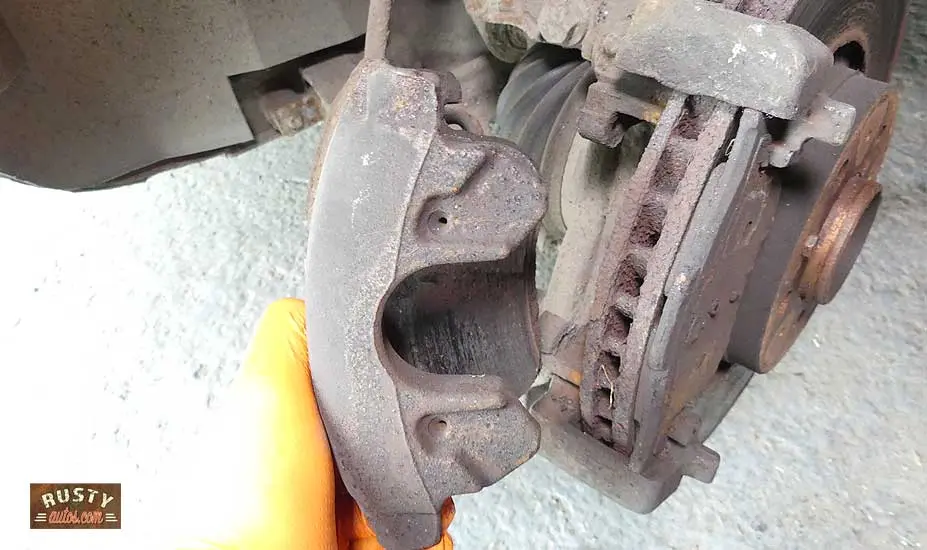
Fitting the new pads:
- Clean caliper rails and pad clips (if fitted) apply Permatex lube
- Clean caliper slide pins and apply silicone grease (if fitted)

- Apply Permatex to rear of pads and fit pads


- Fit caliper and fasteners (torque 20 lb. ft. (28 Nm)
- Refit caliper clip (if fitted)
- Refit road wheel and repeat the process on the opposite side
After completing the process on the opposite side of the vehicle, tighten the brake fluid reservoir cap and torque wheels to specification. Cars around 75 lb. ft. (100 Nm) – SUV and trucks approx. 100 lb. ft. (135 Nm).
–THIS IS SUPER IMPORTANT—
Before driving your vehicle PUMP THE BRAKES SEVERAL TIMES
You’ll know when you have done this successfully, the brake pedal will be firm. Failing to pump the brakes will mean your vehicle has no brakes.
Bed in brake pads:
Until the brakes are bedded in they won’t feel right. The bedding in the process is as follows – drive the vehicle at 30 – 40 mph and apply the brakes, repeat four to five times and avoid heavy braking.
Check brake fluid reservoir level after a road test, that’s it, you are a brake technician.
Is it safe to drive with grinding brakes?
If the brakes have just begun to grind, like today, and as long as your brakes are still operating efficiently, it is safe to drive to the local garage. But it is not safe to drive any further. Grinding brakes are a serious warning, if ignored, it becomes a hazard to both life and your wallet.
What happens if I ignore the grinding brakes?
The sound will get worse and because the backing plate will eventually wear through, the caliper piston will begin to make contact with the rotor. At this point, the vehicle will have little in the way of stopping ability and the car will require new calipers, rotors, and pads. Brake components are fitted in pairs on the same axle, and so both front or rear will need overhauling. Quite the spendy day at the garage.
Trapped Debris

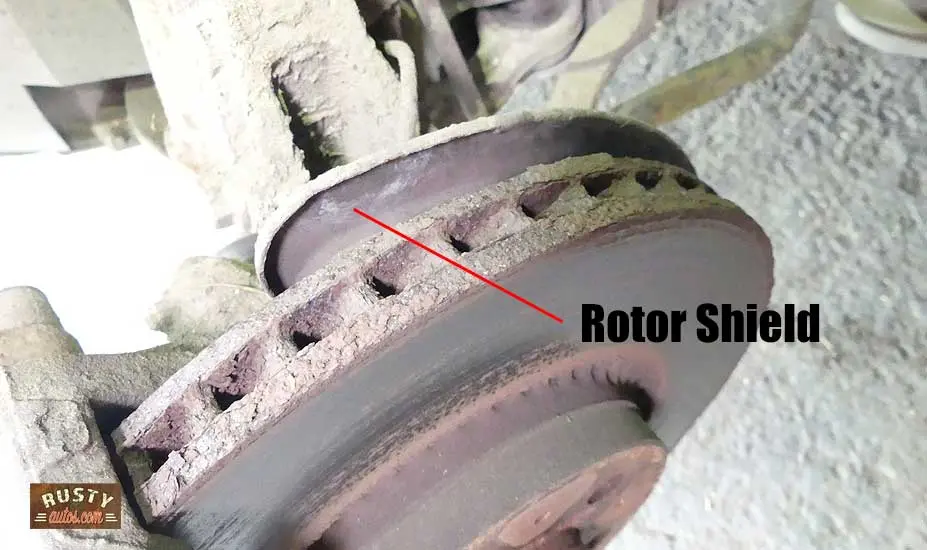
Trapped debris in the brakes doesn’t happen a ton on sealed roads, but on loose surfaces or where roads are under construction, you’ll find small pebbles and rocks that can easily become trapped between the rotor and the rotor shield.
The shield is a tin metal cover that protects the rotor (as viewed from under the car) from such stone-throwing events. Problem is, the shield can actually be the cause too, stones that do make it past the shield become wedged between the shield and rotating rotor.
And the other somewhat common rotor shield issue is a shield becoming bent out of shape and making contact with the spinning rotor. The rotor shield is a lightweight material and an undercarriage strike from road kill or whatever would easily deform it.
How to diagnose trapped debris in brake rotor

A common symptom of trapped debris between the rotor and rotor shield is the grinding noise. However, unlike worn brake pads, trapped debris will make noise all the time. Meaning the tone of grinding noise isn’t affected by brake application, it’s a constant grind, but the tone does change with vehicle speed.
To diagnose them successfully, a helper would be great. Have the helper walk each side of the car as you move it forward and have them narrow down which wheel is causing the grind.
After identifying the grinding wheel, run a visual, likely your vehicle has spoked alloy wheels, which as you know is great for inspections.
Check and see if you can identify any areas where the rotor shield is damaged. If you identify a front-wheel grind, lock the steering wheel outwards to improve visibility. Check the shield for a witness mark, which may signify a strike.
Take a look from under the car, no need to jack it, you’ll see plenty. If you see nothing unusual, we’ll need to remove the wheel and inspect for possible trapped debris.
How to fix trapped debris in brake rotor

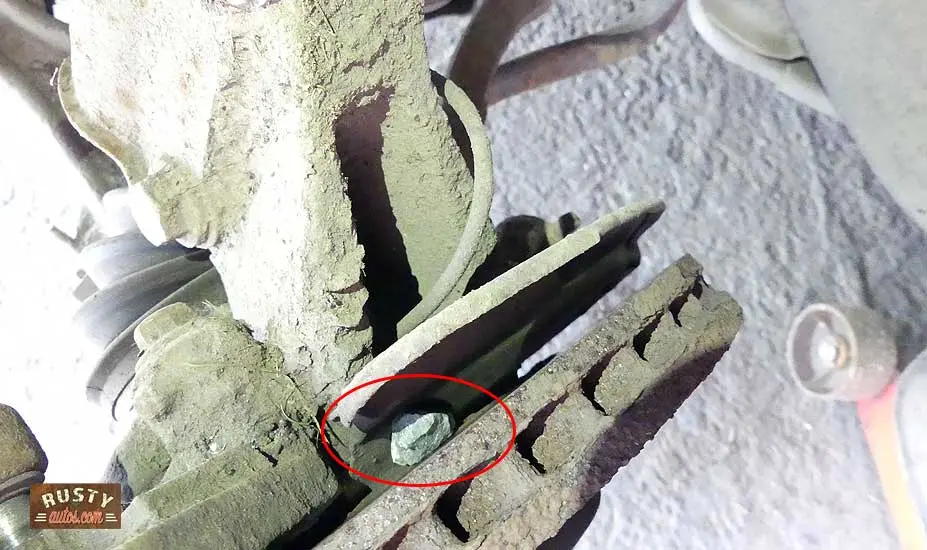
If you found your rotor shield damaged, reshaping it is easy and can possibly be repaired without removing the wheel. It may be bent back into shape and away, crucially from the rotor with just a long screwdriver worked from the wheel face side.
If however, you suspect trapped stone between the rotor and shield, we’ll need to work a little harder. The wheel will need to be removed.
The process is as follows:
- Park on level ground with parking brake on
- Loosen lug nuts
- Jack vehicle
- Fit axle stand
- Remove wheel
- Place the vehicle transmission in Neutral (N) and spin the hub by hand to check for noise
- Using a light and a long screwdriver free the debris (stone) trapped between the rotor and shield (may need to bend the shield)
Refit the wheel and torque to specification. Cars around 75 lb. ft. (100 Nm) – SUV and trucks approx. 100 lb. ft. (135 Nm).
You may find the brake resources page useful, it’s a fluff-free guide to DIY brake repairs.
Good job!
You may find these post helpful:
- About the Author
- Latest Posts


John Cunningham is an Automotive Technician and writer on Rustyautos.com. He’s been a mechanic for over twenty-five years and has worked for GM, Volvo, Volkswagen, Land Rover, and Jaguar dealerships.
John uses his know-how and experience to write articles that help fellow gearheads with all aspects of vehicle ownership, including maintenance, repair, and troubleshooting.