


I’ve been using this technique for years and when I say you’ll be amazed at the results, I’m not kidding. Your neighbors will think you got a new car, seriously!
So, how do you restore faded red car paint? Restoring faded red car paint is a simple 6 step process.
- Power wash bodywork using detergent
- Mask off black rubber trim
- Apply cutting paste
- Buff with orbital power tool
- Clean off paste
- Wax body with colour wax
While it is possible to tackle this job by hand, I wouldn’t advise it. Rubbing a whole car by hand is a real workout, more importantly, the results won’t be as good as they could be.
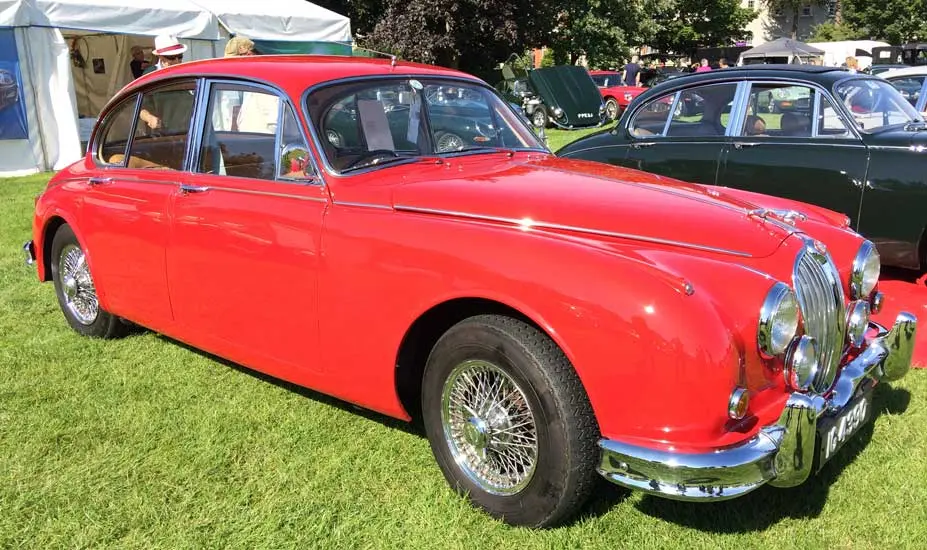
Red is the color most likely to fade and without getting into the weeds on this, it’s because red absorbs more sunlight energy than another color. That results in pigment damage, that our eye sees as faded red.
Tools And Supplies Needed To Repair Red Faded Car Paint


These tools and supplies are crucial to the job. I have listed all the products you’ll need to complete the task on my recommended gear page.
- Car detergent
- Power washer
- Masking tape
- Clay bar
- 1200 grade sanding block
- Compound
- Cutting paste
- Orbital buffer
- 3M Buffer heads
- Soft cloths
- Red touch up kit
- Polish
- Red dye wax
- Faded red car paint
Wash And Dry The Car Using Detergent And Chamois


The car must be clean and free from grit. Power washing the car is best and use a good quality detergent with a soft bristle brush and wash glove.
Using household detergent is bad for car paint, it’s too harsh, strips away protective layers the waxing builds up. Drive the car a few miles to help dry it off if the roads are clean and dry, or use a chamois or squeegee.
I like to rub the paintwork with a clay bar to remove any grit from the surface before polishing. We’ve got a choice to make at this stage, and I know choices can cause confusion.
Paint type

First off, it’s worth noting, all car paints aren’t the same. Modern car paints are thinner and water-based, which means they’re softer and don’t respond as well to block flattening. (more on block flattening later)
If your car was built after 2000, it probably has a water-based paint coating.
At this point you have a couple of options and your choice will be based on (A) How old your car is (B) How badly your paint is faded, and (C), How much work you wish to put in.
Option One: This is the most amount of work, but produces the very best results that will last the longest. You would choose this option if your paintwork is very badly faded and your car is older than the year 2000.
Option Two: This is much less work, it still produces great results and is perfect for light to medium sun damage, it can be used on all-year cars, no matter what paint type.
Option One
This is a five-step process and is the right choice for you if you’re very particular or your car is badly sun-damaged and is older than the year 2000. In this repair, we’ll – Block Flatten, Compound, Paste, Polish & Wax.
Step 1 :


Mask off black trim parts, like door strips and door mirrors. This isn’t a crucial step, but you’ll find the red paint runoff will be difficult to remove from textured plastic trim.
So it’s a case of a little work now or a little more work later. We only work on one panel at a time, we’re not masking the whole car at once here. Prepare a bucket of soapy water and your 1200 grade sanding block. The grade of grit is critical here, using a heavier grit sanding block will damage the paintwork.
This process involves rubbing each panel at a time to remove the layers of oxidized paint. We use a sanding block as this prevents the fingers from causing rub marks in the paint. This is a labor-intensive process and shouldn’t be rushed. Use fresh sandpaper in your sanding block on every panel.
Start in an inconspicuous place, such as below the waist line of a bumper corner, just until you get a feel for the work. Rub the paintwork in a systematic way, use the soapy water as a lubricant, and clean the sanding block from time to time.
You’ll know when to move to a fresh area as the layers of dead red paint will start runoff. When you have a small test section complete, wash it off with water and move to step two.
Step 2 :


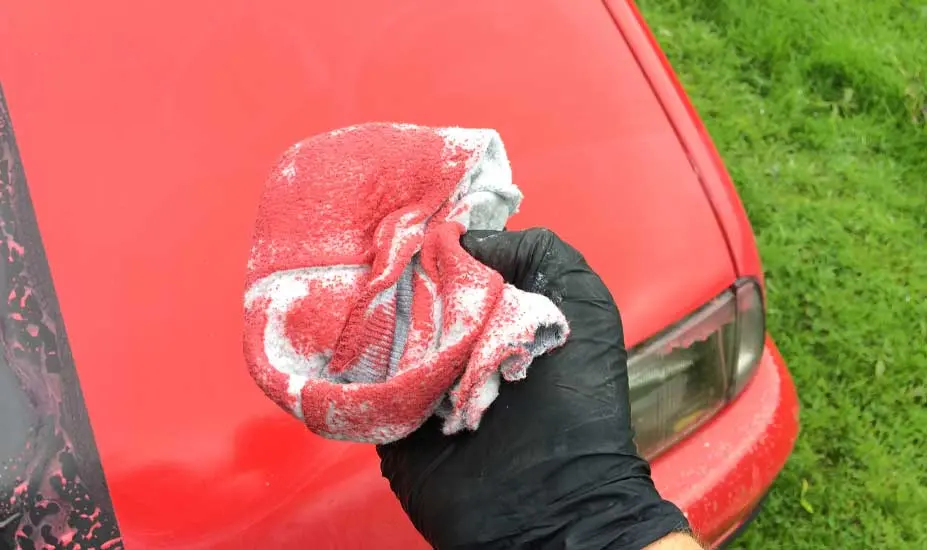
Apply to rubbing compound in an up and down motion to the block flattened area using a clean wet cloth. The compound is a coarse paste that helps remove old paint and revitalize the paint layer beneath. Now prepare a spray bottle filled with water, we’ll use this as a lubricant with the buffer.
Now it’s time to break out the orbital buffer. The buffer is special, it’s designed to move in an elliptical path, it minimizes paint stress. Over the years I’ve used lots of different buffing pads, I like 3M the best, they’re top quality and it shows in the finish.
It is possible to damage rubber trim and edges of panels, but only if you run the buffer without water or you stay in one location too long.


You can minimize this risk by taping off trim areas and using caution on external angles of bodywork. I can tell you from experience if you keep the panel wet you, won’t have a problem.
Pro tips, Keep the buffer off the ground, prevents grit from getting on the pad. When you’re buffing, keep the power cord over your shoulder, it prevents the cord from marking the paintwork.
Pass over the panel three to four times with the wet buffer and pad in a systematic manner. Be sure to cover the whole panel, now clean off the residue with a clean soft cloth. Although we’ve only worked on a small section to get a feel for the process, aim to complete a panel at a time.
Step 3, 4 & 5 :
These steps are identical to option 2. (see below)
Option Two


This is the right choice for your car if it has light to medium sun damage or you simply have less time to spend on this chore, or your car is younger than the year 2000. This refinishing procedure can be used on all paint types. In this repair, we’ll – White Paste, Polish & Wax.
If you’ve read option one above, this procedure will be familiar. This is a three-step process. If you’re buffing for the first time, pick a small test section, just to get a feel for the equipment.
Step 1 :

Apply masking tape to plastic and rubber trim. We’ll use a fine white cutting paste to remove layers of dead paint and renew the paint beneath. The white paste is simply a lighter grade cutting paste than that used in option one.
Apply the cutting paste to the panel and rub in an up and down fashion. Apply water to the panel using a spray bottle. Meguiar’s cutting paste is professional-grade and one of the best products out there, you can check it out here on Amazon.
Using the orbital buffer, you can use the same pad as that used with the compound paste. Make three to four passes over the panel, making sure the pad doesn’t run dry. Buff off the excess with a soft cloth. The results will now be evident, while the paintwork isn’t shining yet, it is a lot brighter.
Step 2 :


In this step we’ll polish the car, polish isn’t the same as waxing, although the process and finish look similar, polish won’t protect the paint like wax.
Polish is actually a very, very fine grit that removes fine scratches from the paintwork. Best results are achieved with the buffer and separate buffer head. I use a lambswool pad. I apply the polish to the wool pad directly and pass over each panel twice.
Buff off any residual with a soft clean cloth, the paintwork now has that wet mirror look. But we’re not finished yet.
Step 3 :

This is the final stage, it’s the most important and the most satisfying. Waxing and buffing the panels to a mirror finish is addictive, you’ll see!
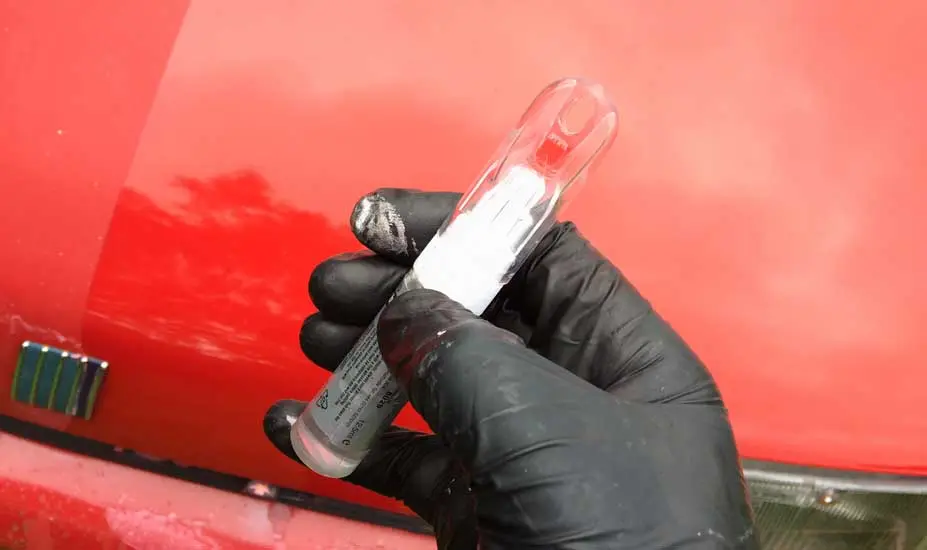
Touch up before waxing
But just before we splash on the wax, we have an opportunity to use a touch-up paint pen on those large stone chips and broken paint scratches. Touch-up paint needs to be applied before waxing, the wax fills up the stone chip marks, and paint won’t stick to the wax.
So go ahead now and use the touch-up stick, obviously, it will need to be matched to the shade of your car of red. You’ll need two coats about 15 minutes apart and an hour to dry before the wax can be applied. I wrote an article about repairing scratches, which includes paint touch-up, you can check it out here – “Remove scratches from car bumper”.
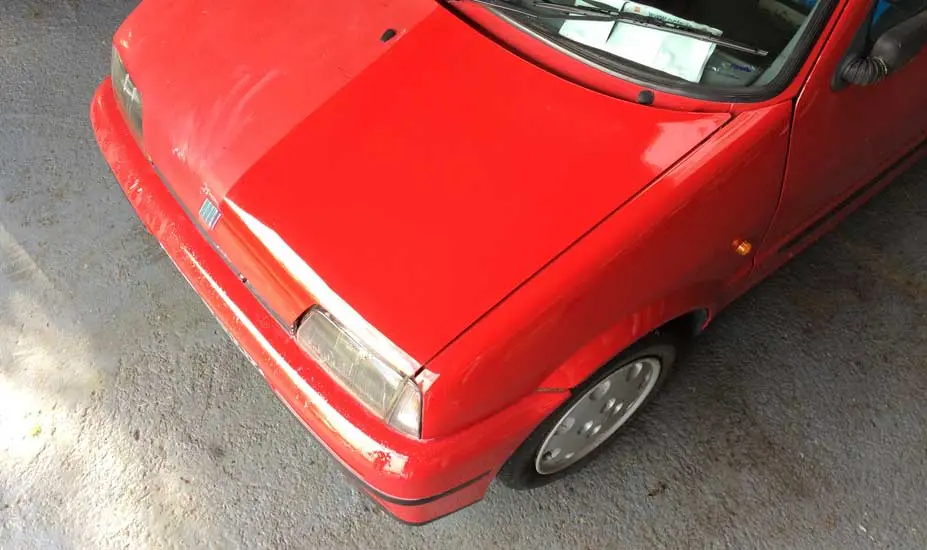
If your paintwork is good and free from scratches, then go ahead and use a good quality wax, a Carnauba-based wax is the best wax money can buy. It’s harvested in Brazil from the leaves of the palm tree. It has a natural ability to repel heat and moisture. It’s a hard wax and so can be difficult work.
Wax comes in a few popular forms, paste, liquid, and sprays, but as a rough rule of the thumb, the harder the wax the better it is. There are many top-quality wax’s on the market, the better ones will have a blend of Carnauba wax. The P21S is one of the very best, but it is expensive and you can check it out here on Amazon.


But, if your paintwork has fine scratches, too fine for touch-up, then you’ll need dye wax. This is special wax, it has a red dye mixed throughout, it’s ingenious stuff. The red dye fills in all the fine cracks in the paintwork, perfect for older paintwork.
It comes in liquid form because it needs to flow into all those cracks, shake the bottle well before applying.
I like to start with fresh cloths, damp cloth for applying, and fresh soft for removing. Keeping the final microfiber cloth for a final rub down. This wax works best when hand finished.
Now stand back and admire ……… you did that!

Related Questions
Does red car paint still fade? Yes, even modern red car paint fades, but you can minimize damage by:
- Garaging
- Parking in the shade
- Wash & wax regularly
- Cover with protective wrap
You may find the following posts helpful:
Are Weathertech mats worth it?
- About the Author
- Latest Posts


John Cunningham is an Automotive Technician and writer on Rustyautos.com. He’s been a mechanic for over twenty-five years and has worked for GM, Volvo, Volkswagen, Land Rover, and Jaguar dealerships.
John uses his know-how and experience to write articles that help fellow gearheads with all aspects of vehicle ownership, including maintenance, repair, and troubleshooting.