
Cold air at idle is uncomfortable and frustrating, especially on winter mornings. Winter commuting under these conditions is a miserable experience. But not to worry, the solution is at hand and for most, it’s a simple fix.
Top two causes of a car heater that only works when driving includes:
- Low coolant level
- Air-locked coolant system
In this post, you’ll learn the top two causes of no heat at idle; you’ll learn how to diagnose them and how to fix them. Soon you can dispense with the second pair of gloves on the winter commute.


1 Low Coolant Level

A car’s engine produces a lot of heat and without a functioning coolant system to remove the excess heat, the engine would seize. A functioning coolant system is super important, and having no heat at idle is a sign all is not well.
The root cause of many heater issues is simply insufficient coolant. In many cases, the simple answer is the solution. Most cars will display a warning message on the dashboard if the coolant is low. However, it is still possible for the coolant to be low with no warning message.
Check the coolant level
Checking the coolant level is easy, but you’ll need to be mindful of the most important rule. Don’t remove the coolant cap when the engine is hot.
Removing the cap while the engine is hot risks injury. Coolant is hot and pressurized; opening while hot will cause the coolant to spray from the radiator or reservoir.
So with a cold engine, go ahead and open the hood. First, you must locate the coolant filler cap. Two types are common.
Older vehicles


Older vehicles locate the coolant cap right on top of the radiator, which is easy to see as it’s at the front of the engine bay. The winged cap is easily identified by its bright metal appearance. (Rusty, in my case) The cap needs to be removed in order to check the radiator coolant level.
To remove this style cap, push down and twist anticlockwise, but only if the engine is cold. The coolant level should be full to the very top; in addition, the radiator may employ a plastic expansion tank.
The tank is a store of coolant, the level of which fluctuates as coolant temperature changes. The tank must not run dry; doing so causes the coolant system to an airlock.
The tank is usually opaque plastic which makes checking the coolant level easy. The tank sports a full coolant mark and a low-level mark. (See topping up coolant below)
If your coolant level is okay, go ahead and check for air locking; see below.
More modern cars

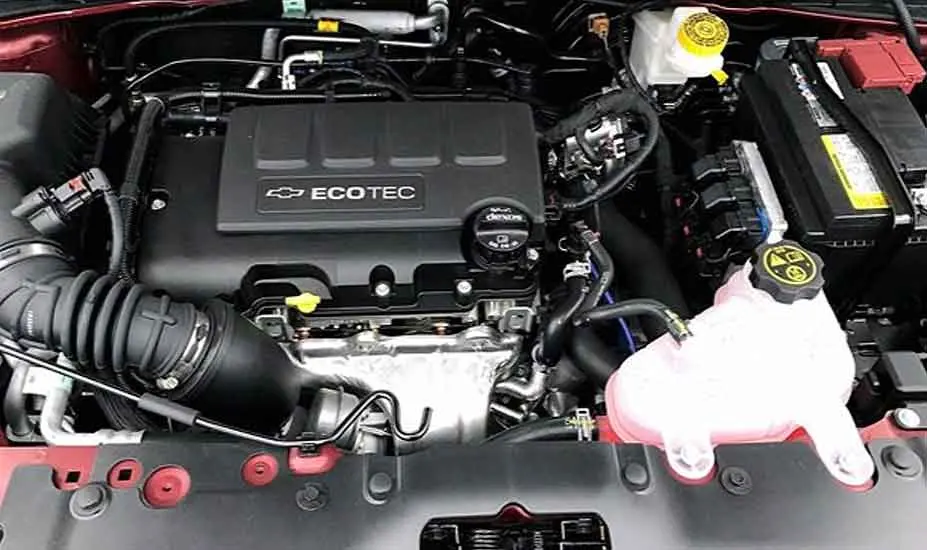
Employ a pressurized plastic coolant reservoir, also known as a coolant tank or bottle. It’s located on one or the other side of the engine bay. The coolant reservoir, which is usually opaque, allows for easy checking without removing the cap.
Note: Older-style coolant systems may employ a coolant expansion tank; this is a different system. While the tank is plastic and technically a reservoir, it’s not pressurized. You can identify this type of system by the presents of a traditional-style rad cap on the radiator.
Identify the coolant cap

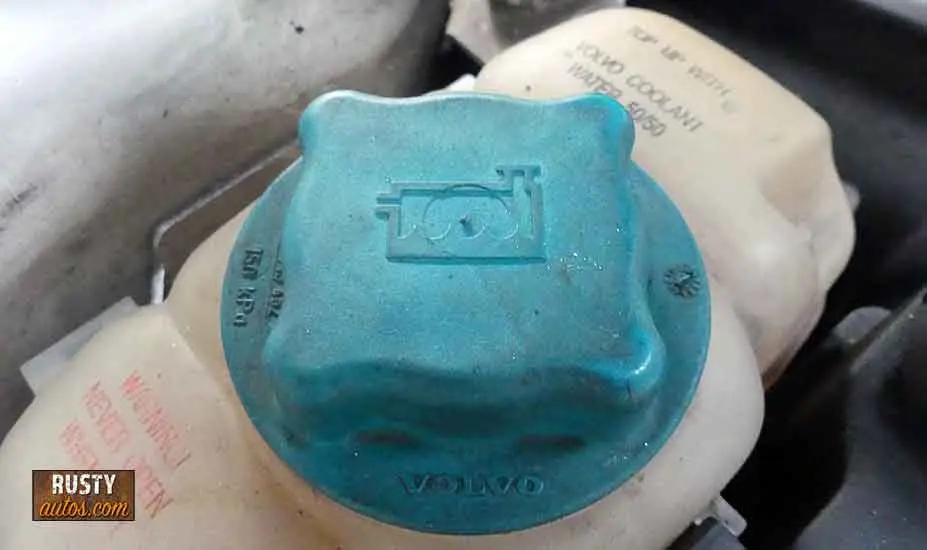
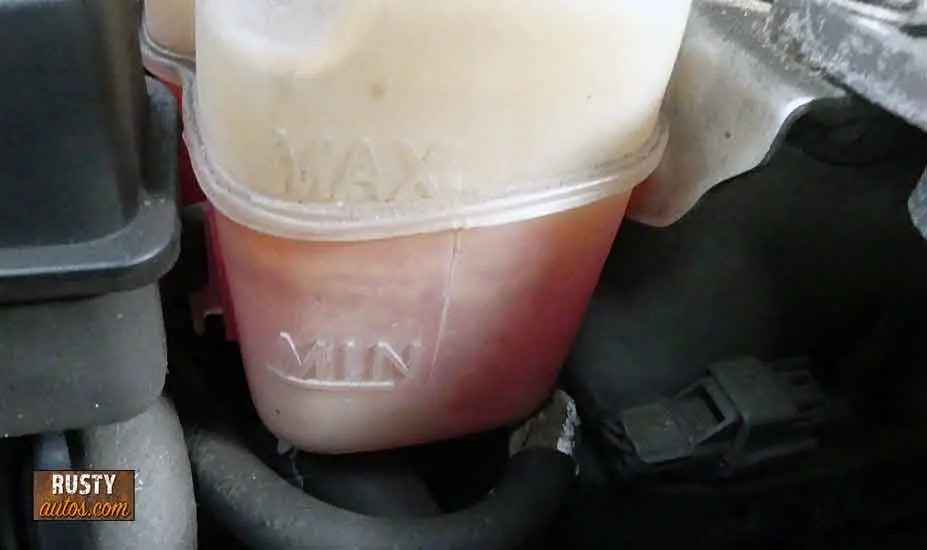
The coolant reservoir cap is usually plastic and carries a symbol or wording to identify itself. As said, this type of cap doesn’t need to be removed in order to check the coolant level. Most reservoir bottles are clear plastic, and the reservoir bottle carries a full-level mark and a low-level mark.
These marks are designed to be read when the coolant is cold; reading them when the engine is hot will be inaccurate.
Reading the levels is as simple as you can imagine – engine cold, identify the fluid level in relation to the bottle’s high and low marks.
A fluid level between the high and the low is okay, but the full is obviously the target. If your coolant level is okay, go ahead and check for air locking. See below.
If you need to add some fluid, remove the cap by twisting it anti-clockwise. See below.
How to add coolant to radiator


Never remove the rad cap from a hot engine or add coolant or water to a hot engine.
When adding coolant to a radiator, first fill the expansion tank to the full mark. (if expansion tank fitted) Then fill the rad to the very top while squeezing the radiator hoses gently to remove air pockets, and top-up again. Repeat until the radiator remains full. That’s it replace the cap.
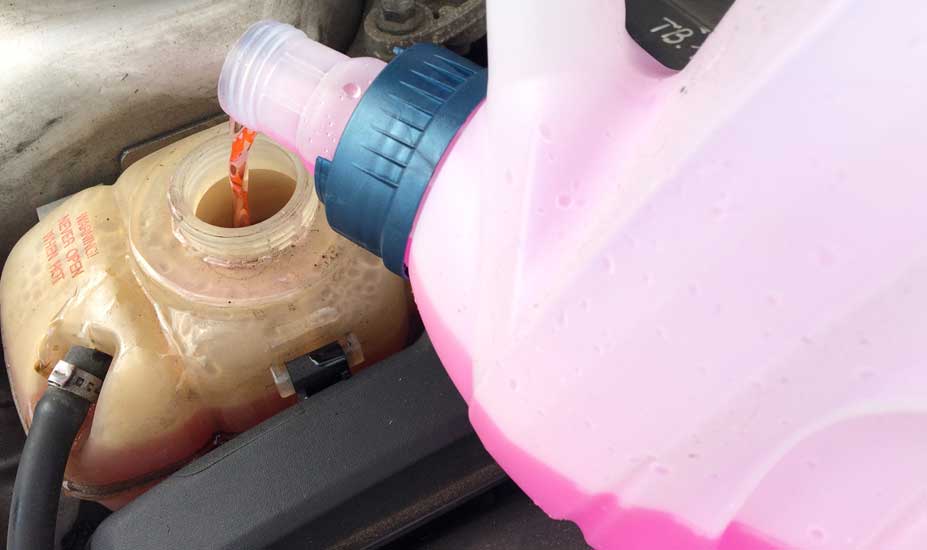
How to add coolant to a reservoir
Never remove rad cap from a hot engine or add coolant or water to a hot engine.
When adding coolant to a reservoir, fill the coolant level to the full mark on the bottle. Squeeze the top and bottom radiator hoses, check the level, and top up if needed. Repeat as necessary. When the level rests at the full mark, replace the cap and make sure it’s tight. Reservoir caps are sometimes difficult to remove and fit.
Coolant types
Coolant comes in many different flavors and colors; judging a coolant by color isn’t dependable as local and foreign manufacturers use similar colors. Most vehicles use Ethylene Glycol (EG). Coolant comes as premixed (50% coolant and 50% distilled water) or as a concentrate.
Typically mixing EG 50% coolant and 50% water will protect your engine down to about -34 F. It’s possible to mix concentrate EG to a max of 70% coolant and 30% water for extreme Brrrr conditions.
Other less common coolant types are available – Propylene Glycol (PG) and European G spec coolants common in VW, Audi, Mercedes, Porsche, and BMW.
Every car manufacturer has its own recommendation for the coolant type and that should be followed.
I’m a mechanic for twenty-plus years; in relation to coolant, I’m asked the following questions a ton. So here’s the answer.
What type of coolant should I use?


Follow your car’s recommendations. Often it says right on the radiator/reservoir cap. Alternatively, check with the auto parts store or check the handbook. Most vehicles use Ethylene Glycol and are okay to use a universal coolant.
Is it okay to mix coolant?
Ideally, no, but if you’re in a pinch, then yes, it’s okay. But both coolants must be the same family, for example, both Ethylene Glycol.
Is it okay to top up with water?
Yes, you can top up with water; distilled is best. However, be mindful that constant top-ups using just water reduces the coolant’s protective qualities.
Are coolant and antifreeze different?
No, the words coolant and antifreeze in relation to a coolant system mean the same thing. Your coolant or antifreeze, whichever you prefer, contains chemical properties to help protect the engine from overheating and freezing but also contains chemicals to prevent engine corrosion and also includes a lubricant to protect seals and gaskets.

Air Locked Coolant System
An air-locked coolant system is a common problem and will, without a doubt, cause heating issues. Air locking is, as its name suggests, pockets of trapped air inside the maze of coolant pipework. The pockets of trapped air prevent the movement of fluid when the engine’s RPMs are low, and that’s why you have no heat at idle.
The main symptom of trapped coolant system air is no heat at idle.
Other symptoms include:
- High coolant temperature gauge
- Overheating
- Sound of water rushing around pipes inside the vehicle
- Steam from the under the hood
If you notice these types of symptoms, it’s very likely the coolant system is dogged by trapped air.
What causes air locking?
A car’s coolant system is a closed, sealed, and pressurized system. A sealed pressurized system is important because coolant that’s pressurized has a higher boiling point. The boiling point is basically the point upon which your car’s coolant turns to steam; steam is bad as it doesn’t cool the engine.
A higher boiling point means your engine can cope in really hot conditions like towing or a traffic jam on a super hot day with the a/c turned on full.
It’s helpful to know how a coolant system becomes air-locked. The most common cause is allowing the coolant level to get too low. Some healthy engines need more regular coolant top-ups than others.
Allowing the coolant to get too low causes air to enter the system, and for most, just topping up the coolant causes the air to leave the system, but for some, it needs some help.
Here’s a list of some of the more common root causes of air locking. Many of these will allow air to enter the system and will continue to cause air locking until they are repaired.
A coolant system test kit is used to test the radiator, system, and rad cap for leaks. You can check out the test kit I use on the Coolant system tools page.
- Faulty coolant cap
- Faulty coolant hoses
- Faulty hose clamps
- Gaskets
- Faulty heater core

Bleeding the coolant system
Bleeding the system will differ just slightly depending on which system you have, an older style radiator or the reservoir tank type.
To bleed the radiator type
Begin by parking the vehicle on a steep incline, facing uphill. This often helps the trapped air make its way to the radiator, which is positioned at the front of the vehicle.
We want the radiator to be the highest point of the coolant system. This isn’t a crucial step, but it does speed up the bleeding process.
Your vehicle will likely have a coolant expansion tank located by the side of the radiator or on either side of the engine. Make sure the tank is at least at the low level.
Tools and supplies you’ll need, a spill-free funnel or regular funnel with tape, coolant, and water. All these tools are listed on the Coolant system tools page.
The process is as follows:
- Fill the coolant expansion bottle to low mark
- Turn heater to full heat (both sides if dual)
- Turn heater blower to full
- Open rad cap
- Fit spill free funnel (or adapt regular funnel with tape)
- Open coolant system bleed screw (if fitted)
- Fill rad with coolant until coolant flows consistently from bleed screw
- Close bleed screw
- Top up funnel, but just ¼ way
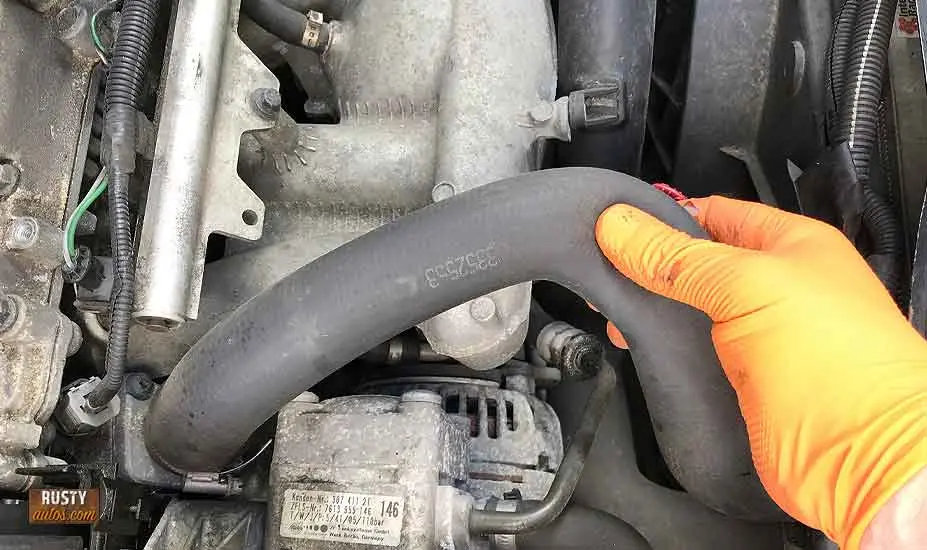
- Squeeze hoses and top up funnel again
- Start engine with funnel in place
- Lift the rpm to 2500
- Occasionally squeeze top and bottom hoses
- Keep funnel at ¼ full
- When both top and bottom hoses are hot, thermostat has opened
- At this point the temperature gauge reads normal, cabin heat should be present and hot
- Remove the funnel and refit cap
- Continue to monitor until radiator fan comes on
- Allow engine cool and top up expansion tank to the full mark
Bleed a reservoir type
Bleeding a reservoir-type system is very similar but easier.
The process is as follows:
- Turn heater to full heat (both sides if dual)
- Turn heater blower to full
- Open reservoir cap
- Open coolant system bleed screw (if fitted)
- Fill reservoir with coolant until coolant flows consistently from bleed screw
- Close bleed screw
- Top up coolant reservoir just above the full mark
- Squeeze hoses and top up again, repeat as necessary
- Refit the reservoir cap
- Lift the rpm to 2000 for about 5 minutes
- Occasionally squeeze top and bottom hoses
- Monitor reservoir coolant level
- When both top and bottom hoses are hot, thermostat has opened
- At this point the temperature gauge reads normal, cabin heat should be present and hot
- Continue to monitor until radiator fan comes on
- Shut the vehicle off and allow it to cool overnight if possible.
- Final and important step, check coolant level when cool and top up to full level, job done.
Check out the mechanics tools page for a list of my favorite tools.
- About the Author
- Latest Posts


John Cunningham is an Automotive Technician and writer on Rustyautos.com. He’s been a mechanic for over twenty-five years and has worked for GM, Volvo, Volkswagen, Land Rover, and Jaguar dealerships.
John uses his know-how and experience to write articles that help fellow gearheads with all aspects of vehicle ownership, including maintenance, repair, and troubleshooting.