
Repeatedly jumping a car just isn’t a fun way to start your day. But on the upside, it sounds like you’ve pinned your flat battery down to a faulty alternator, and now it’s swap-out time. Well, you are in the right place, I’m a mechanic, and very shortly, you’ll get a flavor of exactly what it’s like to swap out an alternator.
Swapping out an alternator for most vehicles is straightforward, and no special tools are needed. However, some higher-end luxury cars, sports cars, and large diesel pick-ups may be too challenging for the home mechanic.
In this post, we’ll cover changing an alternator on a regular family sedan (both front-wheel-drive and rear-wheel-drive). We’ll cover the steps and the areas where you’ll need to take special care. We’ll also cover why changing out an alternator on larger-engined vehicles can be too challenging for the home mechanic.
Index
- Tools you’ll need
- Locating your alternator
- Swap out procedure
- Belt types
- Challenges with Luxury Sedans, Sports Cars & Diesel Pick-Ups
- Sum-up
Tools You’ll Need
The tools you’ll need will largely be dictated by how difficult it is to access the alternator itself. We’ll cover locating your alternator later. Broadly you’ll need the following tools:
- Ratchet and socket set
- Impact gun
- Selection of wrenches
- Long handled pry bar
- Work gloves
- Jack and axle stands
You may not need all these tools, but having access to them will mean you have all the possibilities covered.
Locating Your Alternator

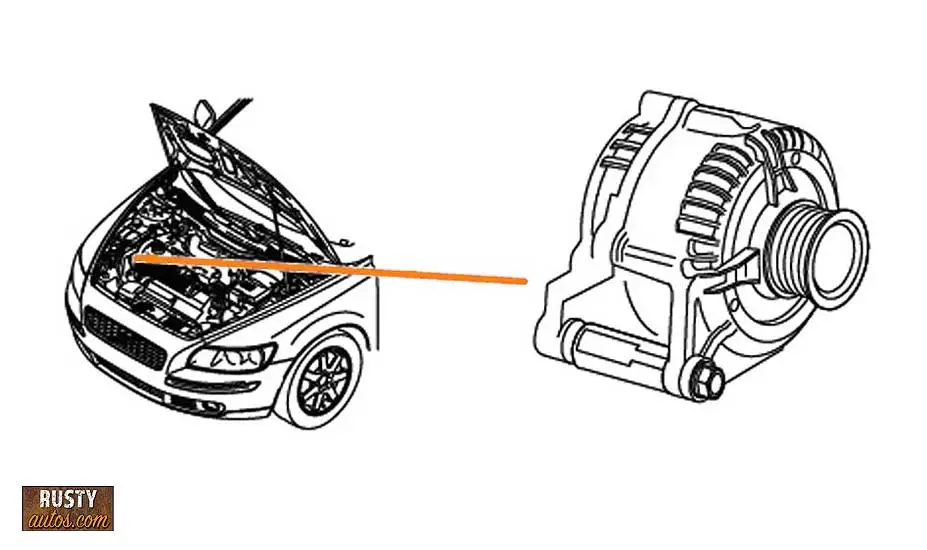
To identify just how much of a challenge swapping out your alternator is makes sense to go ahead and locate it inside your engine bay early in the game.
Engine layouts and size typically dictate how challenging it may be.
Two engine layouts are typical – transverse or longitudinal, and we’ll cover them briefly below.
Transverse Engine Layout

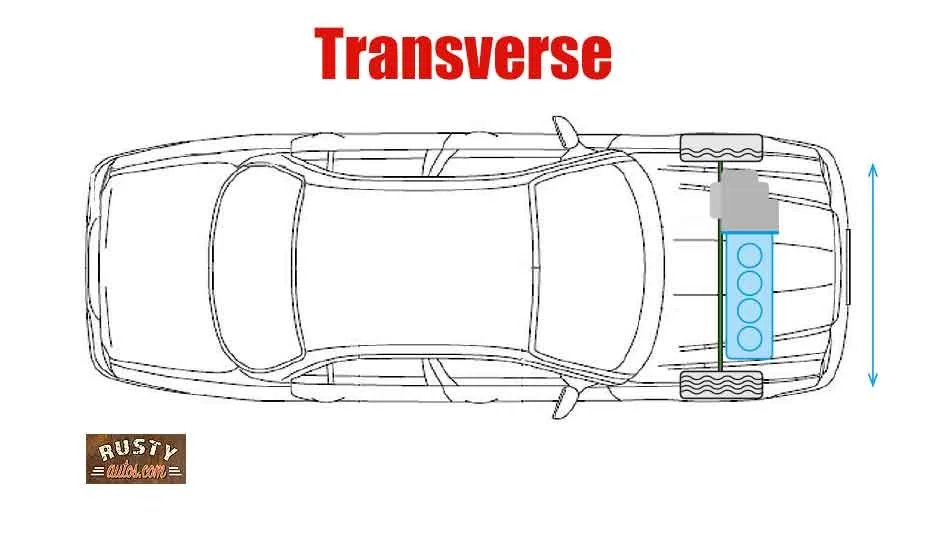
The transverse layout means the engine and transmission are aligned across the chassis width.
The transverse layout is most common in compact cars and regular family cars. If your vehicle is FWD (Front Wheel Drive), your vehicle is almost certainly a transverse layout.

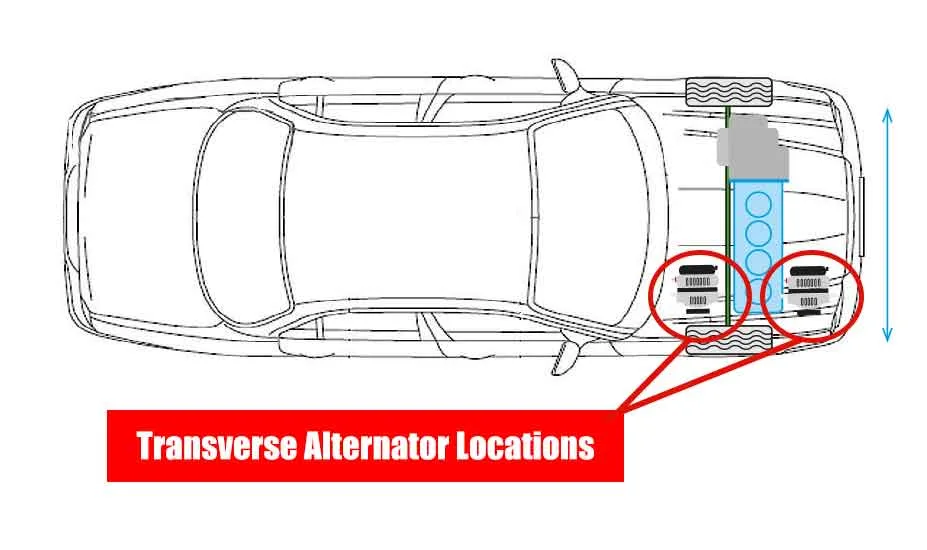
And as such, your alternator will be located at the front of the engine on the right-hand side or the rear of the engine on the right-hand side.
Replacing an alternator towards the front of the engine is always a ton easier, but we’ll cover replacing the alternator when fitted in both in this post.
Longitudinal Engine Layout

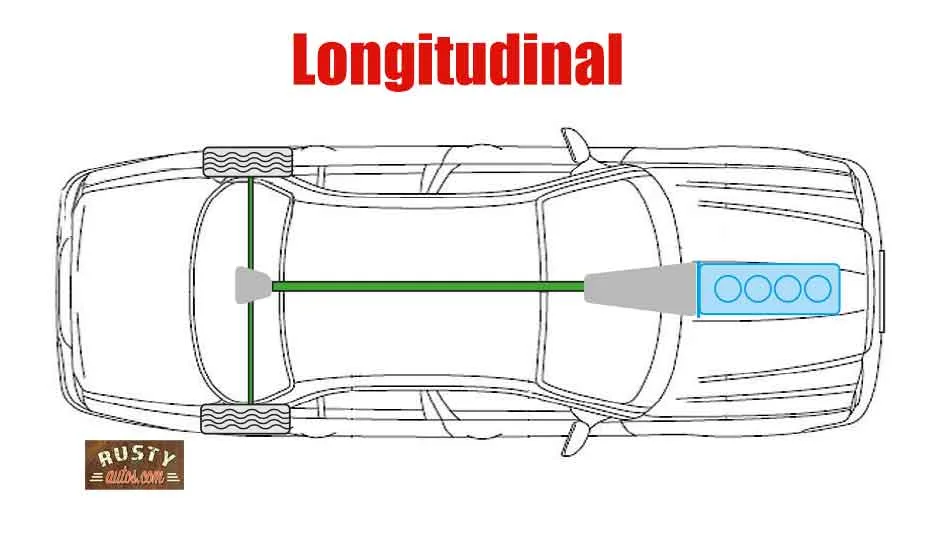
The longitudinal layout means the engine and transmission are aligned with the length of the vehicle.
The longitudinal layout is most common in RWD (Rear Wheel Drive) and 4WD vehicles.


They tend to be easier to work on, as the alternator is located at the front of the engine, either towards the top or the bottom.
Alternator Swap-out Procedure
You already know the swap-out procedure differs slightly depending on how your engine sits in the engine bay. But before we get to the swapping out procedure, we’ll need to cover a couple of procedures that will apply no matter where your alternator is located.
We’ll need to cover belts and batteries.
Belt types
Belts are, as you know, critical to proper alternator function. I’d advise replacing your belt now as removing some are such a pain; it makes sense to fit a new one, especially since they rarely cost very much relative to the inconvenience of a broken belt.
Broadly there are four different types of alternator driving belts, they are:

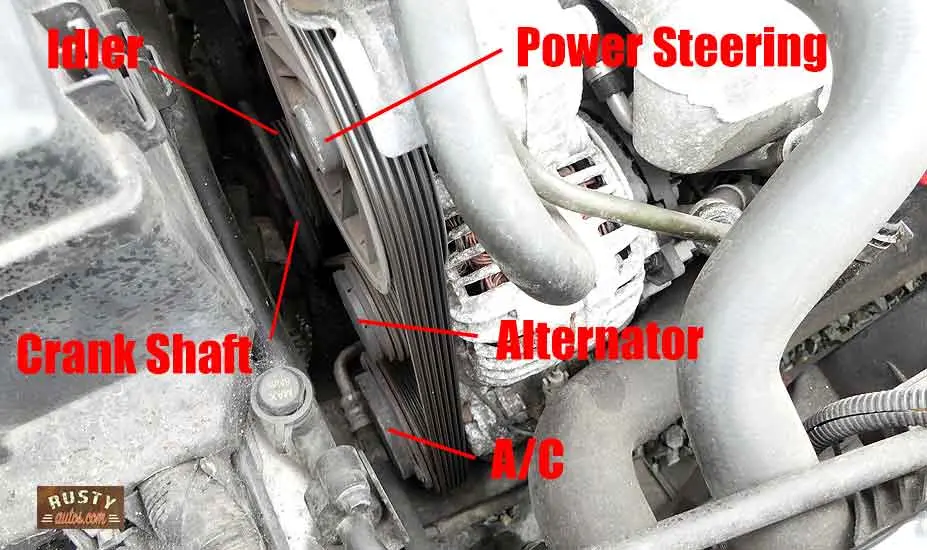
Serpentine – This is the most common belt type in modern vehicles. It is so called as it wraps itself around various pulleys in a snake-like fashion. The durable EPDM serpentine belt is a ribbed belt that offers greater durability.
Typically it drives the alternator, power steering pump, air conditioner compressor, and sometimes the water pump and fan. The belt is tensioned by a spring-loaded tensioner with an idler pulley attached. To remove and fit the belt, the tensioner must be released. Use a long-handled ratchet and socket to release the tension while removing the belt. I’ve covered replacing a serpentine belt previously, and you can check it out here.

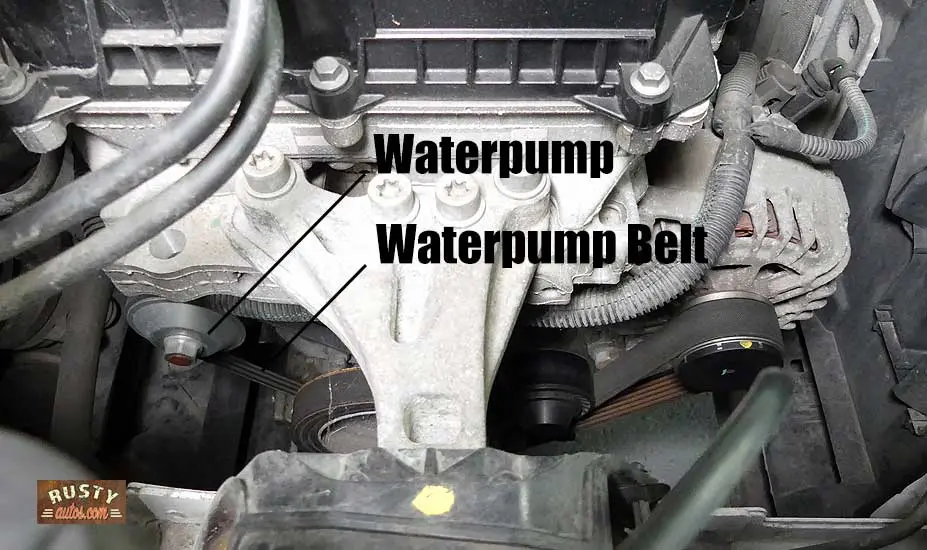
Drive belt – A typical drive belt looks similar to the ribbed serpentine belt, but it’s not as long. The drive belt drives fewer pulleys, usually just one.
A drive belt is tensioned like a serpentine belt. It uses a spring-loaded tensioner with an idler pulley, and the tension must be released while fitting the new belt.

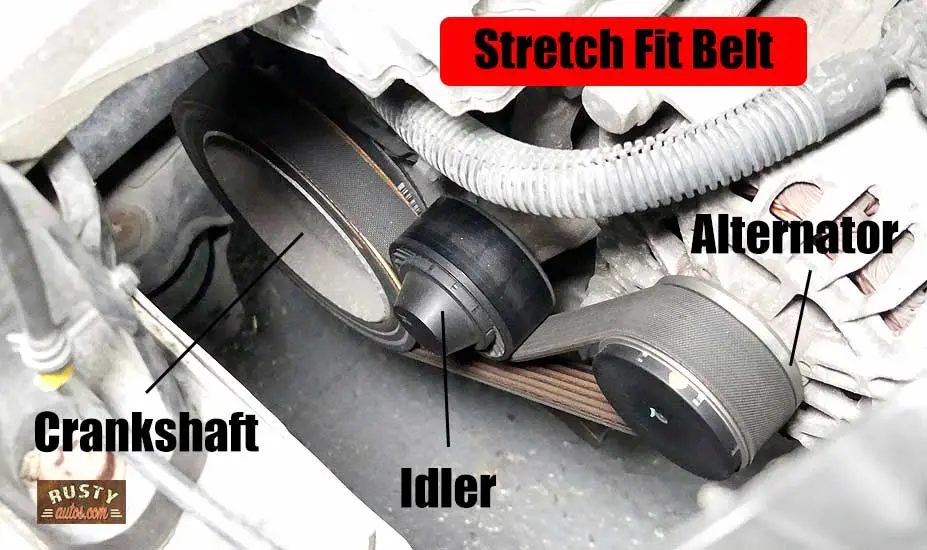
Stretch-to-fit belt – The Stretch-to-fit belt looks similar to the drive belt; they are short ribbed belts that typically drive just one pulley.
As these guys are fitted in place under tension, they don’t require a tensioner and idler pulley and are, in that sense, a unique belt tensioning setup. Stretch to fit can be a pain to fit I’ve covered it previously here.
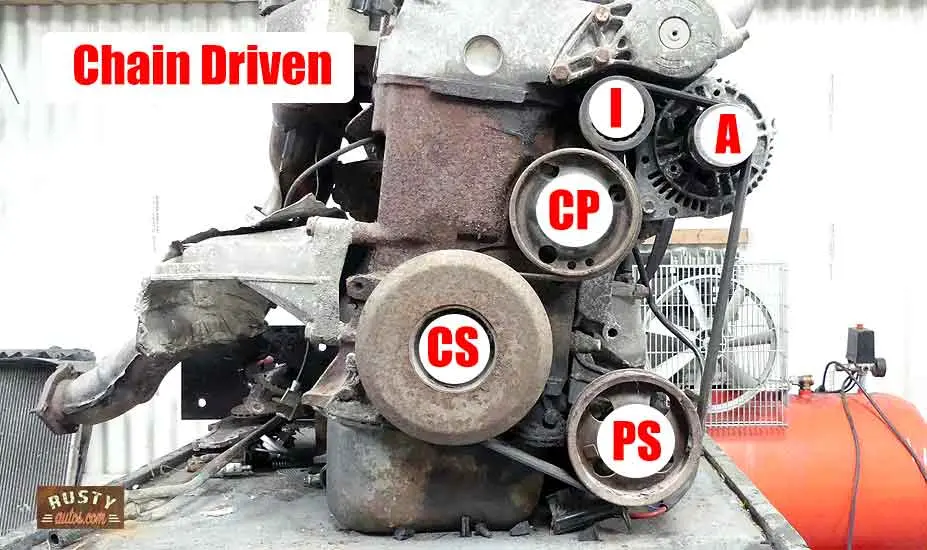
V-Belt – The V-belt is the classic old-school fan belt most of us older folks grew up with. They are still available but aren’t fitted for more modern cars anymore. The classic V-belt setup allows the alternator to pivot on its main axis, which makes belt removal and tensioning possible.

The serpentine belt – commonly drives the alternator, power steering pump, air con compressor, and in some models, the coolant pump and fan.
CS – Crankshaft; CP – Coolant pump; I – Idler & tensioner assembly; A – Alternator; PS – Power steering pump.
Now you are all caught up on the different belt types, and you are ready to tackle your belt.
Battery Disconnection
Disconnecting a car battery can come with some irritating side effects. It causes some systems to lose their learned settings. Issues include erratic idling, awkward gear shifts, warning lights on in the dashboard, and erratic HVAC controls.
That said, for most vehicles, this isn’t a big deal; driving and using the vehicle normally causes the vehicle’s computers to relearn. Some vehicles could, however, require a forced relearn procedure which means a date with a dealer.

To avoid this irritant, I’d advise using a KAM tool; it keeps the vehicle’s computers powered up while the battery is disconnected. It’s not expensive, and you’ll find one here on the Electrical tools page.
Alternator Replacement
The replacement steps, while slightly different from transverse to longitudinal, are largely the same; they differ a little from front to back on the transverse and from top located to bottom on the longitudinal engine.
Alternator located at the front of the engine on transverse or top on longitudinal
Replacement steps are as follows:
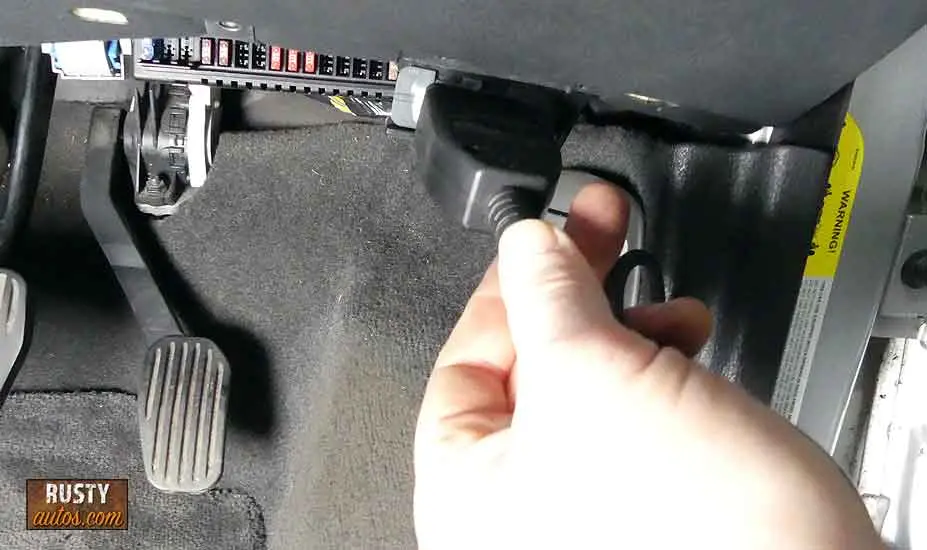
- Fit KAM tool (see KAM tool I recommend here)
- Remove battery negative terminal

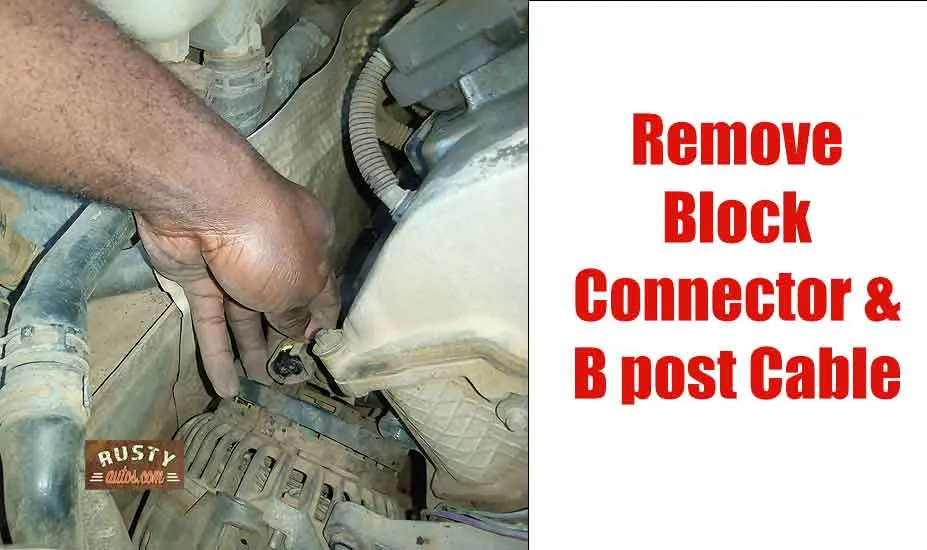
- Remove the alternator power cable (B post) and the block connector.

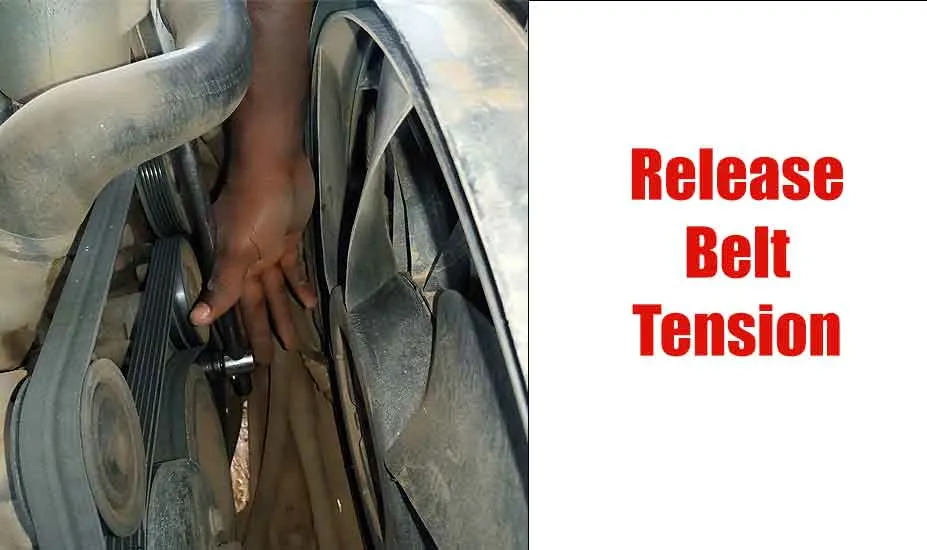
- Release drive belt tension (use a long-handled ratchet to release tension).

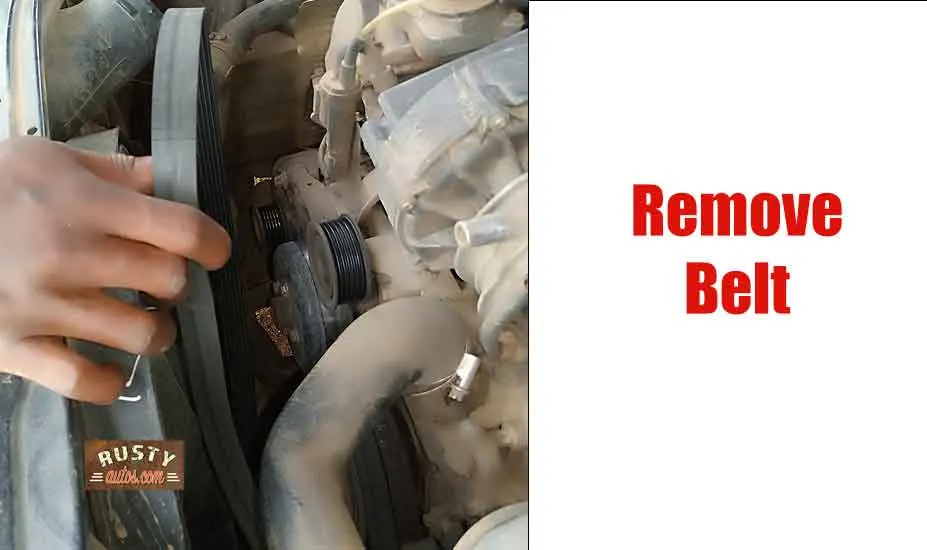
- Remove the drive belt.

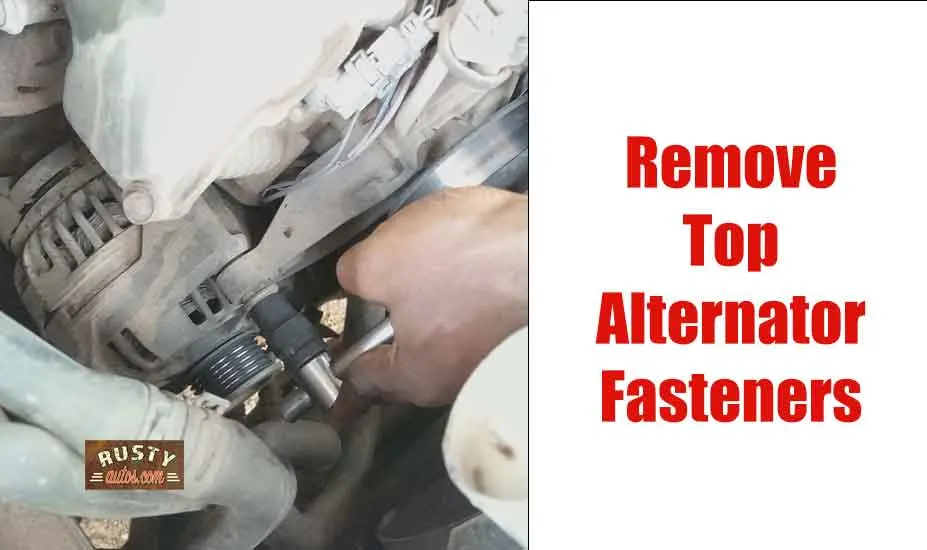
- Loosen and remove the alternator fasteners on top and bottom.

- May need to use a pry bar to loosen the alternator from the mounting brackets.
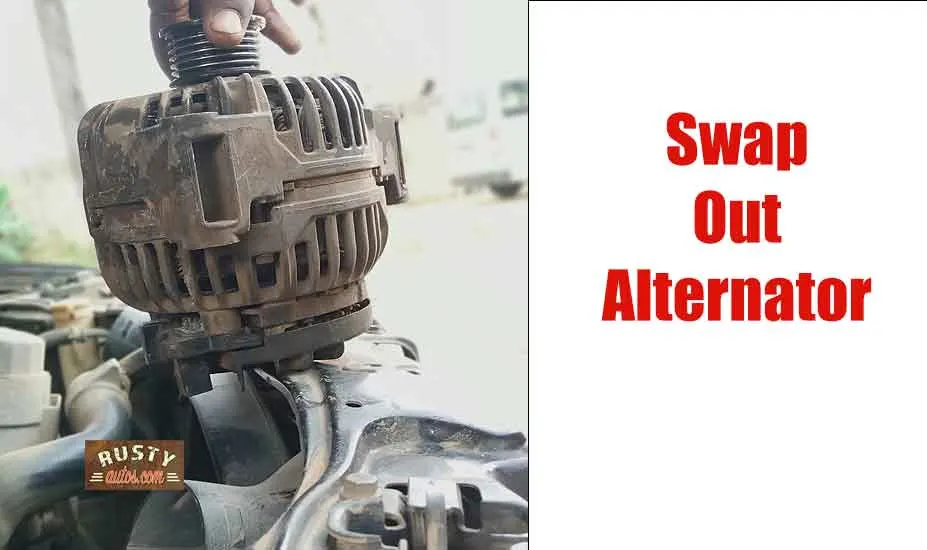
- The fitting procedure is these same steps in reverse.
Alternator located at the rear of transverse or bottom on longitudinal
The steps here are identical to the above. However, you’ll need to jack the vehicle up, support the vehicle on axle stands and remove the engine splash guard as you’ll likely be removing and fitting the alternator from underneath the vehicle.
Challenges With Luxury Sedans, Sports Cars & Diesel Pick-Ups
Luxury sedans, sports cars, and large diesel pickups have a couple of things in common. They are fun to drive but not so much fun to work on. No, sir, you’ll soon see why big-ass luxury vehicles are so dame expensive to work on.
The problem is a lack of wrench swinging real estate under the hood, which is ironic, given the size of some of these vehicles.


It’s not uncommon on high-end vehicles for even the simplest job to take unbelievable hours of labor.
Some high-end vehicles will require engine removal to fit something as simple as fitting an alternator, and an engine out is a two-day job minimum, plus parts
Consider also the complexity; many large luxury vehicles are so power hungry that the alternator is plumbed into the coolant system to help cool it down when operating at peak output. Now you’re working on the coolant system in addition to replacing the alternator, and that adds another layer of difficulty.
Opening a coolant system means the system needs to be bled to remove air pockets. This tends to be more difficult the larger the coolant system; some systems may require a special procedure to execute it successfully.
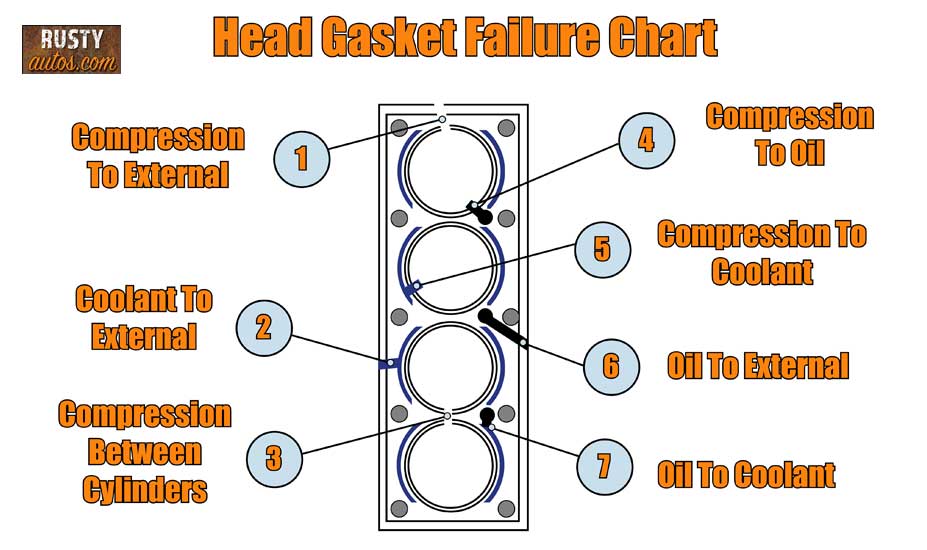

Incorrect bleeding can lead to overheating and blown head gaskets, and these types of problems are very spendy to fix. Before embarking on these types of vehicles, best to check what it entails ahead of time.
Sum Up
Replacing an alternator is not normally a difficult job; that said, when the alternator is located at the rear of a front-wheel drive vehicle (transverse engine), some extra steps are needed. Large luxury vehicles, sports cars, and large diesel trucks are typically too difficult for the home mechanic to attempt.
The two most challenging parts of fitting an alternator are accessing the alternator itself and manipulating the drive belt.
You may also like:
Are long drives good for vehicles?
How often to start a sitting car?
How long to charge a battery driving?
- About the Author
- Latest Posts


John Cunningham is an Automotive Technician and writer on Rustyautos.com. He’s been a mechanic for over twenty-five years and has worked for GM, Volvo, Volkswagen, Land Rover, and Jaguar dealerships.
John uses his know-how and experience to write articles that help fellow gearheads with all aspects of vehicle ownership, including maintenance, repair, and troubleshooting.